Adobe Illustrator tutorial: The Blend Tool
Spoiler Alert
Here is my design result after finishing this tutorial. Let’s get started on yours and see what we can create.

Step 01:
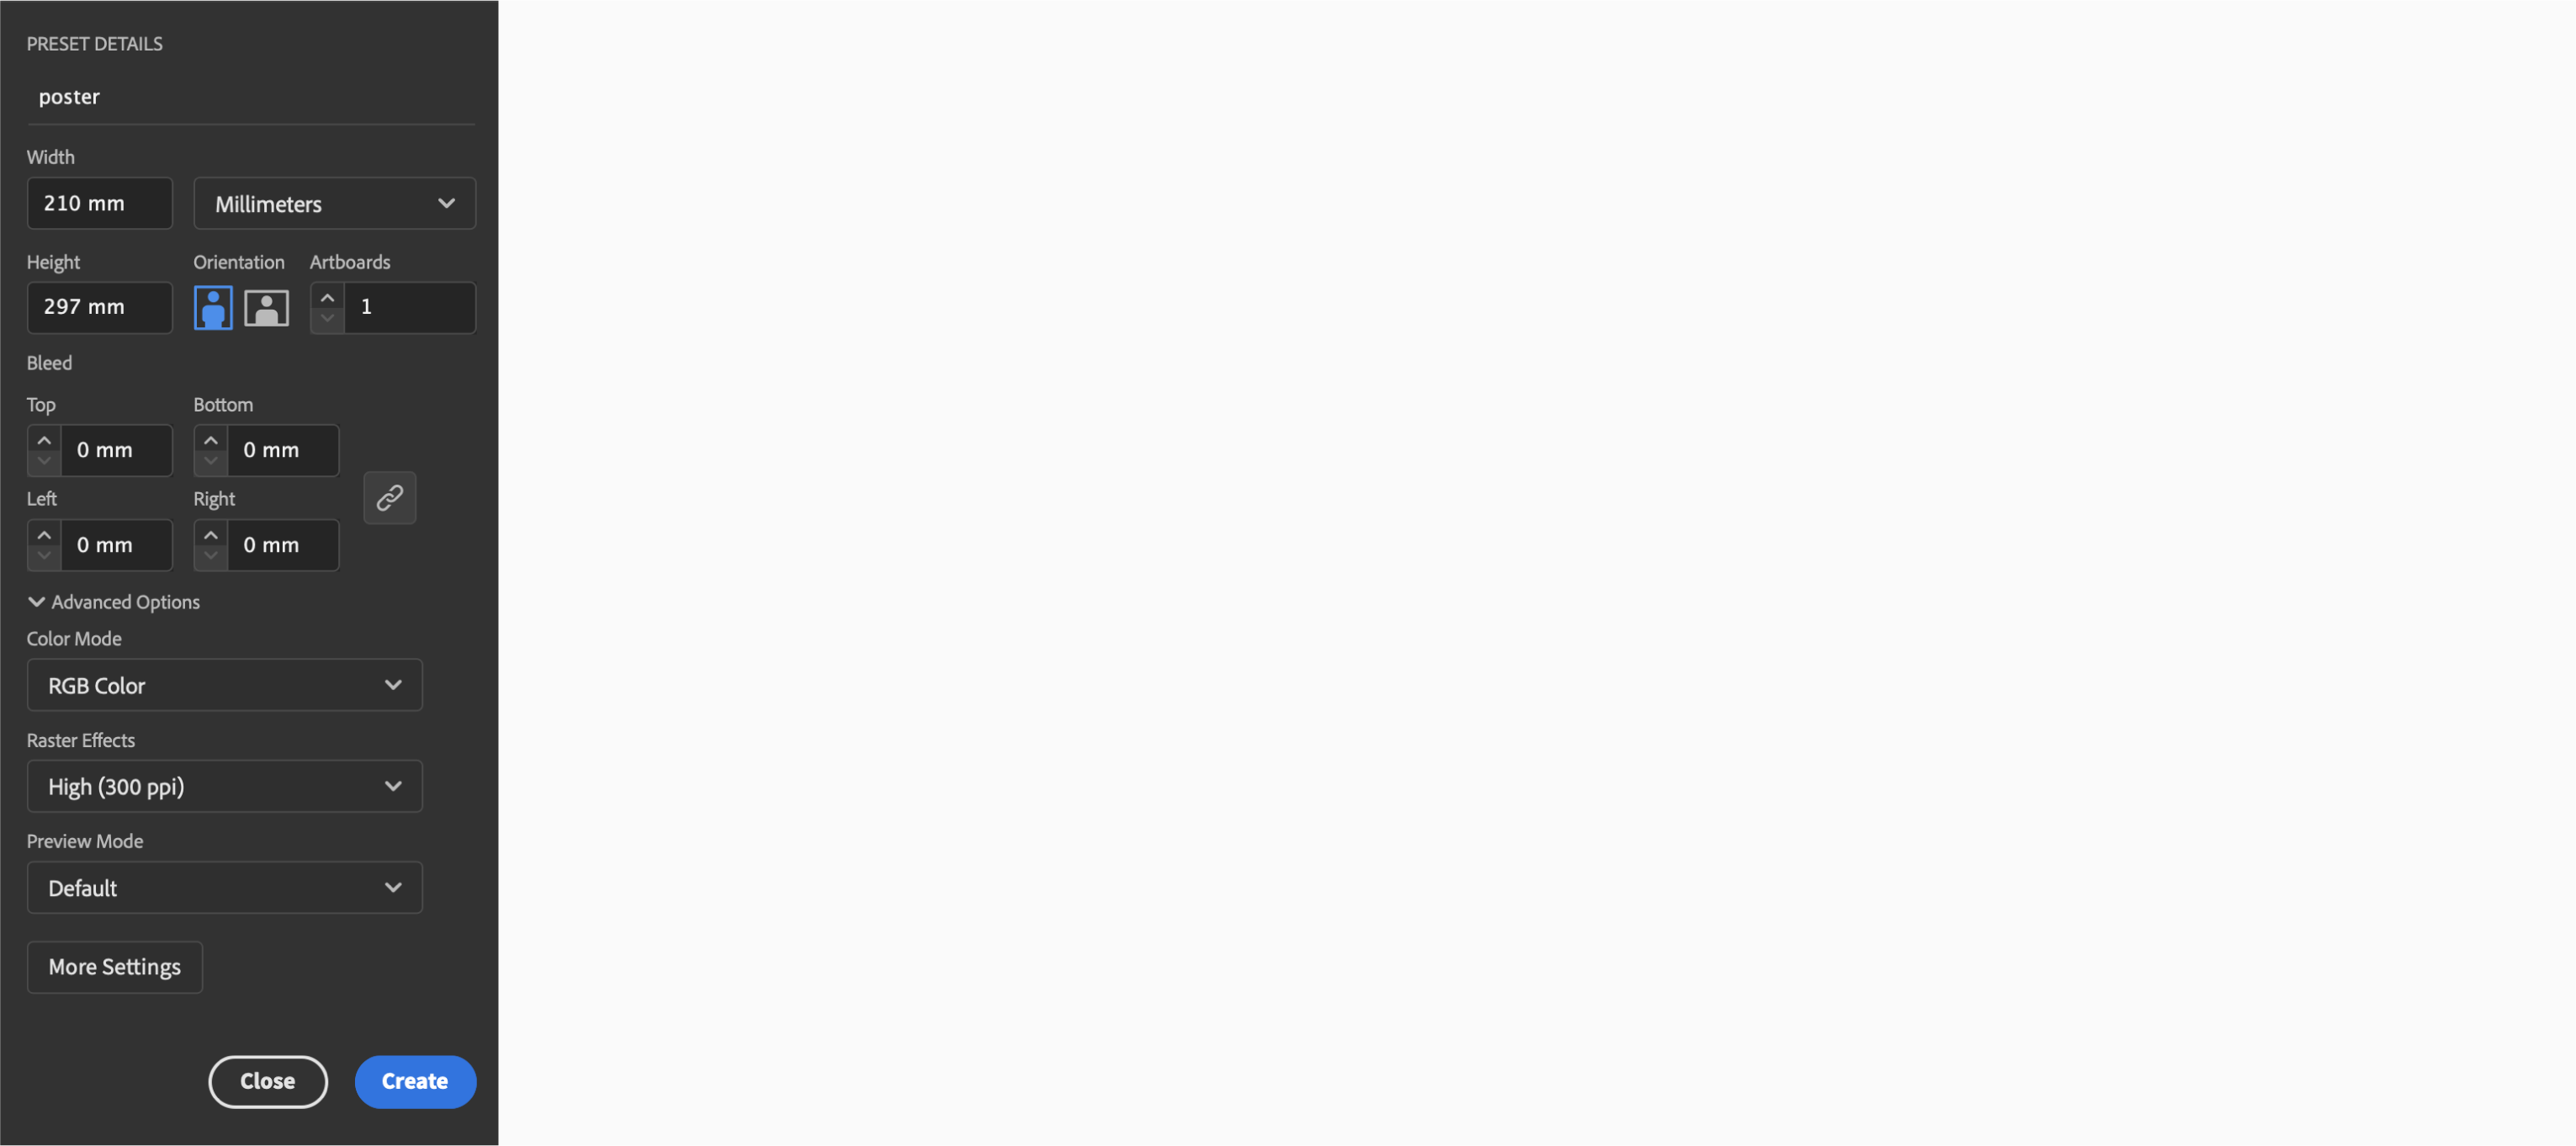
While creating a new file (Control/Command + N), set up the artboard dimensions to A4 size (210x297mm).
Step 02:
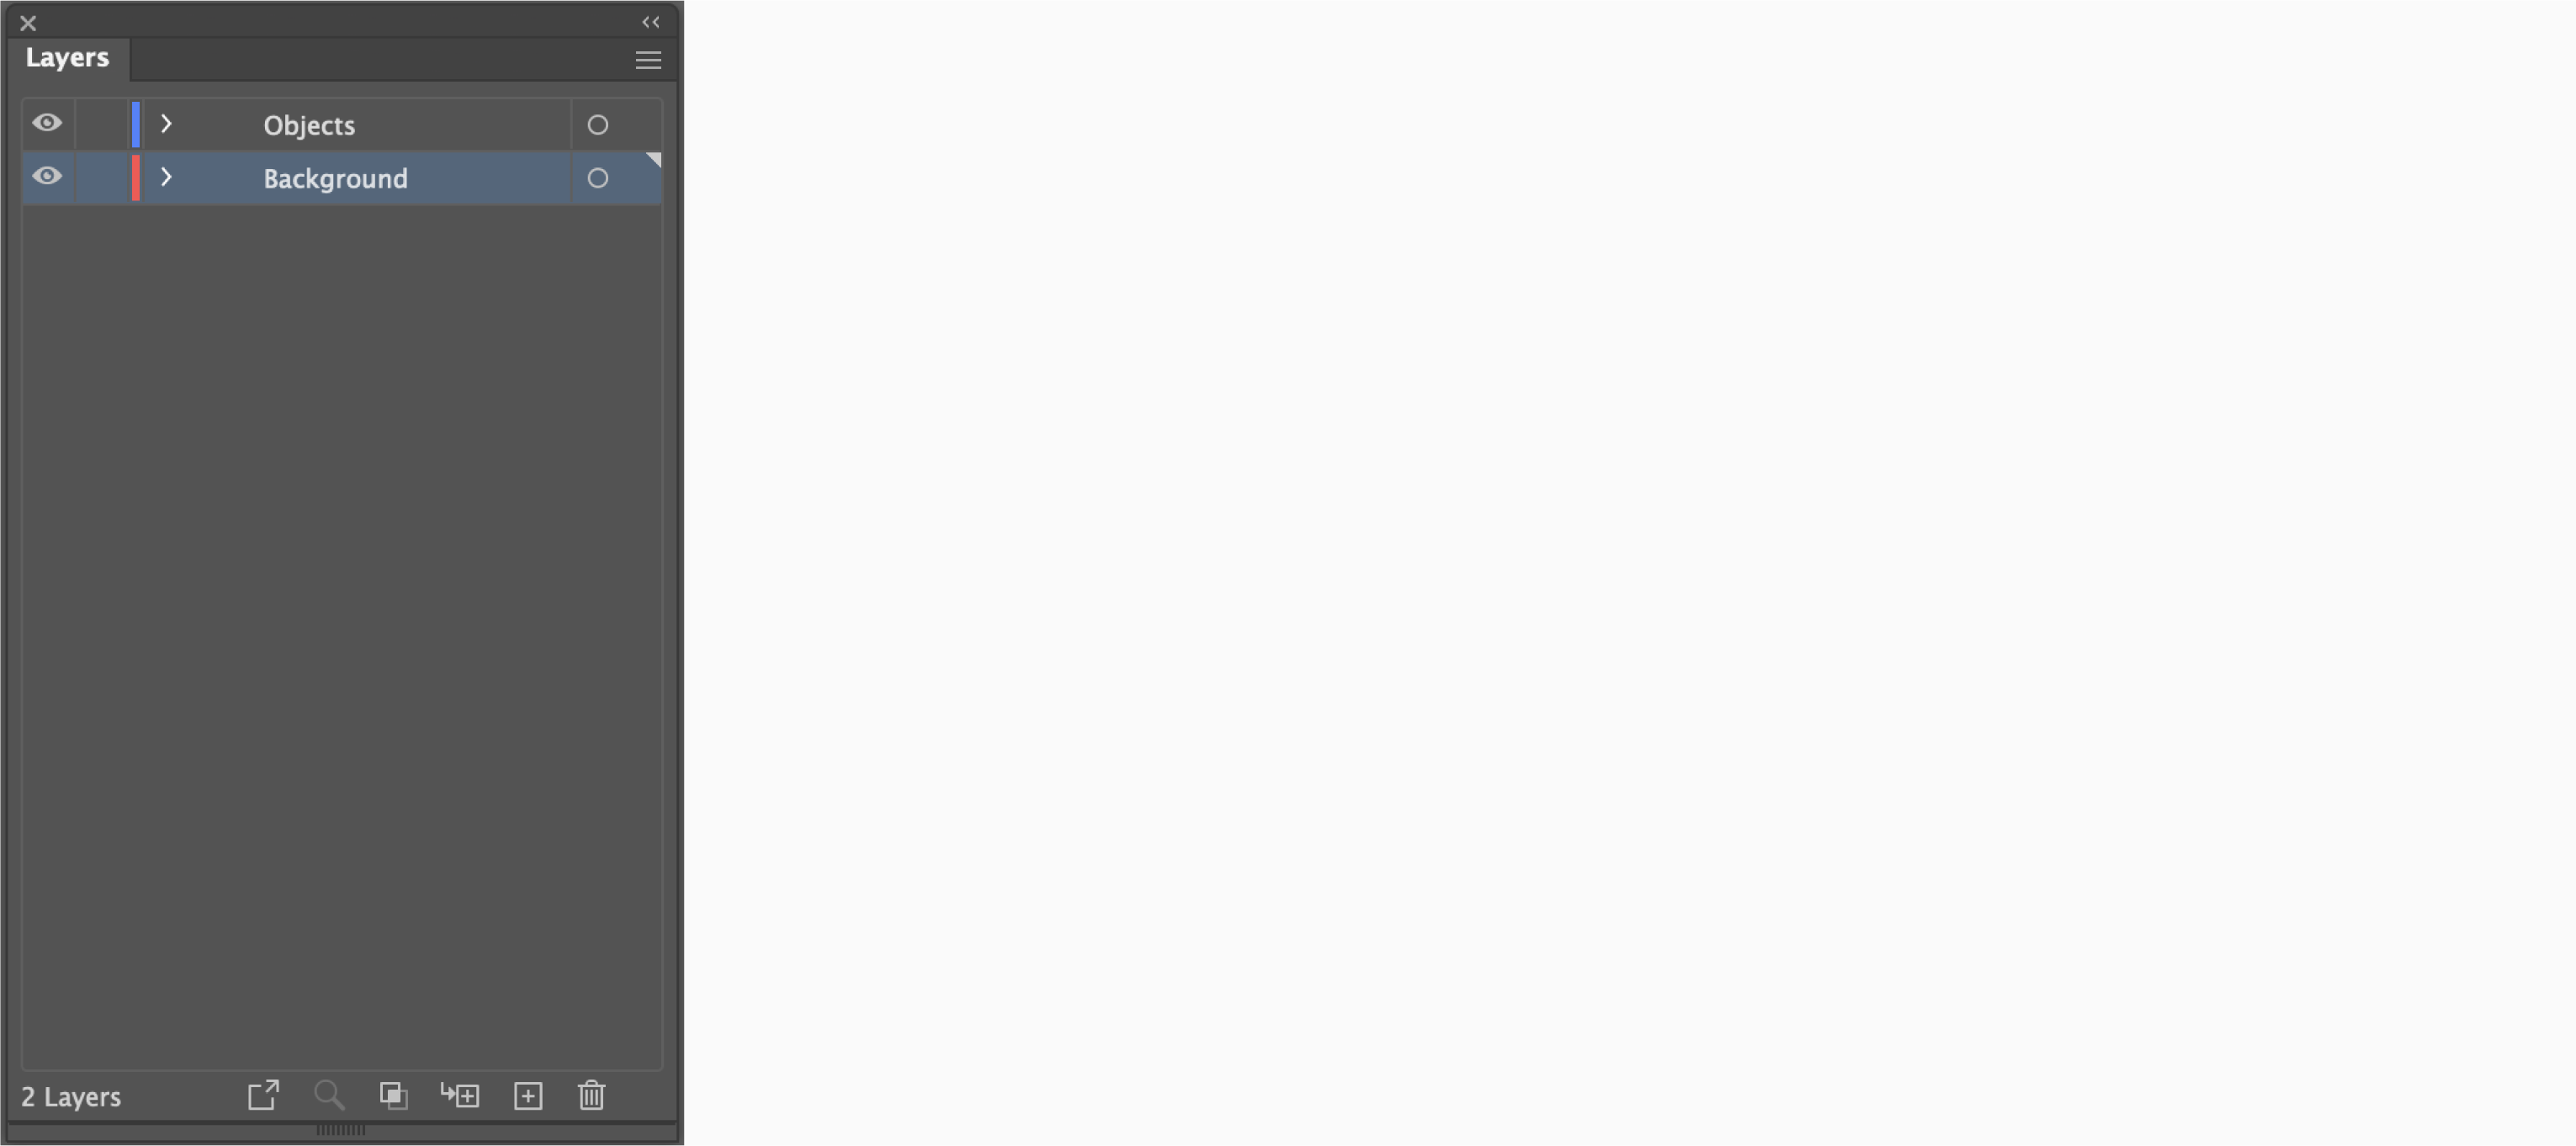
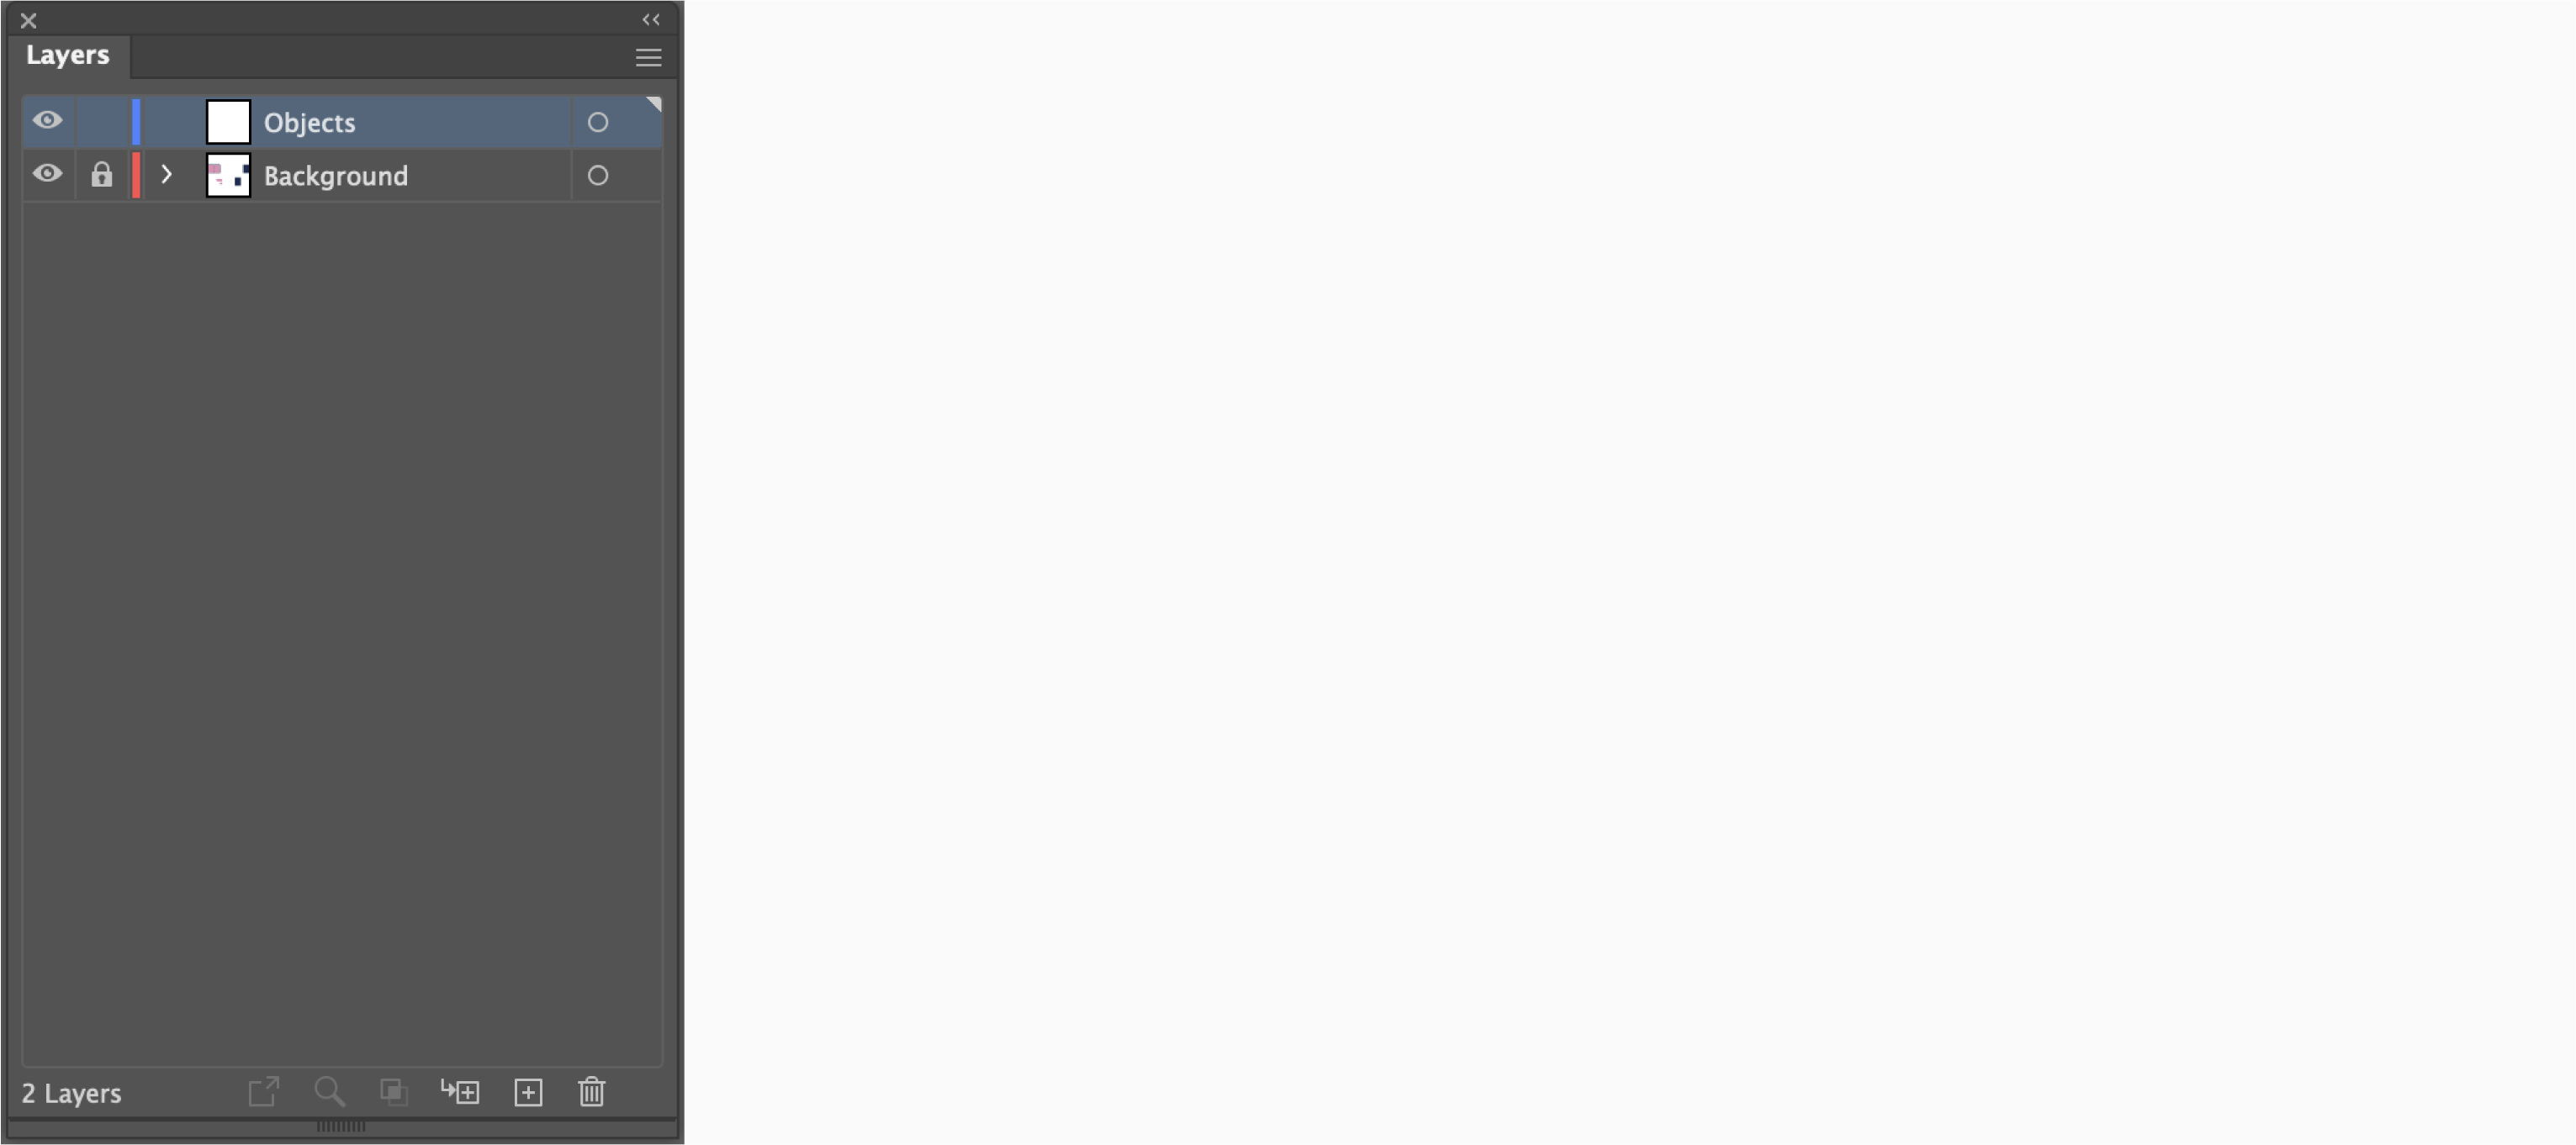
Next, create two layers in the layers panel “Background and Objects”. Since our poster will be made in a minimalistic style, we don’t need more than two. Notice that the Objects layer should be kept above the Background layer.
Step 03:
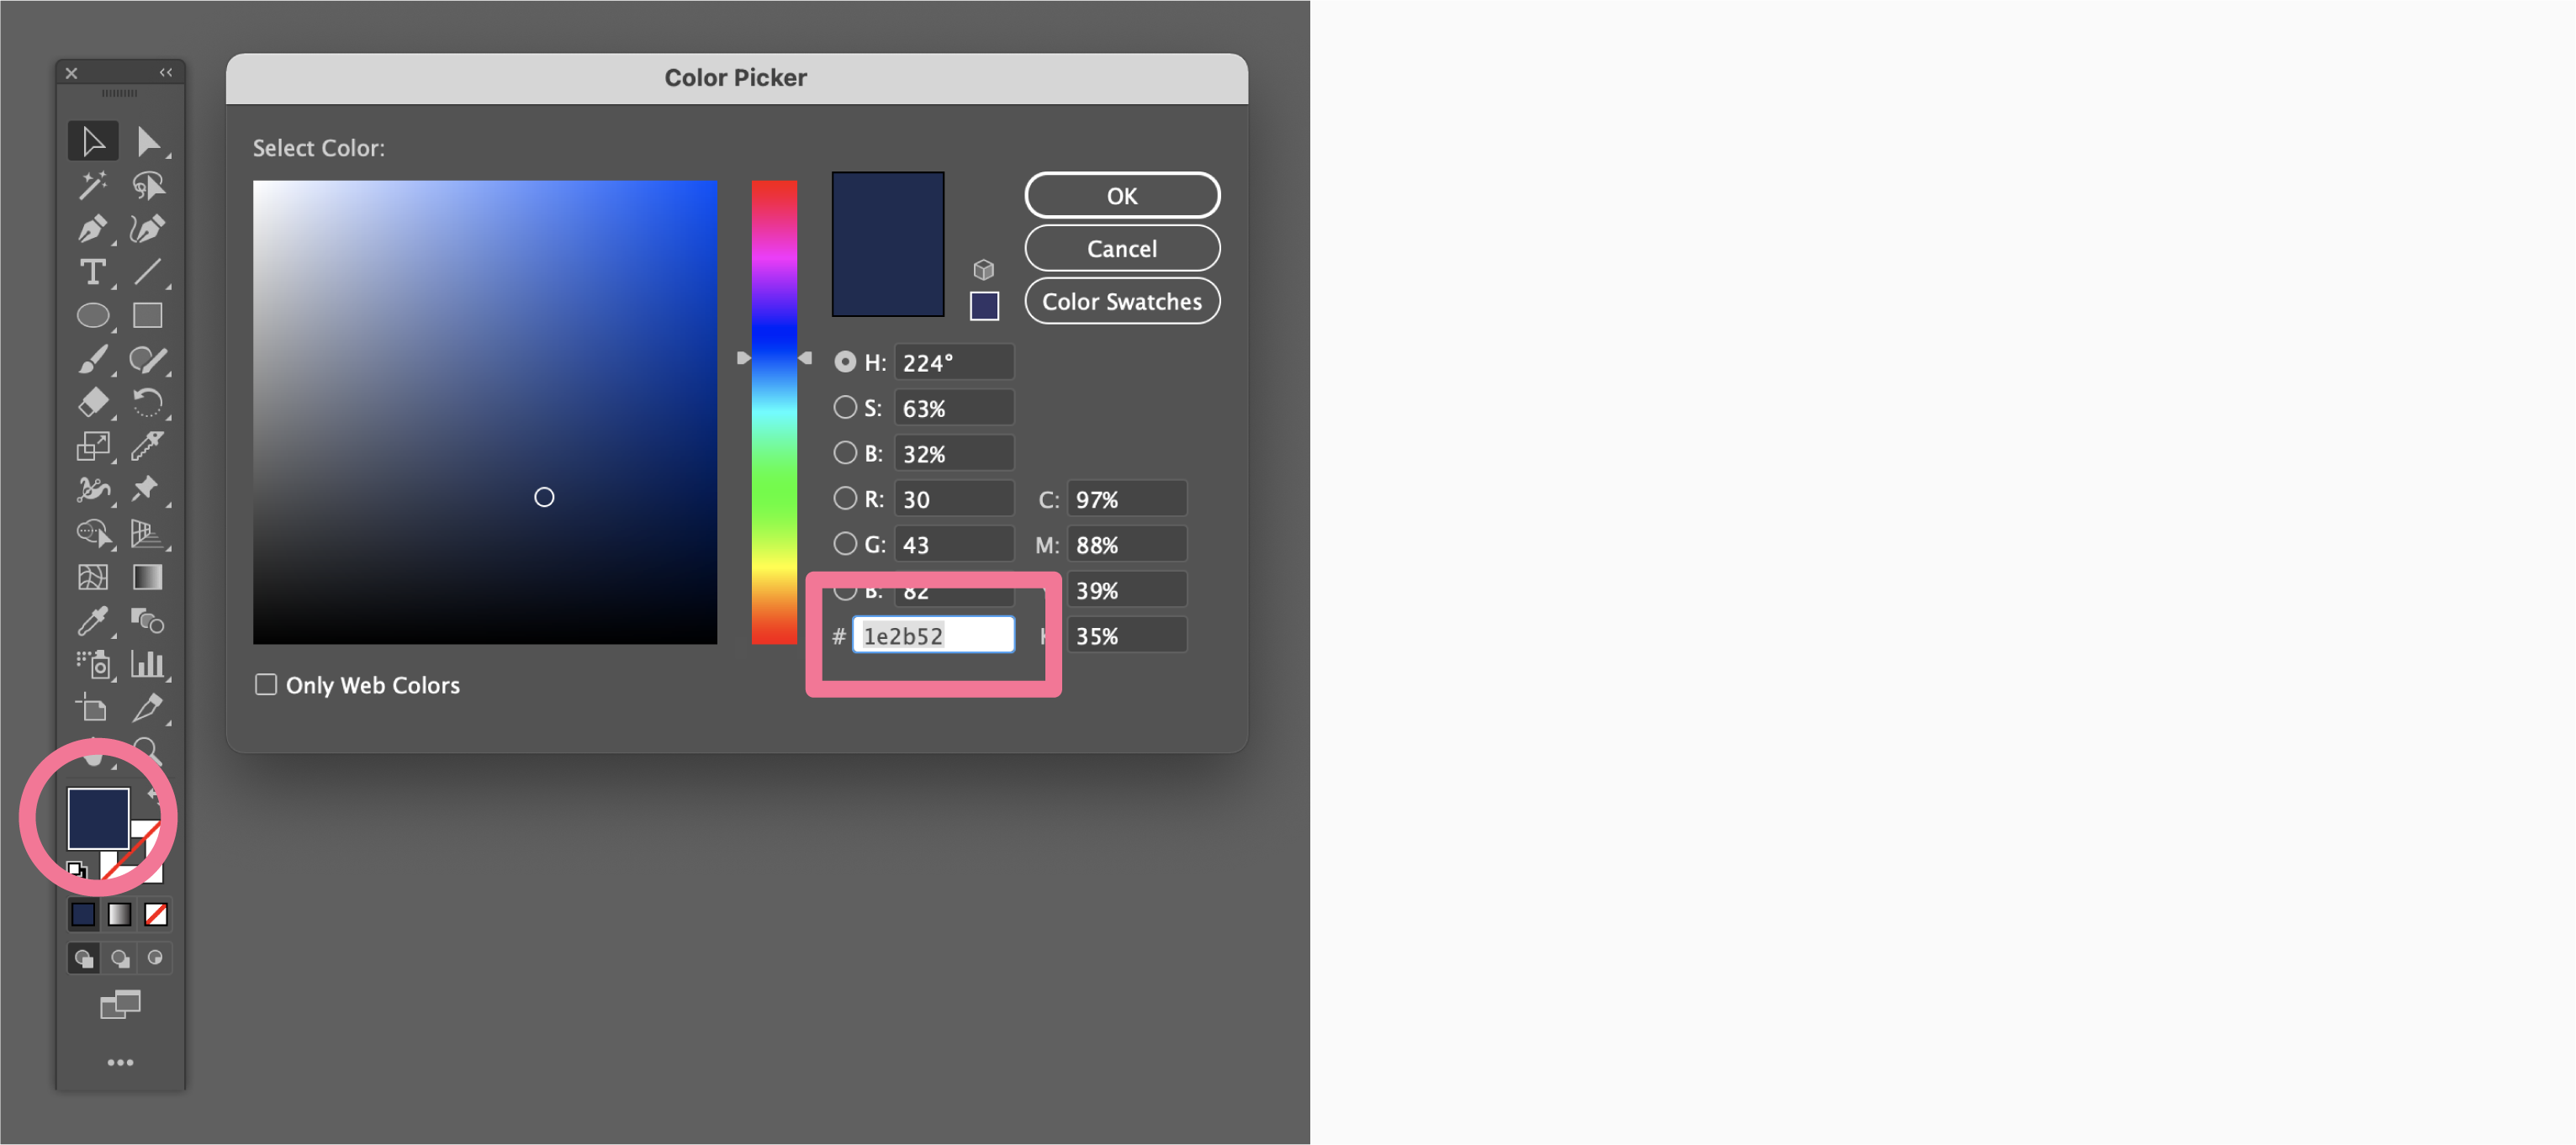
Double click on “Fill” from the bottom of the Tools Panel. Pick a background color by inserting the 1e2b52 HEX color code into the marked box (#).
Step 04:
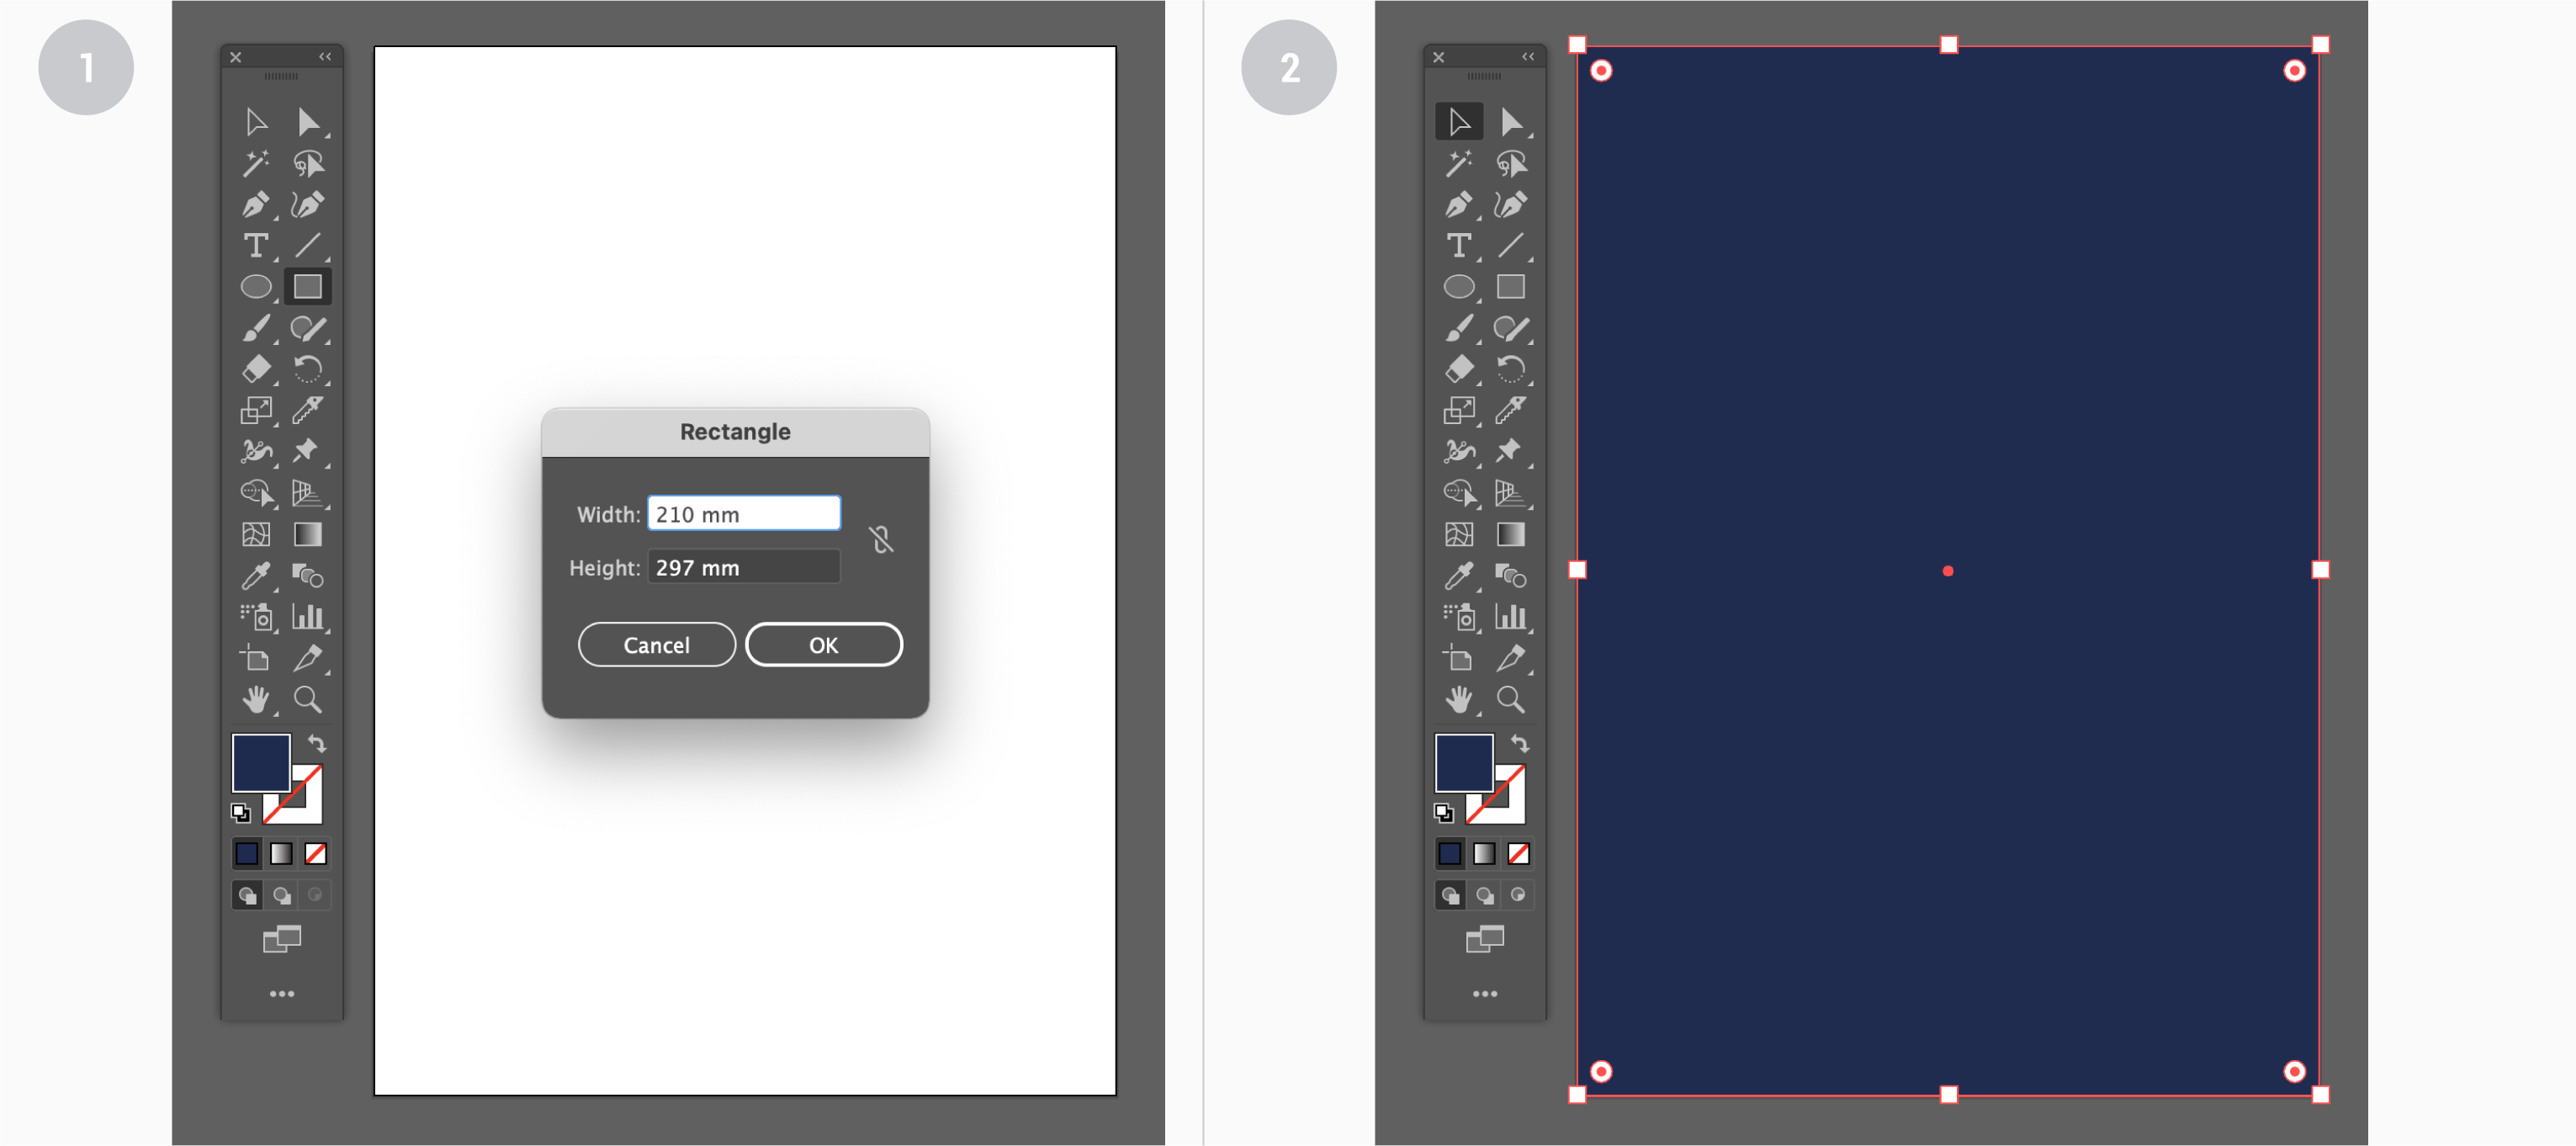
From the layer panel, click on “Background Layer” so we can add the background object there. To do this, select "Rectangle Tool” (M) from the Tools Panel, and click on the artboard once. The rectangle panel should appear. Set the height to 297mm, and the width to 210mm.
Step 05:
Go to the Layers Panel and lock the Background layer by clicking on the blank square space next to eye (Toggles Visibility) icon. Once this is done, a lock icon should appear. This is letting us know that layer is locked and it can’t be edited until we click on the lock icon again. Now it’s time to create the basic shape wind blend tool. It will serve as our basis for the pattern in the next part of this tutorial. Start by selecting the “Objects” layer.
Step 06:
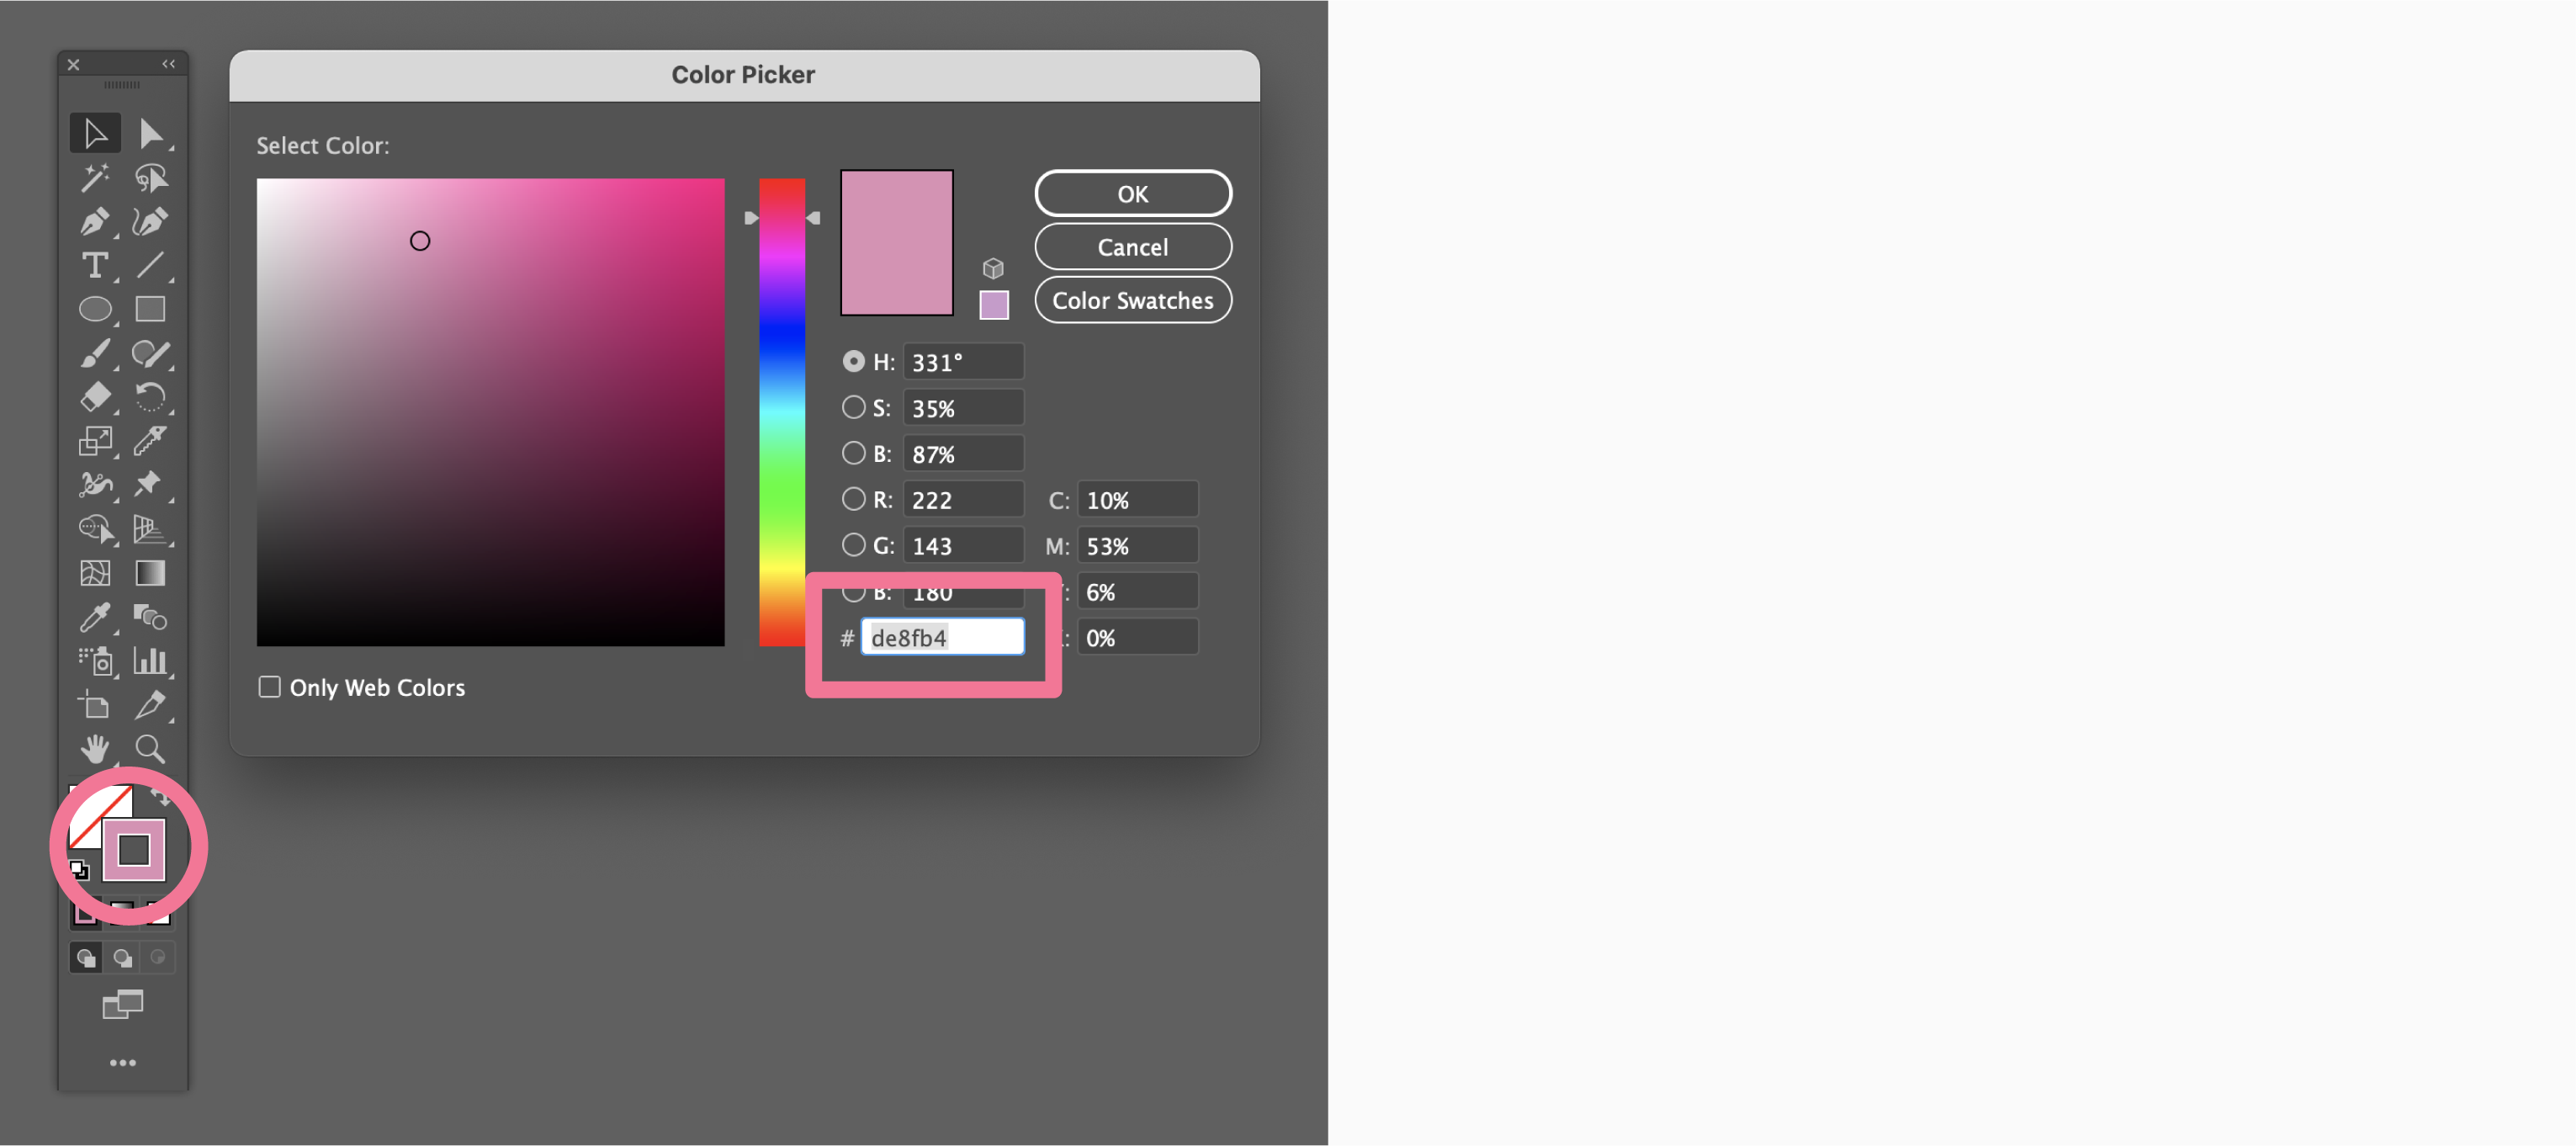
Press (X) on the keyboard to switch the selection from “Fill" to “Stroke” in the Tools Panel. Then, double click on “Stroke” to change its color. In the HEX box (#), insert de8fb4.
Step 07:
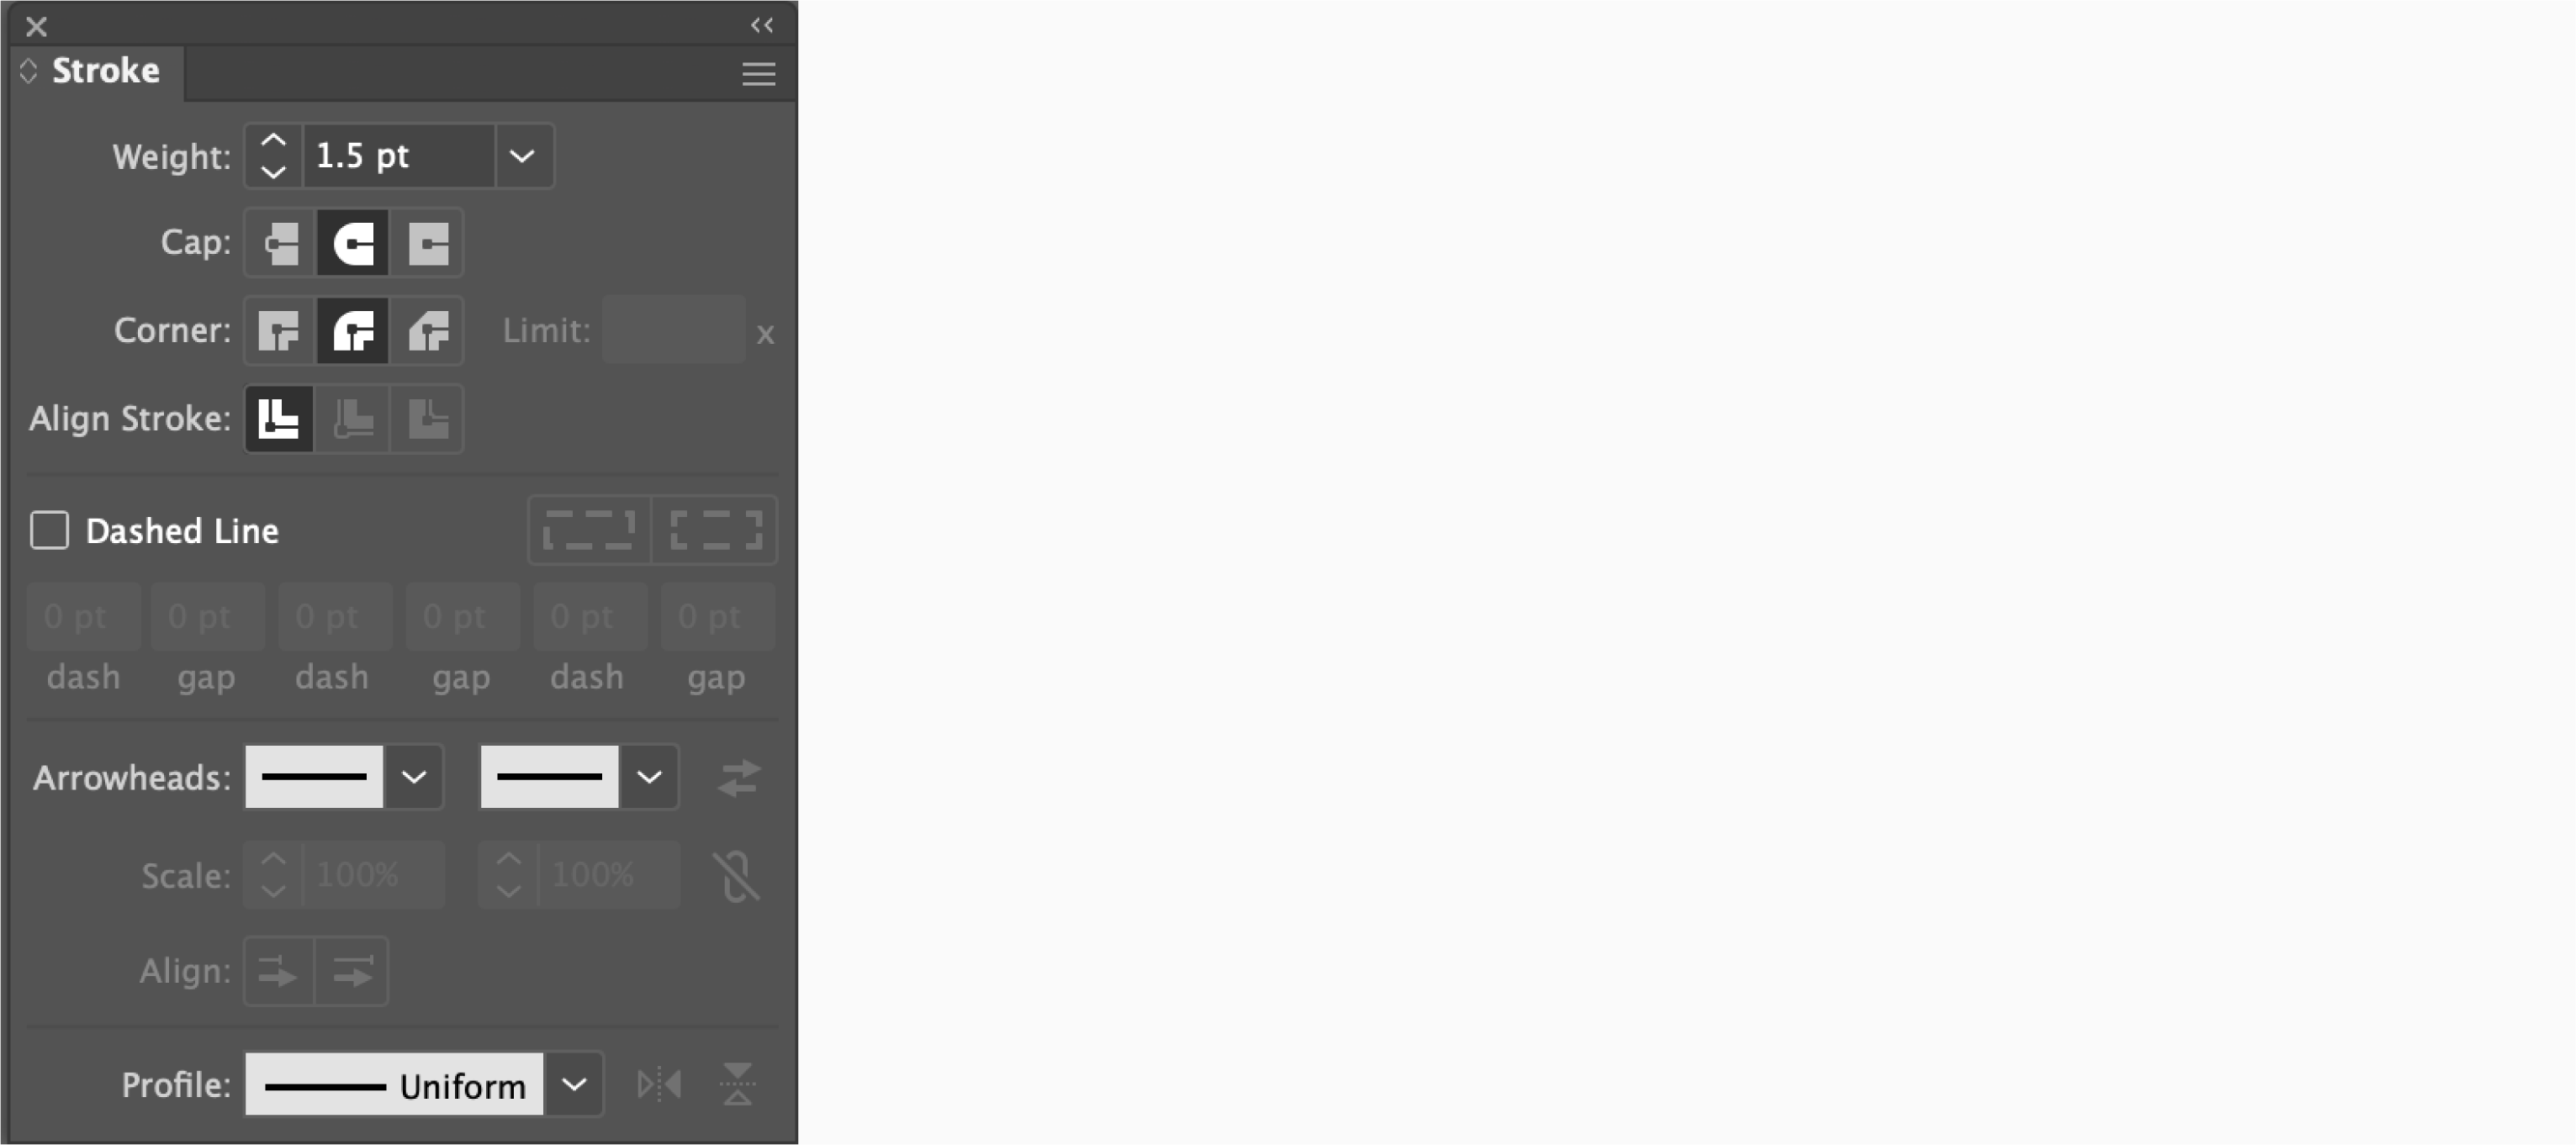
Open the Stroke Panel and change the value to 1.5pt. Then, under the Cap section, choose the “Rounded Cap” option. In the Corner section, choose the “Round Join” option. Lastly, in the Align Stroke section, choose the "Align Stroke to Center" option.
Step 08:
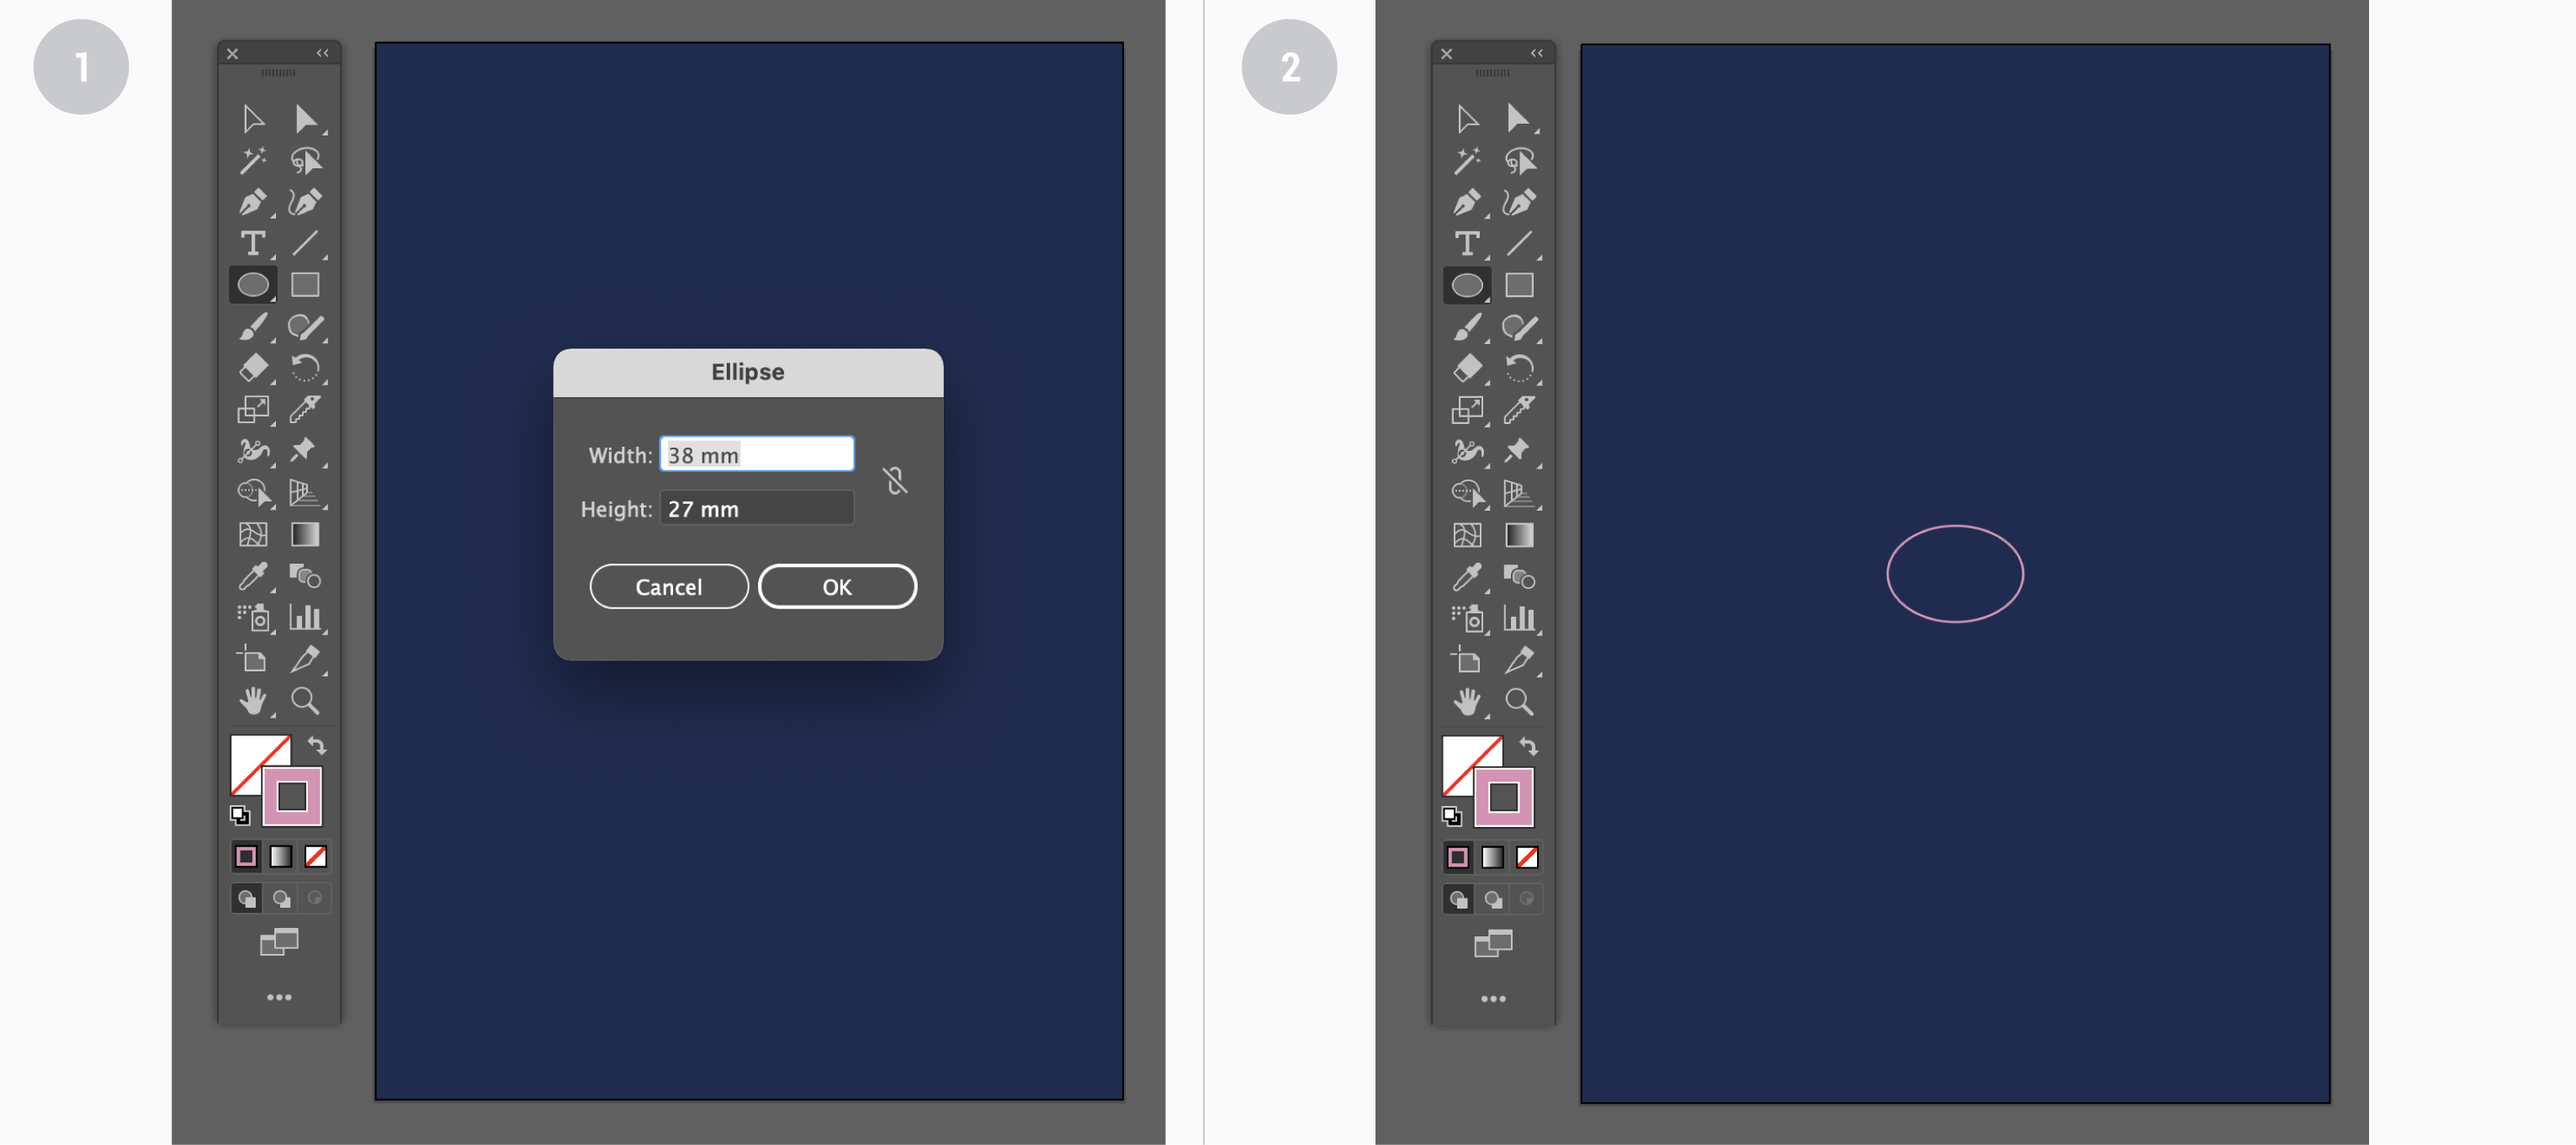
Choose the Elipse Tool (L) from the Tools Panel. Then click on the artboard. Similarly, as with the Rectangle Tool, the Elipse panel should appear. Insert 38mm in the Height box, and 27mm in the Width box. Then click OK so we can see the shape appearing on the artboard.
Step 09:
Next, pick the Direct Selection Tool (A) and select the bottom anchor point of the oval to remove it. Then, using the Selection Tool (V), select the remaining part of shape and drag it below while holding Alt/Option to create a copy. When done, rotate it 180 degrees by grabbing the corner of the shape while holding Shift. Next, select the Rectangle Tool (M) and create a shape with a 38mm Width and a 65mm Height.
Step 10:
Now select the top half of the elipse and our new rectangular shape. While having both shapes selected, click on the rectangle to turn it into Key Object (other selected objects will align to this shape, not to the artboard as it usually does). Then click on “Vertical Align Top”. Doing so should make the top half of the elipse align to the top edge of the rectangle. Lastly, align the bottom half of the elipse to the bottom edge of the rectangle. Afterwards, remove the rectangle.
Step 11:
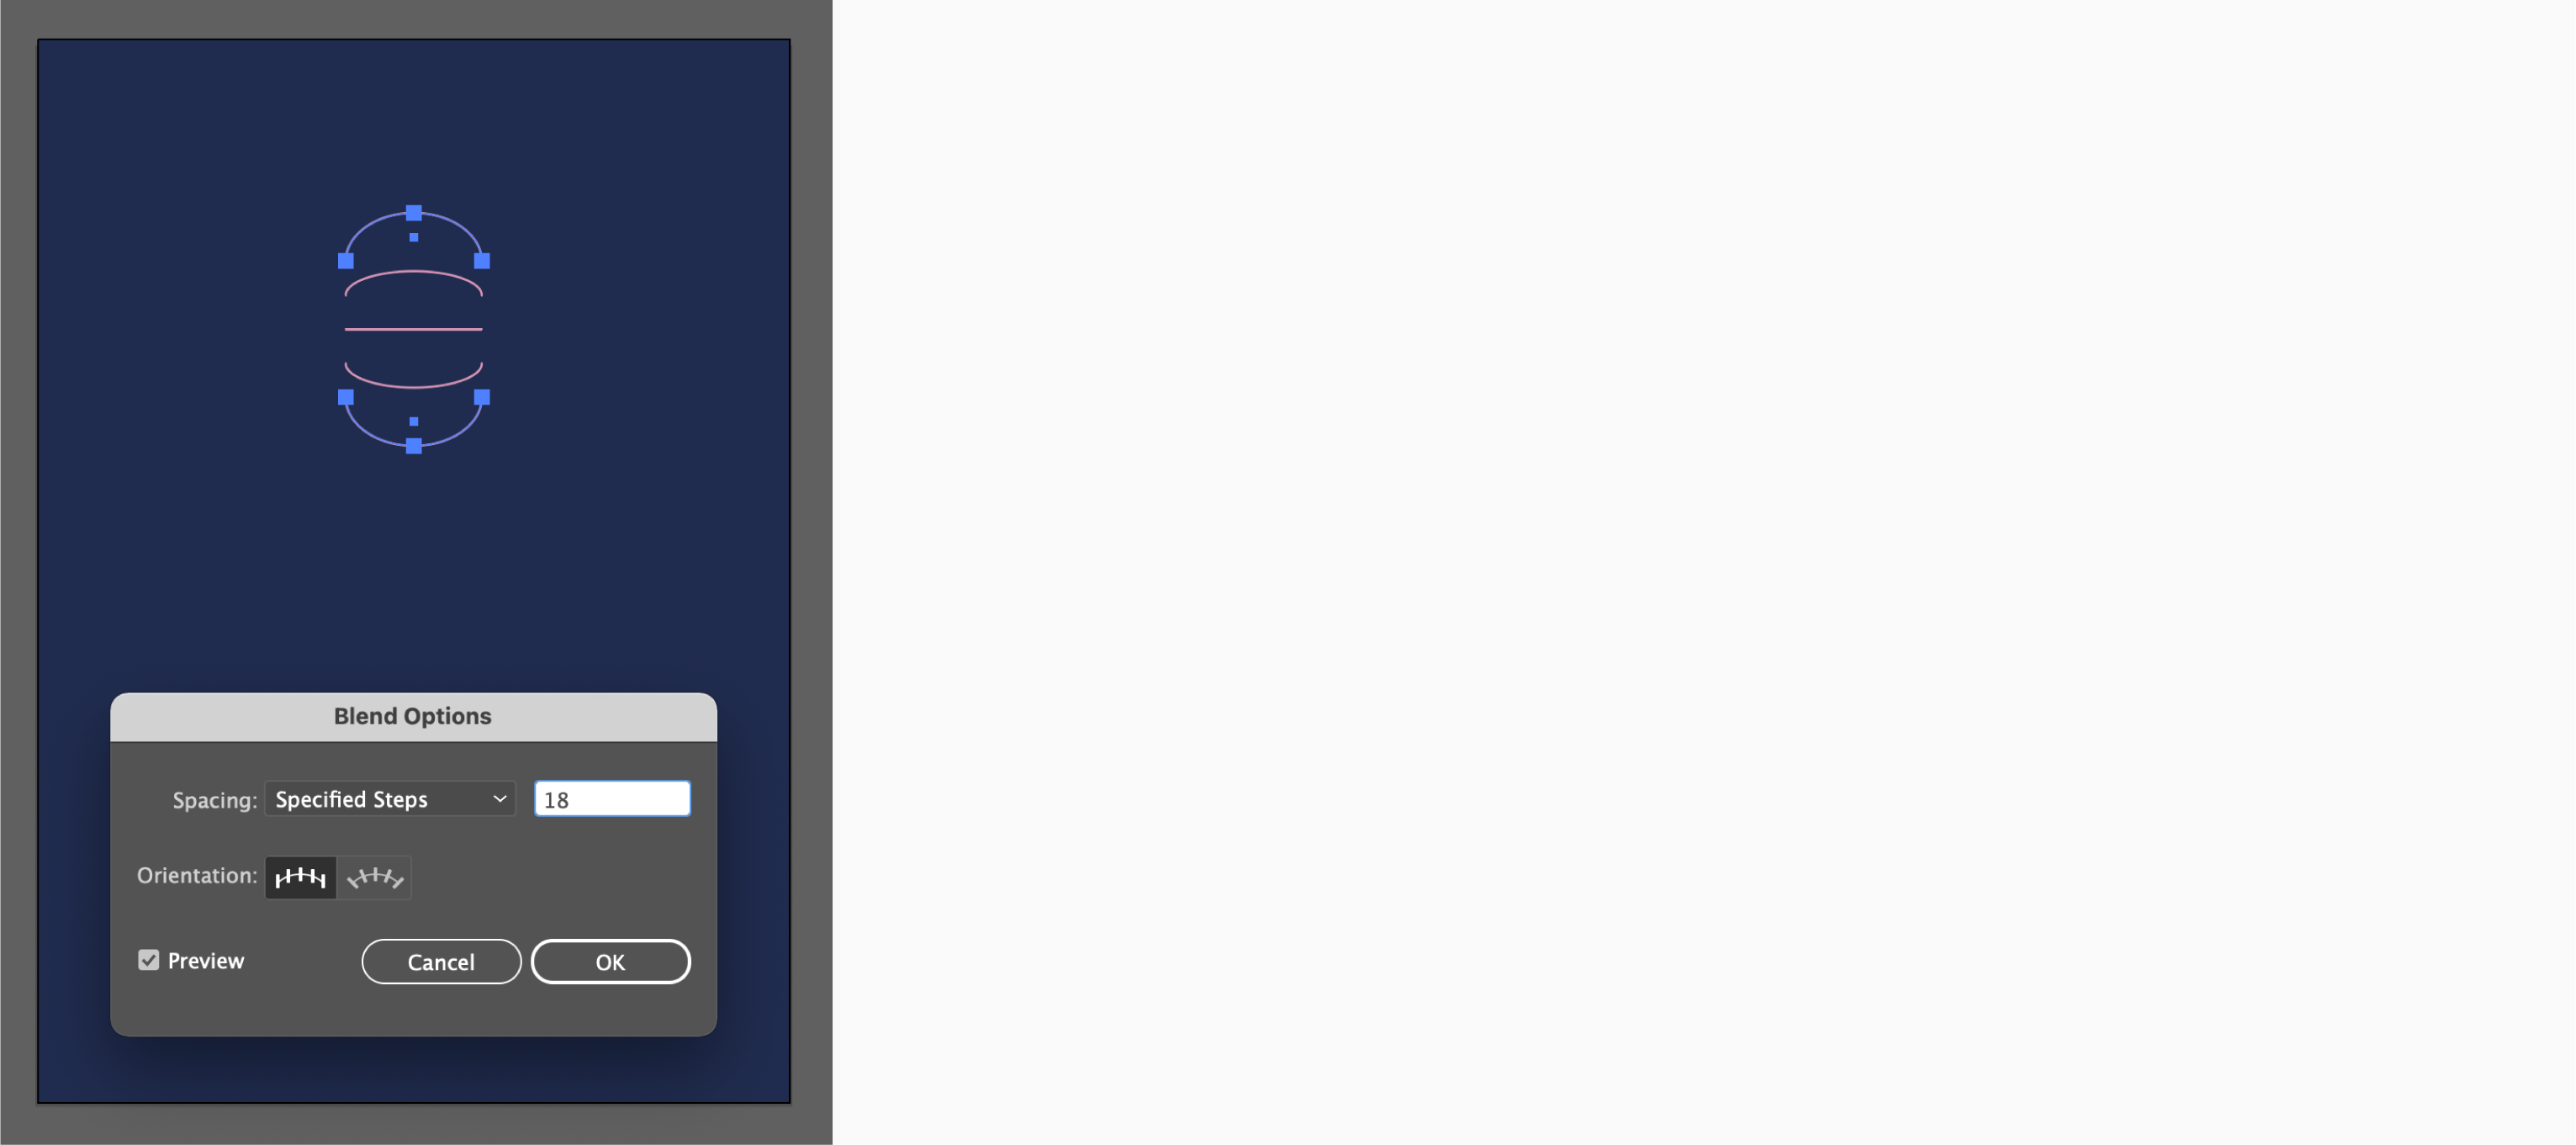
Select the top of both semi-elipses and choose the Blend Tool (W). With this tool selected, click on the left anchor point of the top semi-elipse and then on the left anchor point of bottom semi-elipse. The blend effect should appear. In the Tools panel double-click this icon to open “Blend Options”. A new window with Blend Options will appear. Once there, set up “Spacing To Specified Steps”. In the number box, insert number 18 and set the Orientation to “Align To Page”. Then click OK.
Step 12:
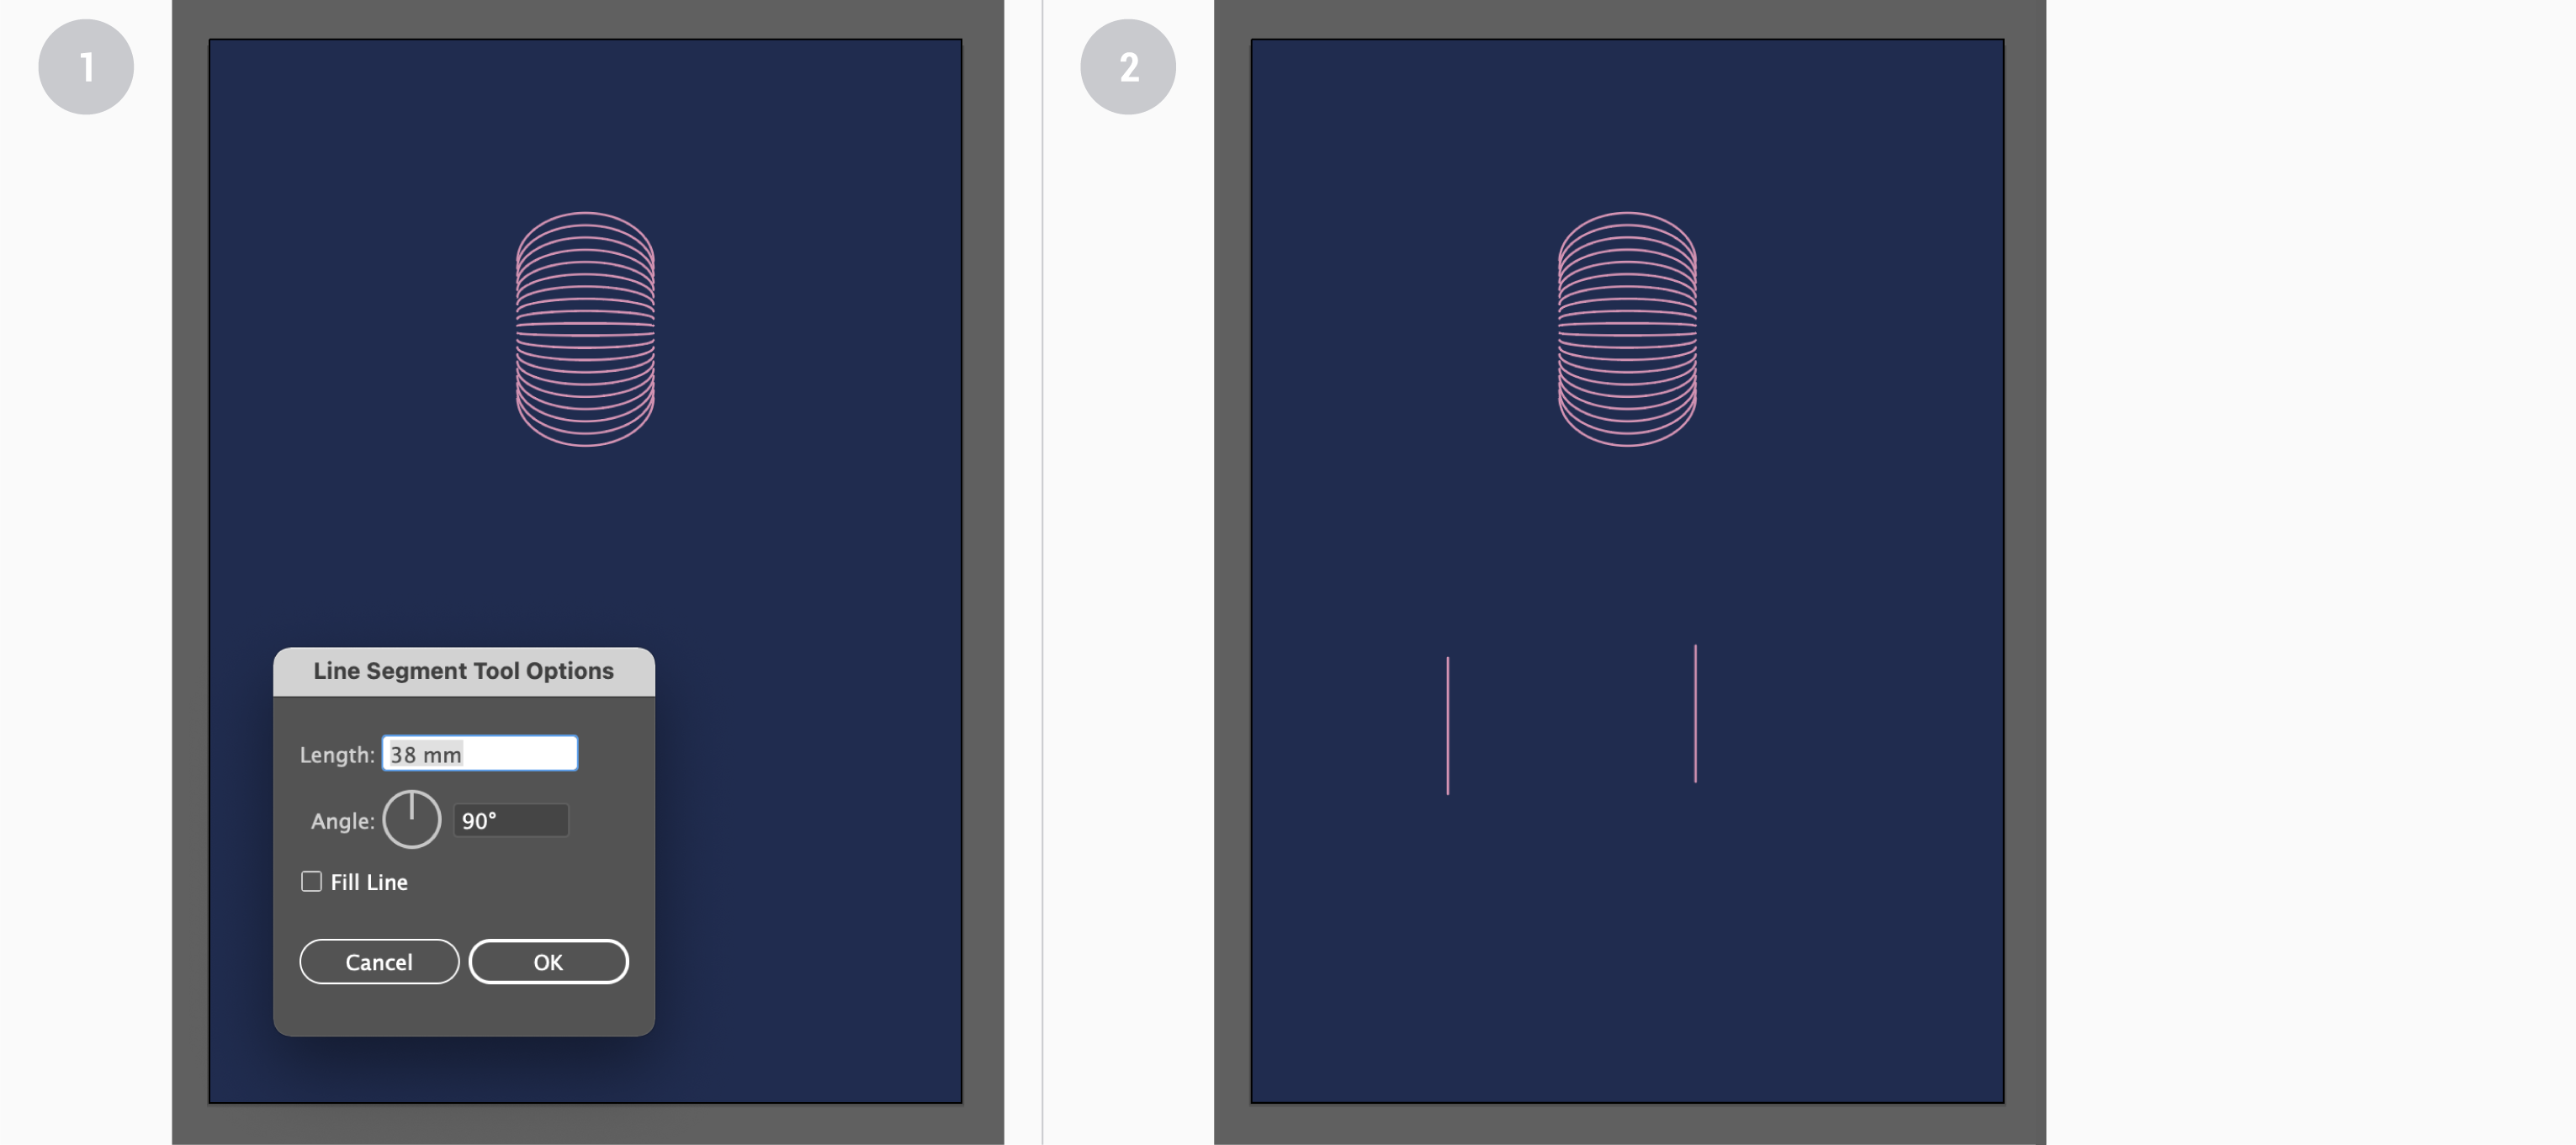
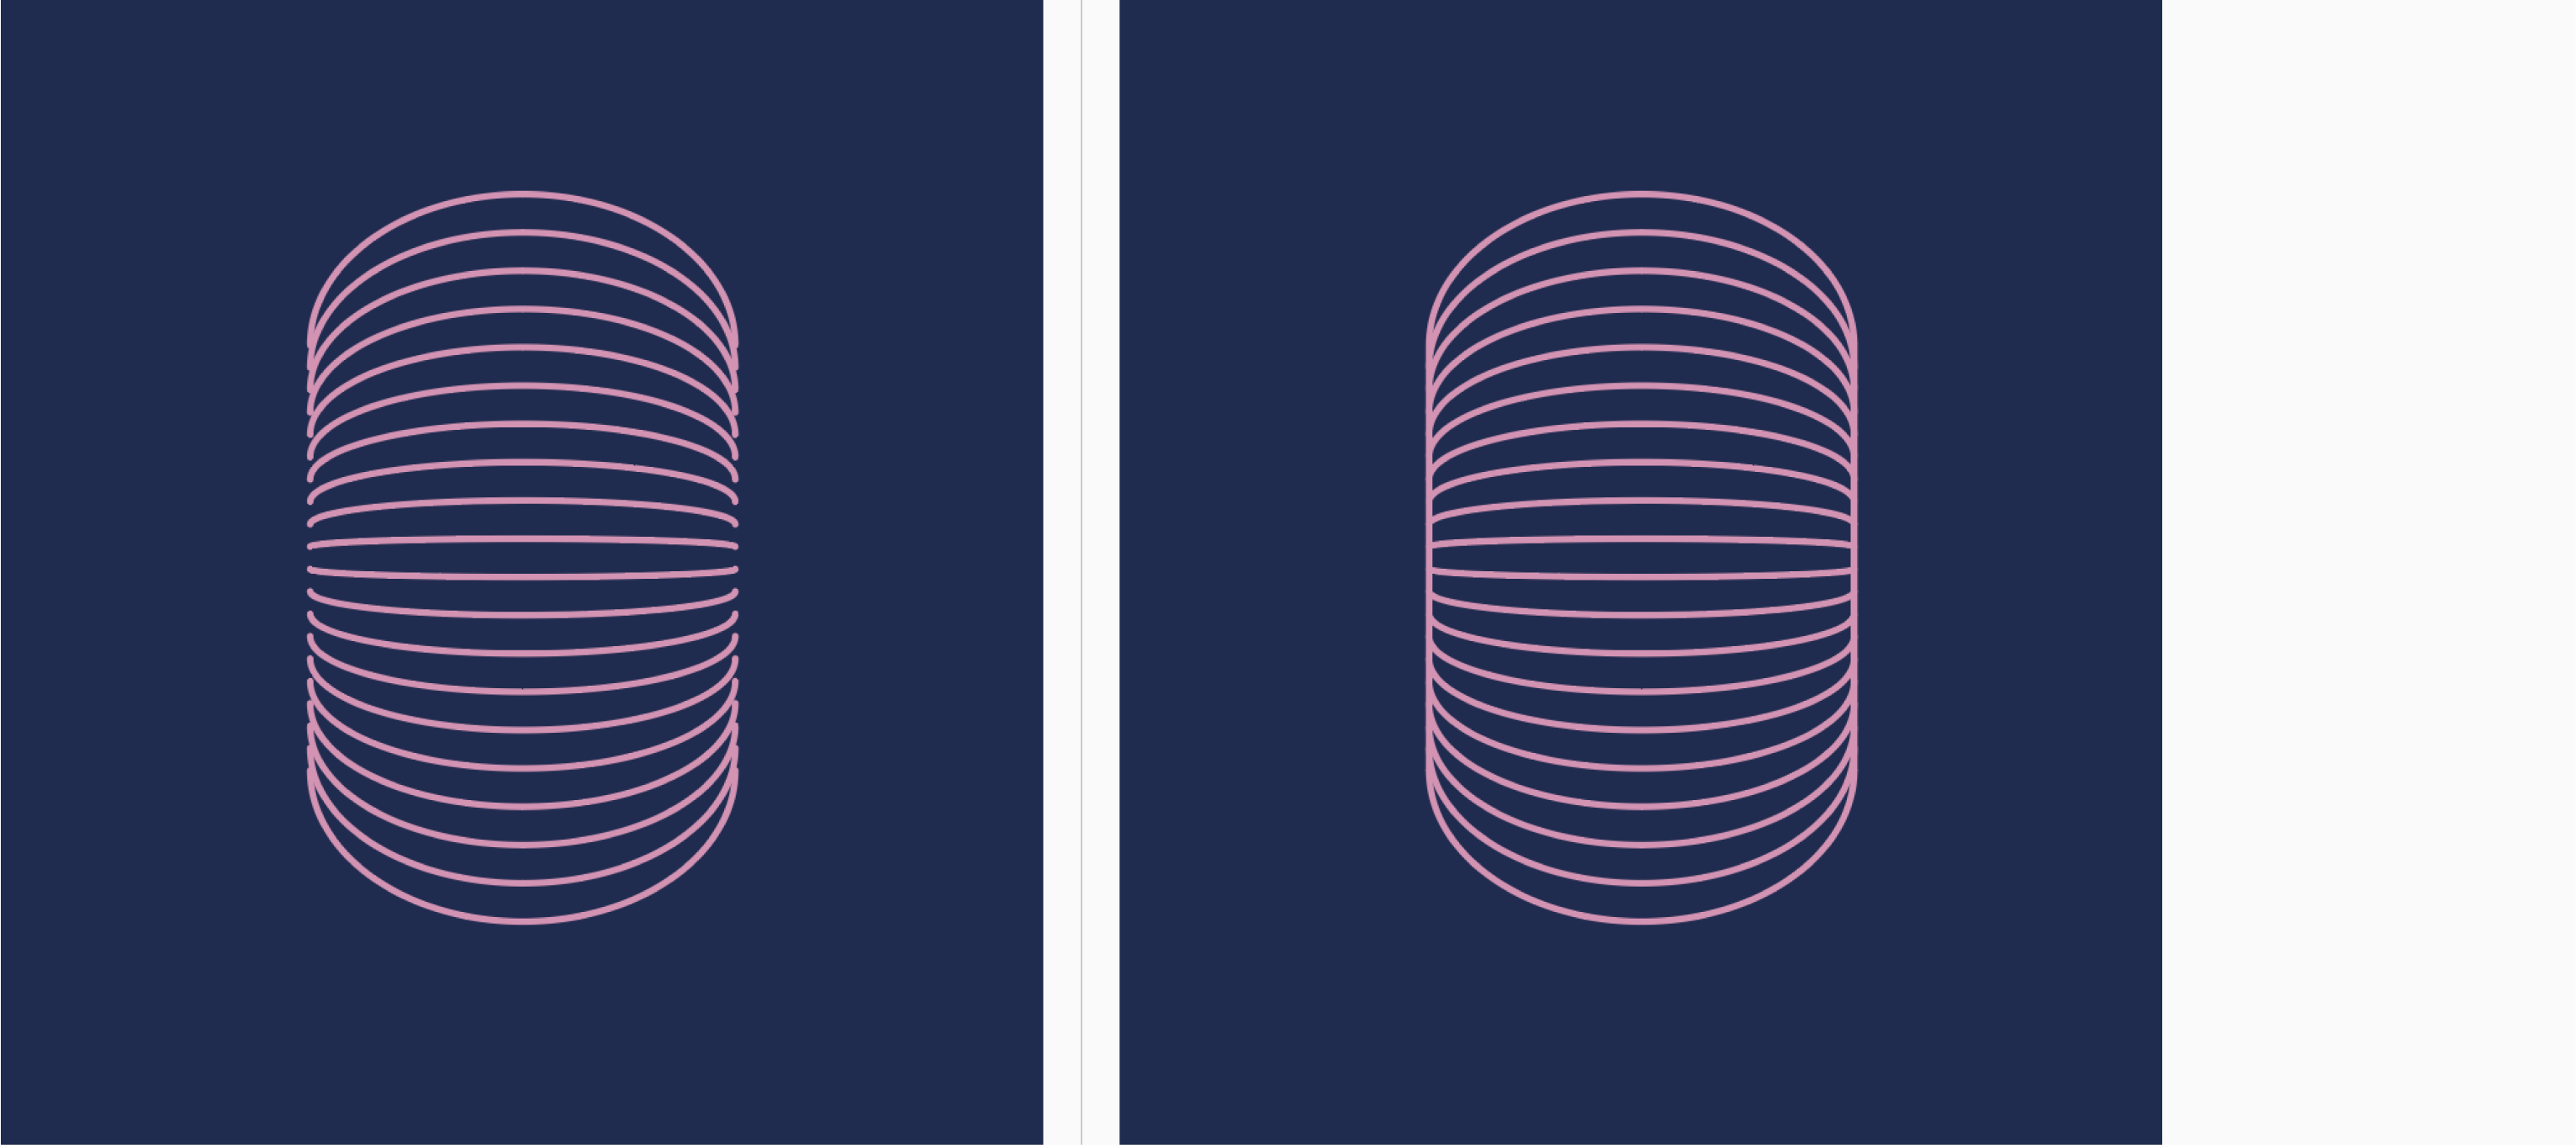
From the Tools Panel, pick the Line Segment Tool (\) and click anywhere on the artboard. When you do this, the Line Segment Tool Options will pop up. Set up the values as presented on the image below (Length 38mm, Angle 90°) and click OK. Copy the created stroke/line segment. Then, align them to the sides of our blended shape. Select both strokes and the blended shape and group them together (Command + G/ Ctrl + G).
On the image below you can see the “Before/After” comparison: before applying line segments to the blended shape, and after.
Step 13:
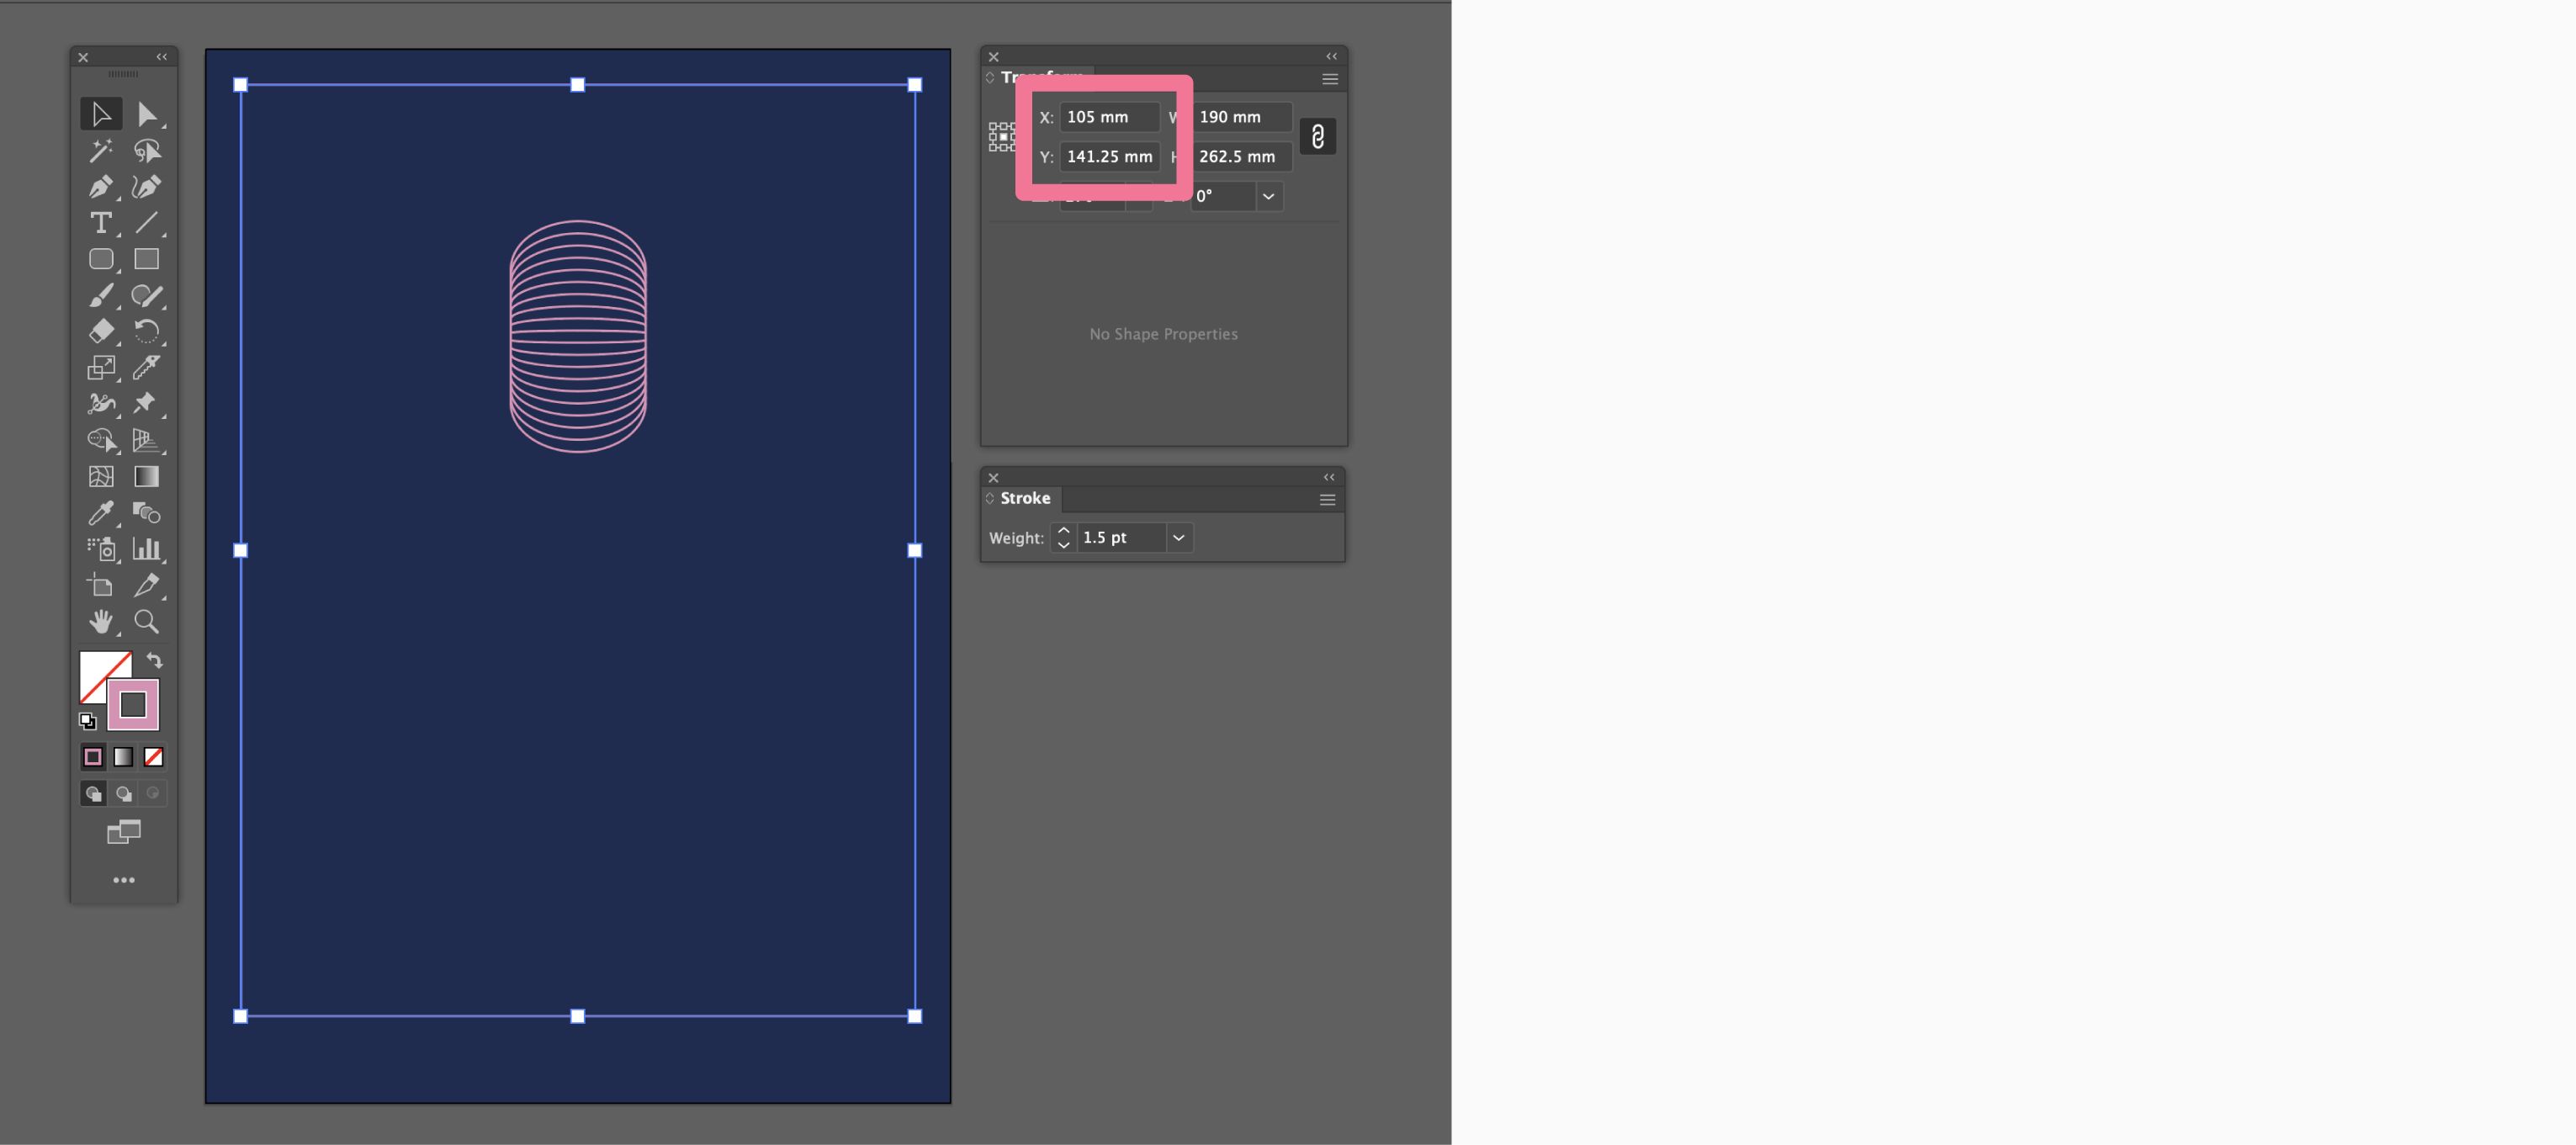
Now it’s time to create the frame. First, set up the stroke width to 1.5pt and apply the #de8fb4 color. Then, from the Tools Panel, choose “Rectangle Tool” (M). Click anywhere on the artboard and the Rectangle window will appear. Set up the Width to 190mm and the Height to 260mm - click OK. Then, in the transformation tool, position your newly created rectangle as it’s seen on the image below. With the rectangle selected in the Transform Panel, insert the values X: 105mm and Y: 141.25mm. The margins (space between top, left and right side artboard edges and frame rectangle) should be 9.912 mm wide.
Step 14:
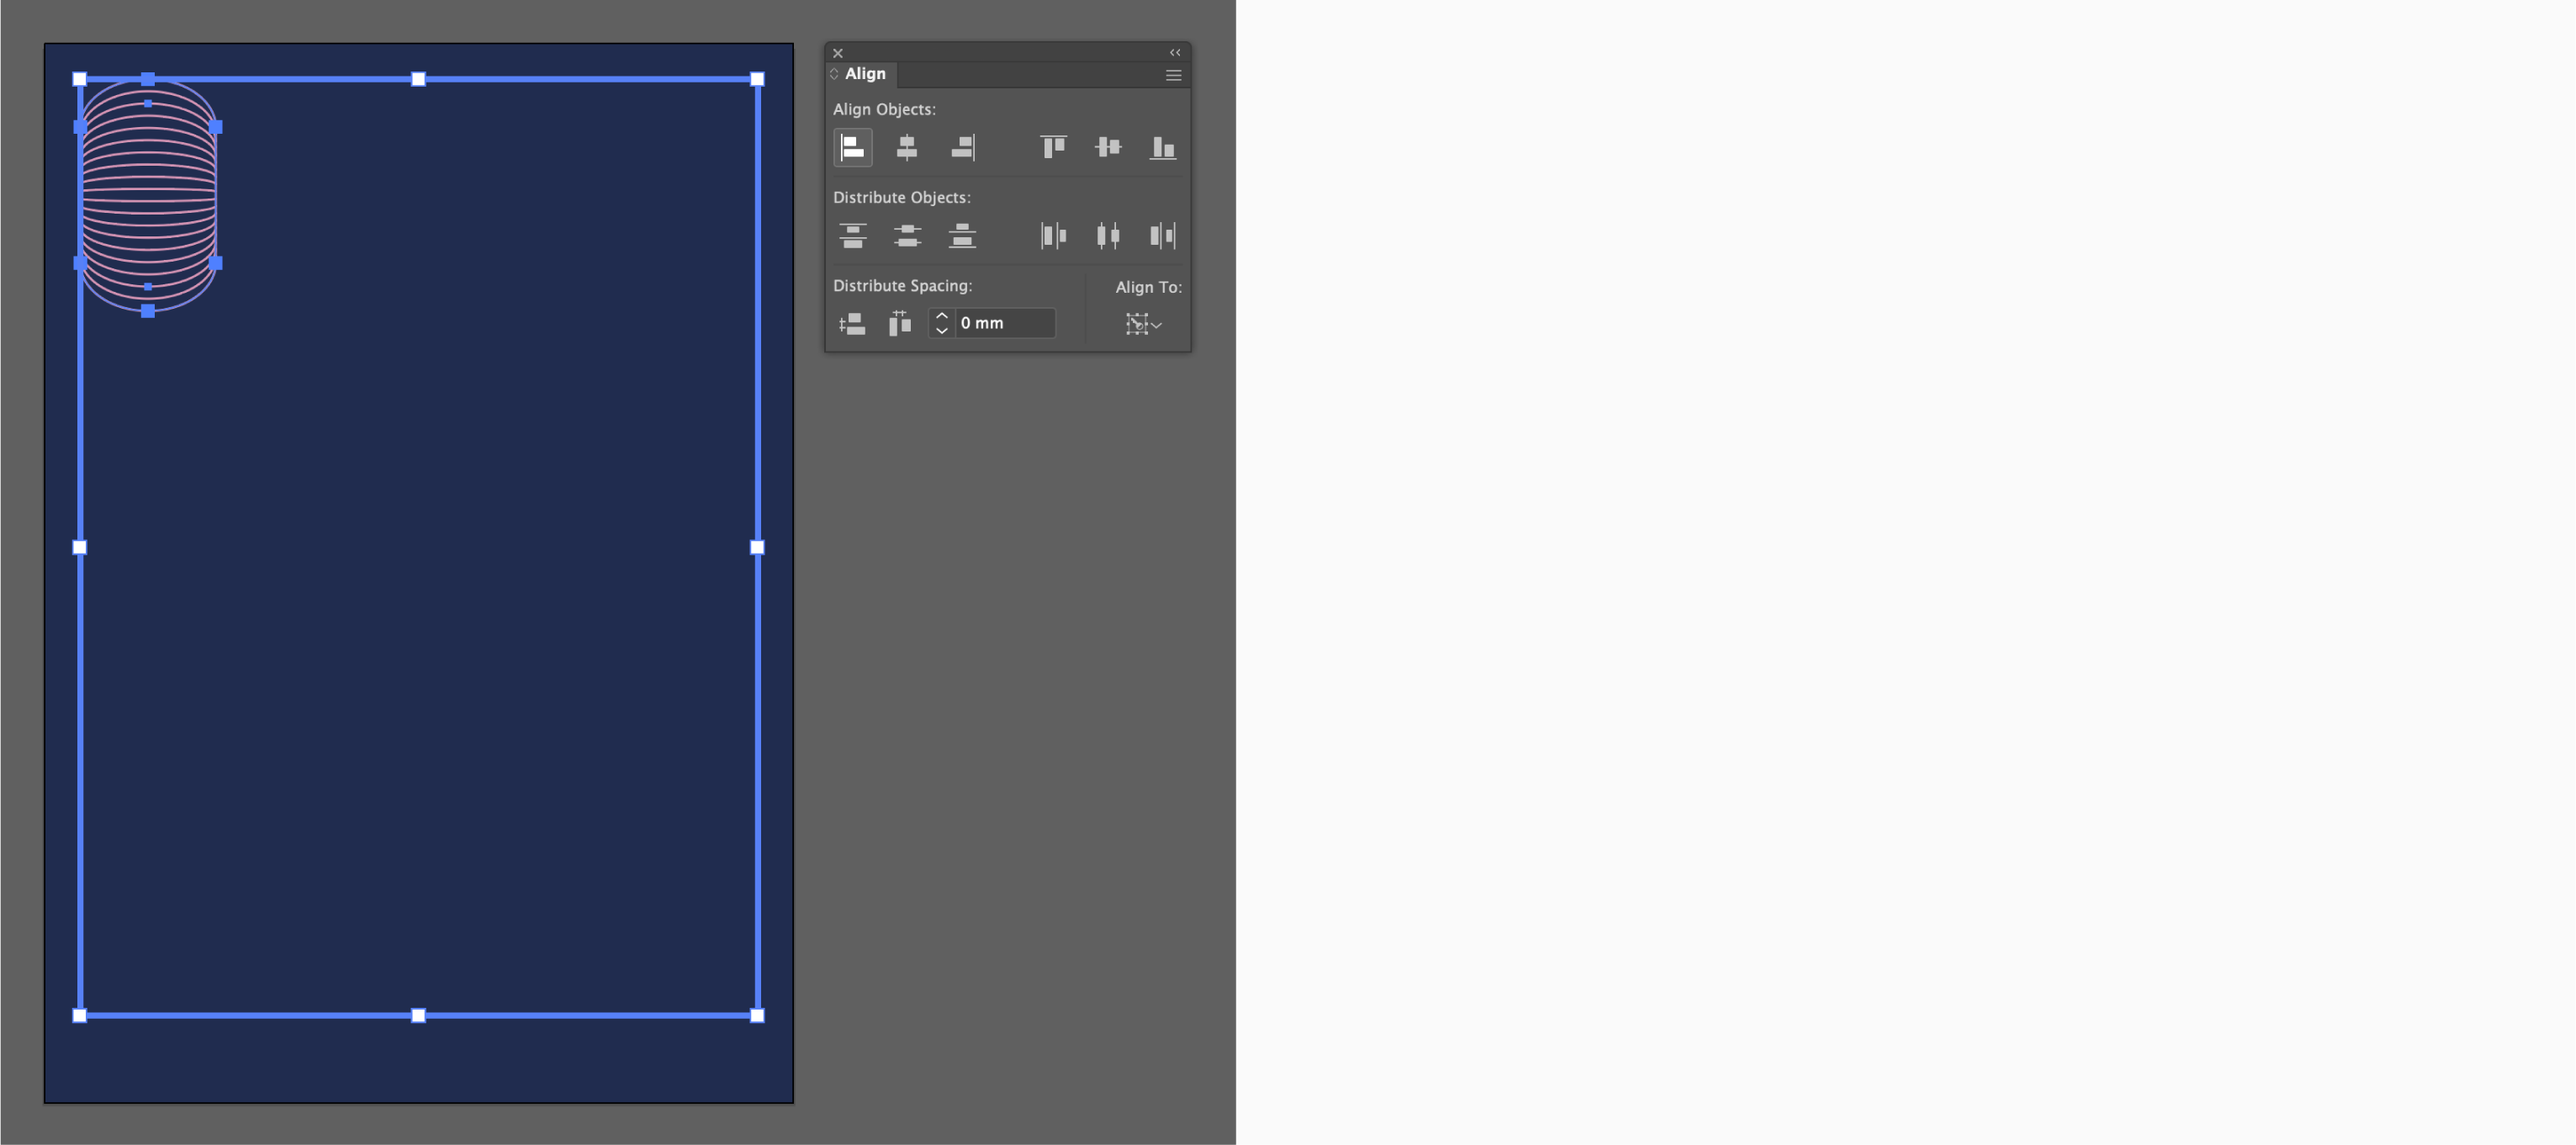
Now select both blended shape and the rectangle frame. With the help of the Align Panel, align the blended shape to the top left corner of the rectangle frame. Remember to set up the frame as a “Key Object” in the Align Panel so you can be sure that other objects (in our case the blended shape) will adapt to it. With the Key Object now set, choose “Horizontal Align Left” and then “Vertical Align Top”.
Step 15:
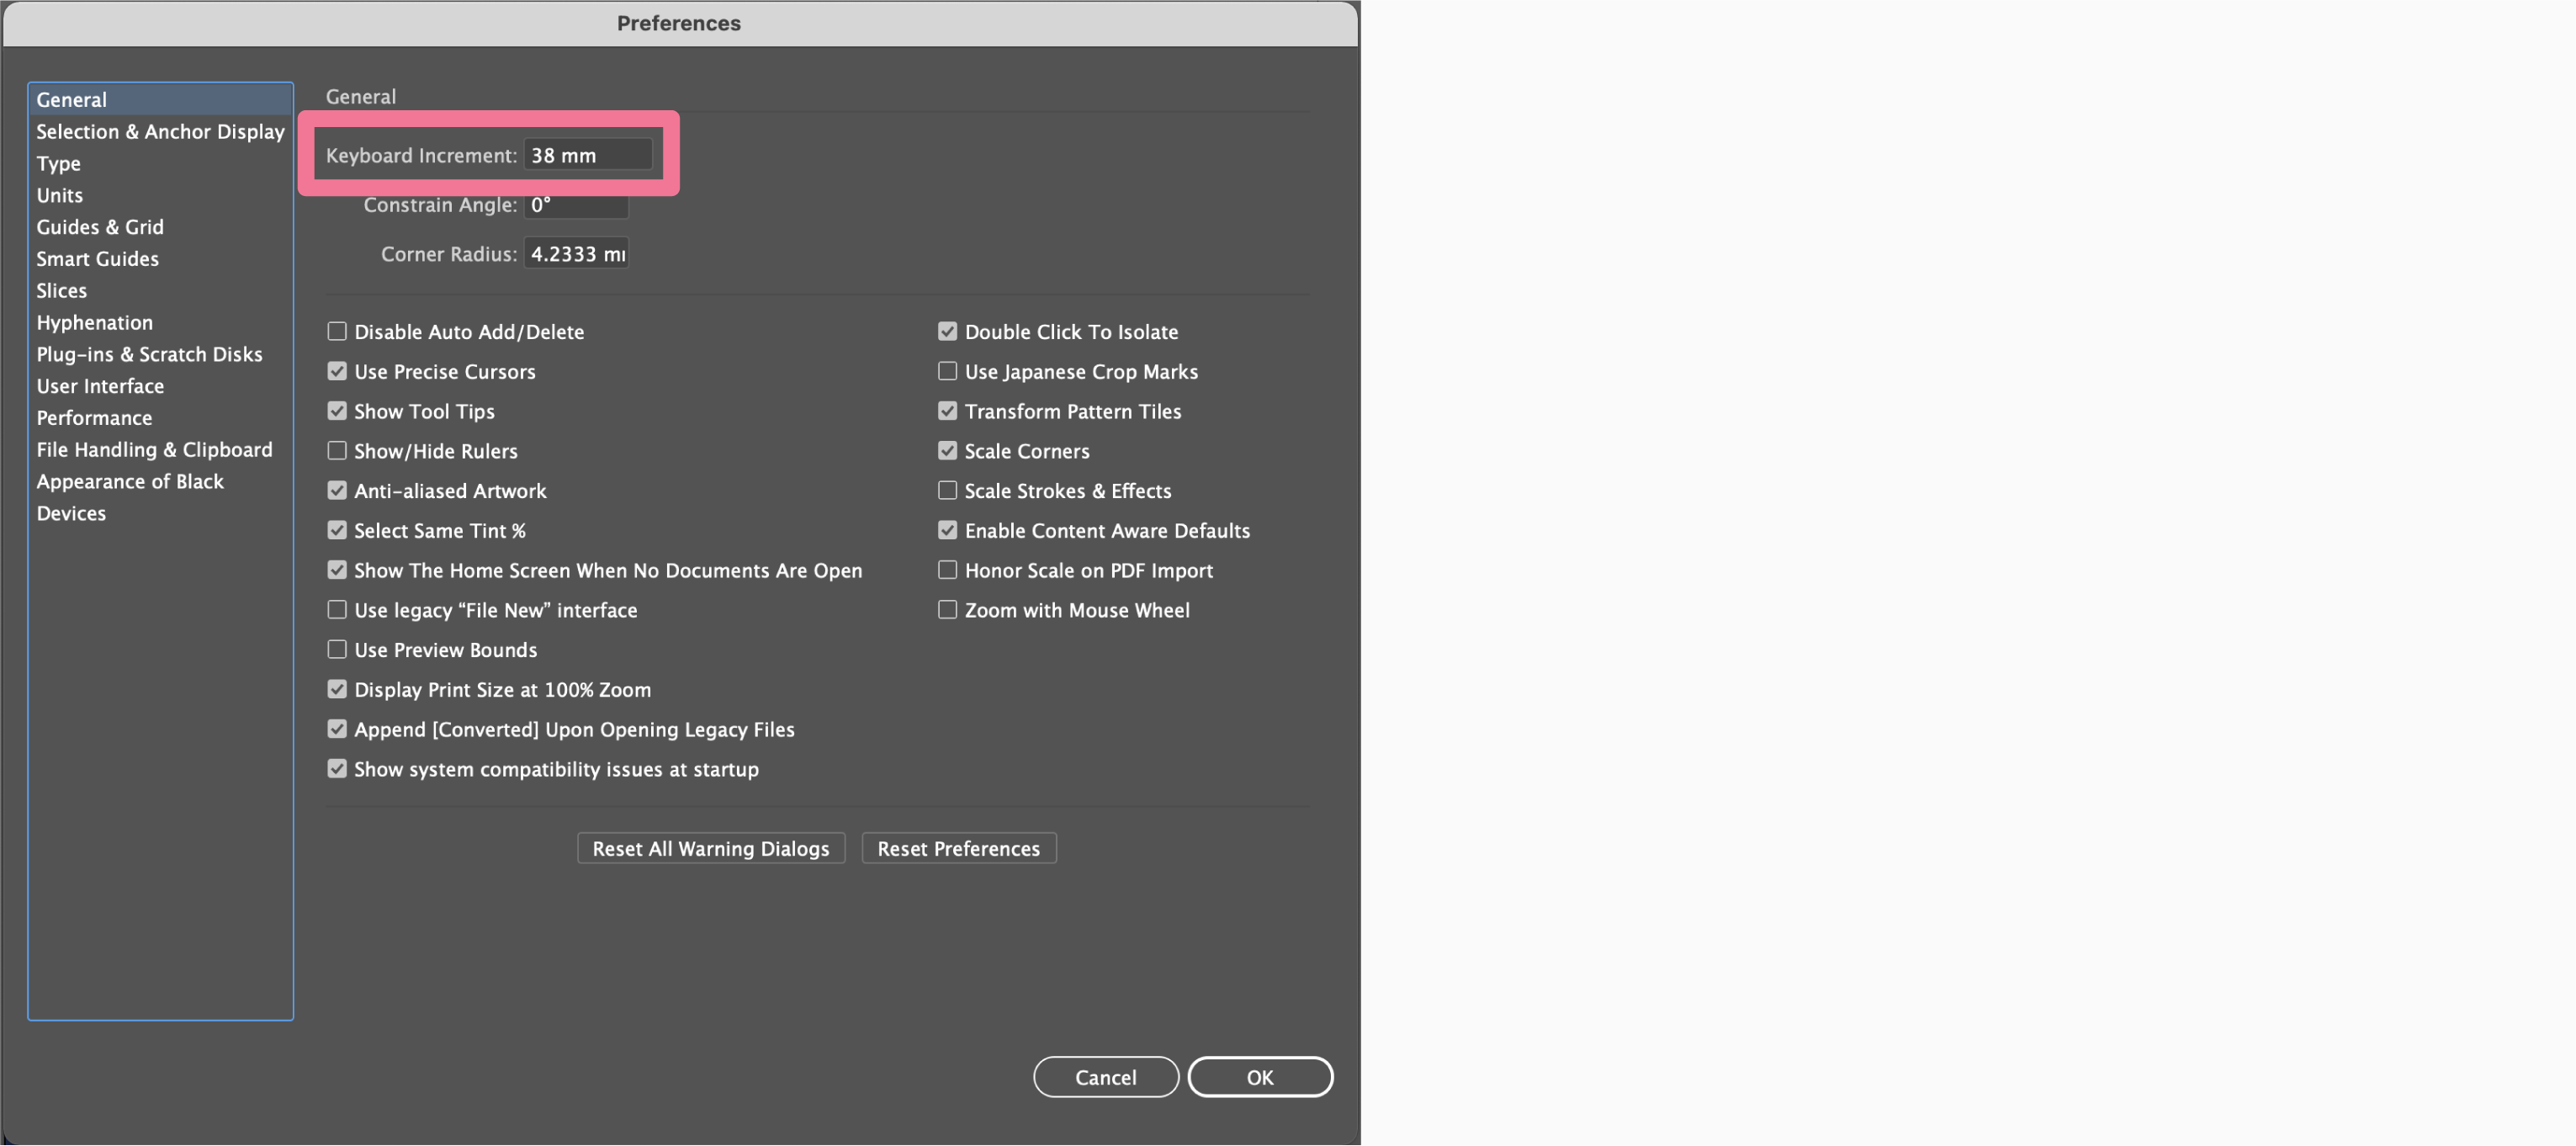
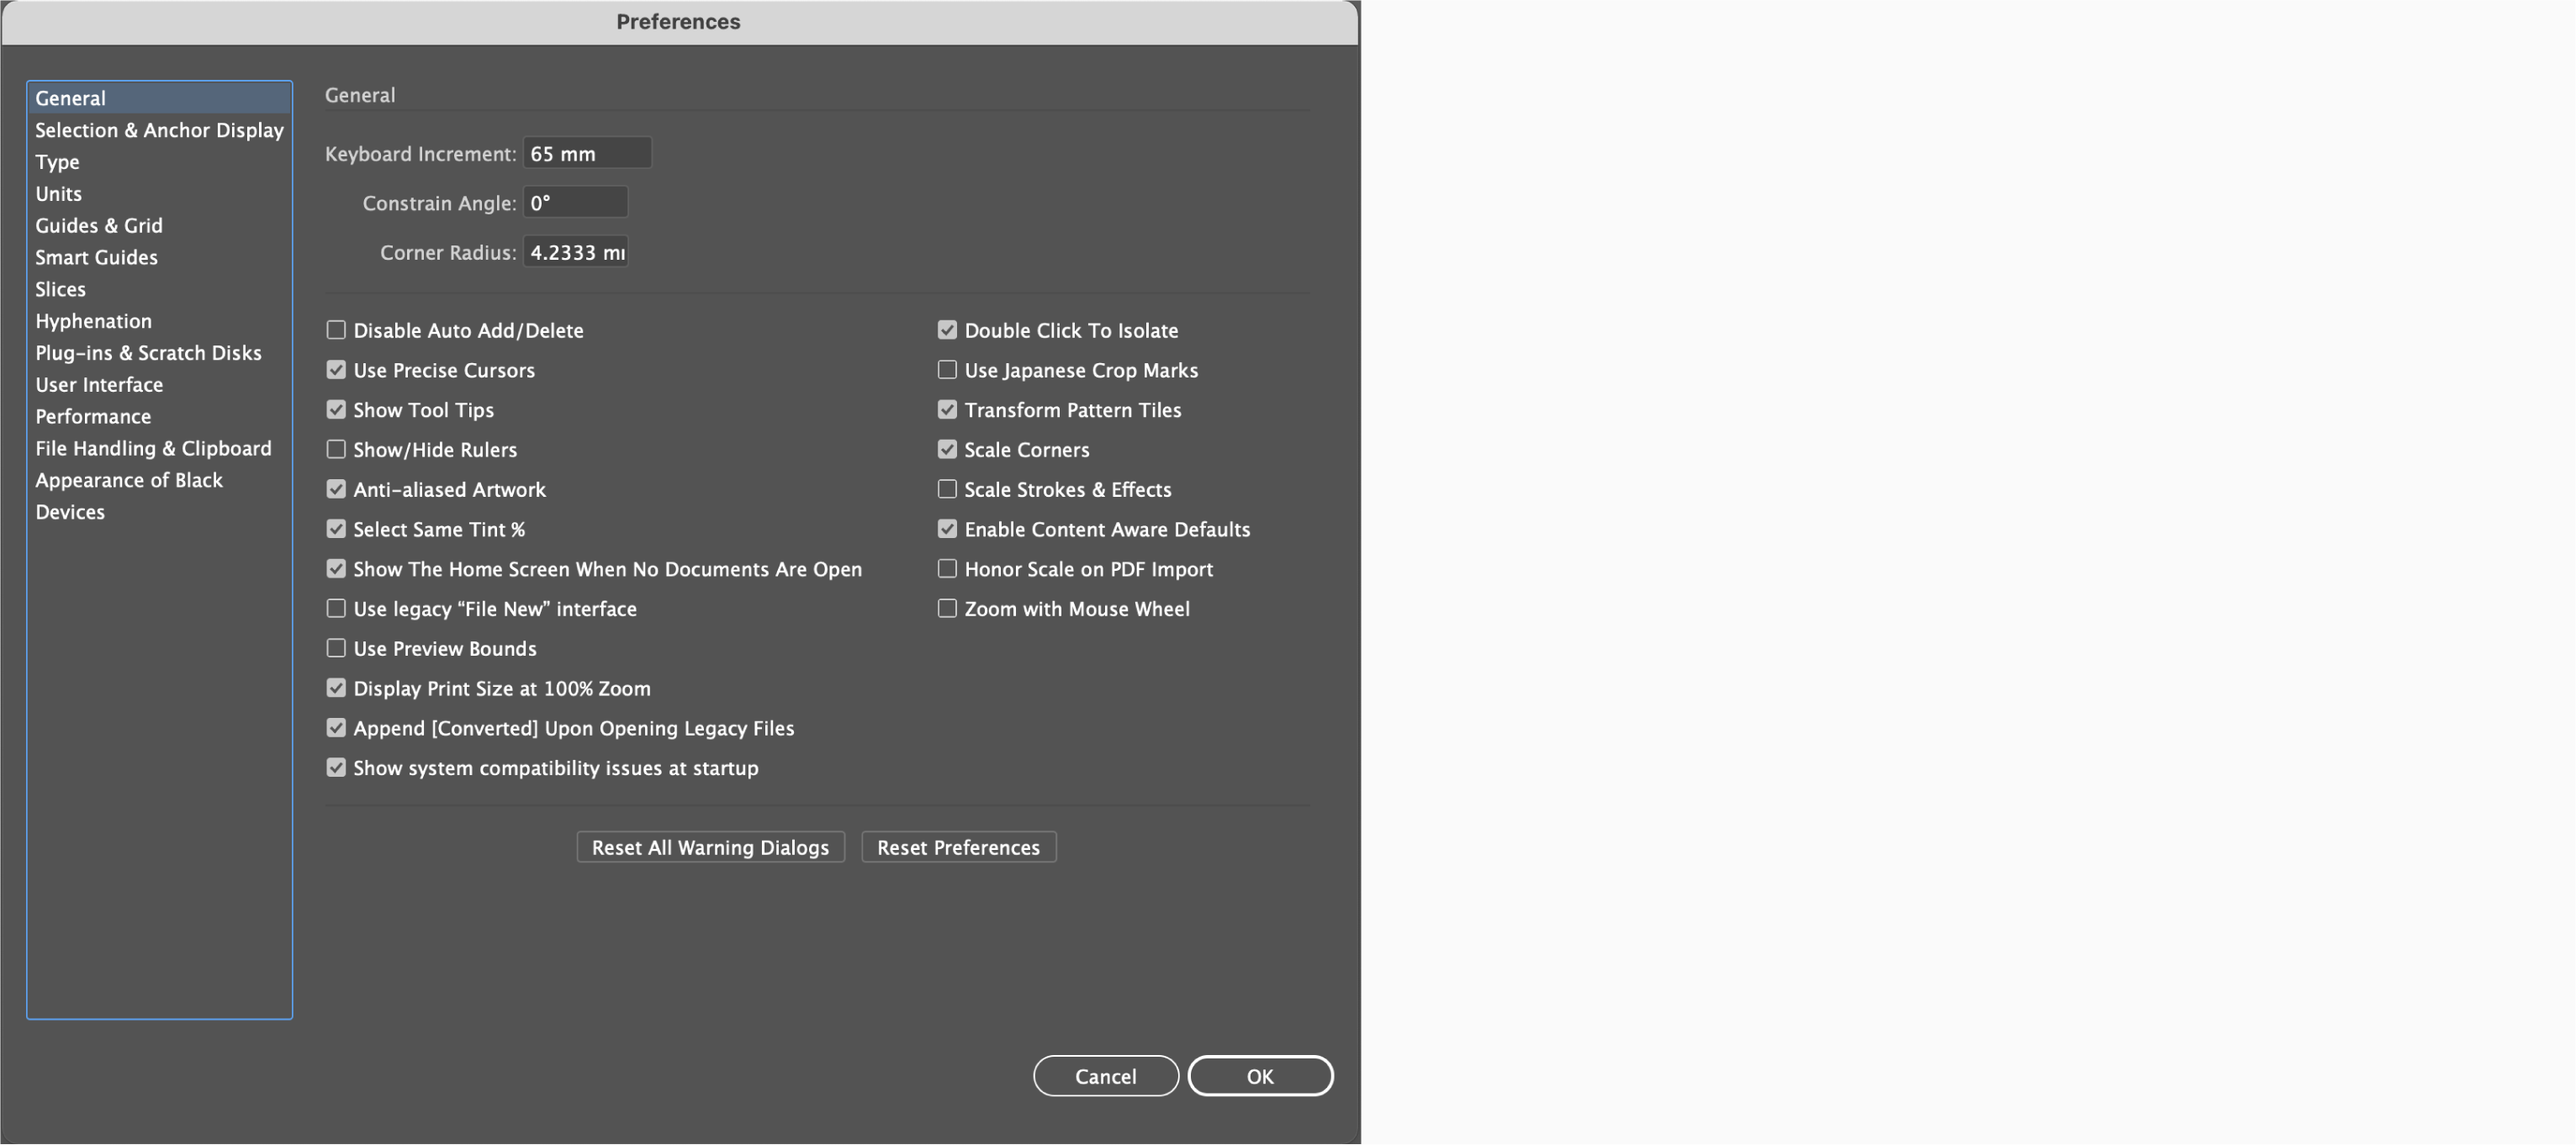
Now go to Preferences > General (Command/Ctrl + K). A new window under Preferences will appear. Under the General tab, you will find the Keyboard Increment box. Here you will insert the value of 38mm - click OK.
Step 16:
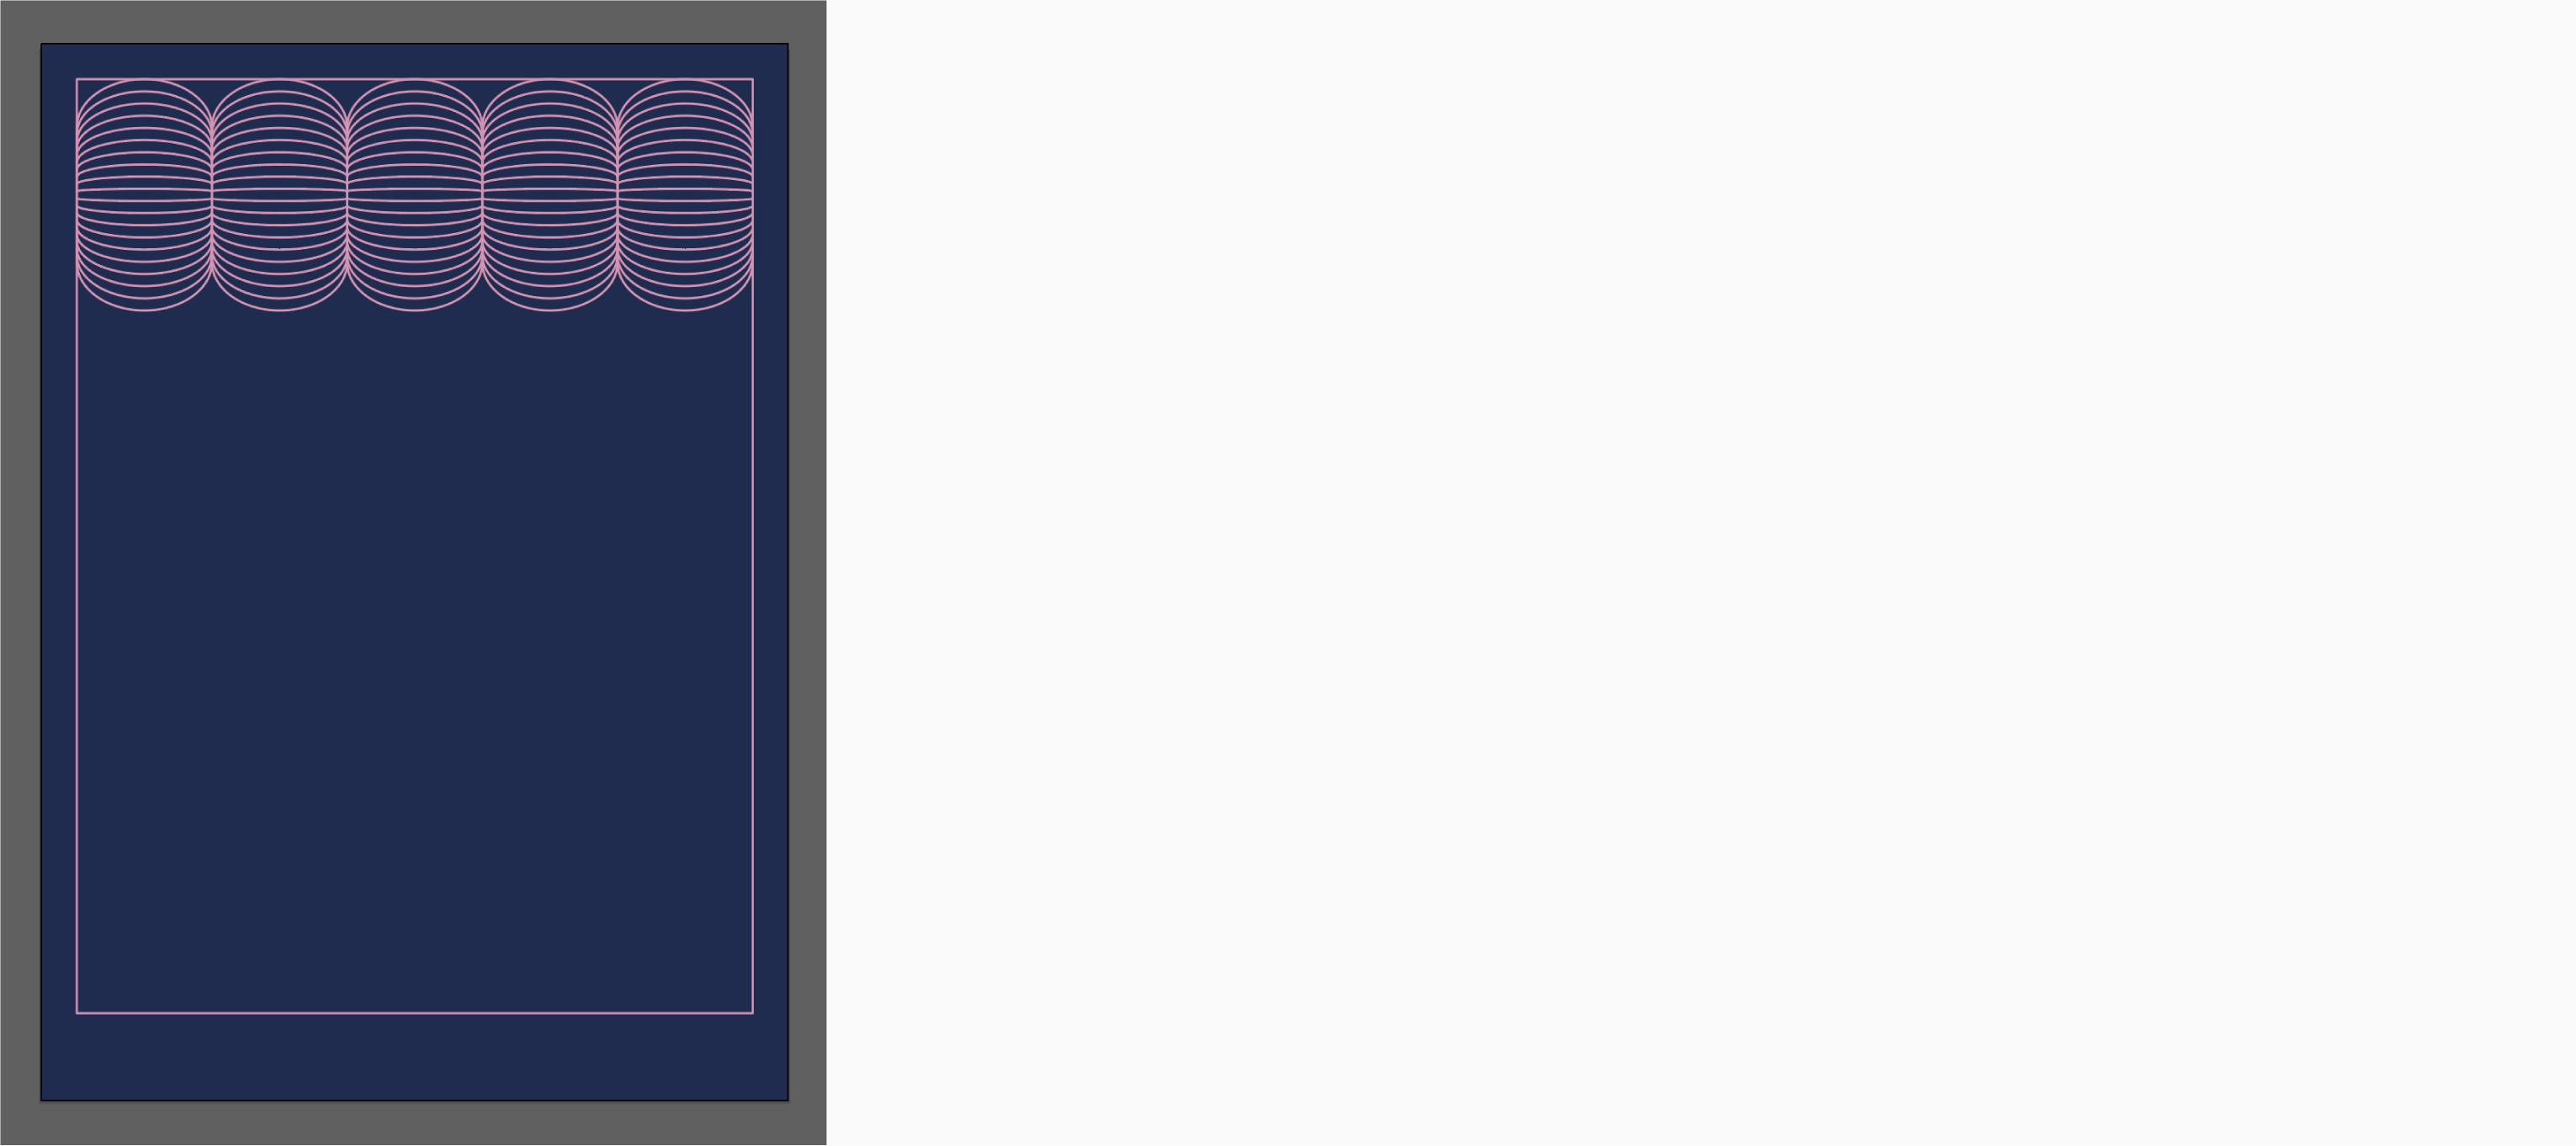
38mm is the total width and allows us to easily copy and align the blended shape. To do this, select “blend shape”, hold down Option/Alt, and click the Right Arrow on the keyboard 5 times. With this you will fill the top row of a frame with 5 blended shapes.
Step 17:
Now let's group the row of our 5 blended shapes. Similar to the Keyboard Increment action, this time we will use the height of the base blended shape as a main measurement unit. To do this, go again to Preferences > General (Command/Ctrl + K) and set the Keyboard Increment to 65mm.
Step 18:
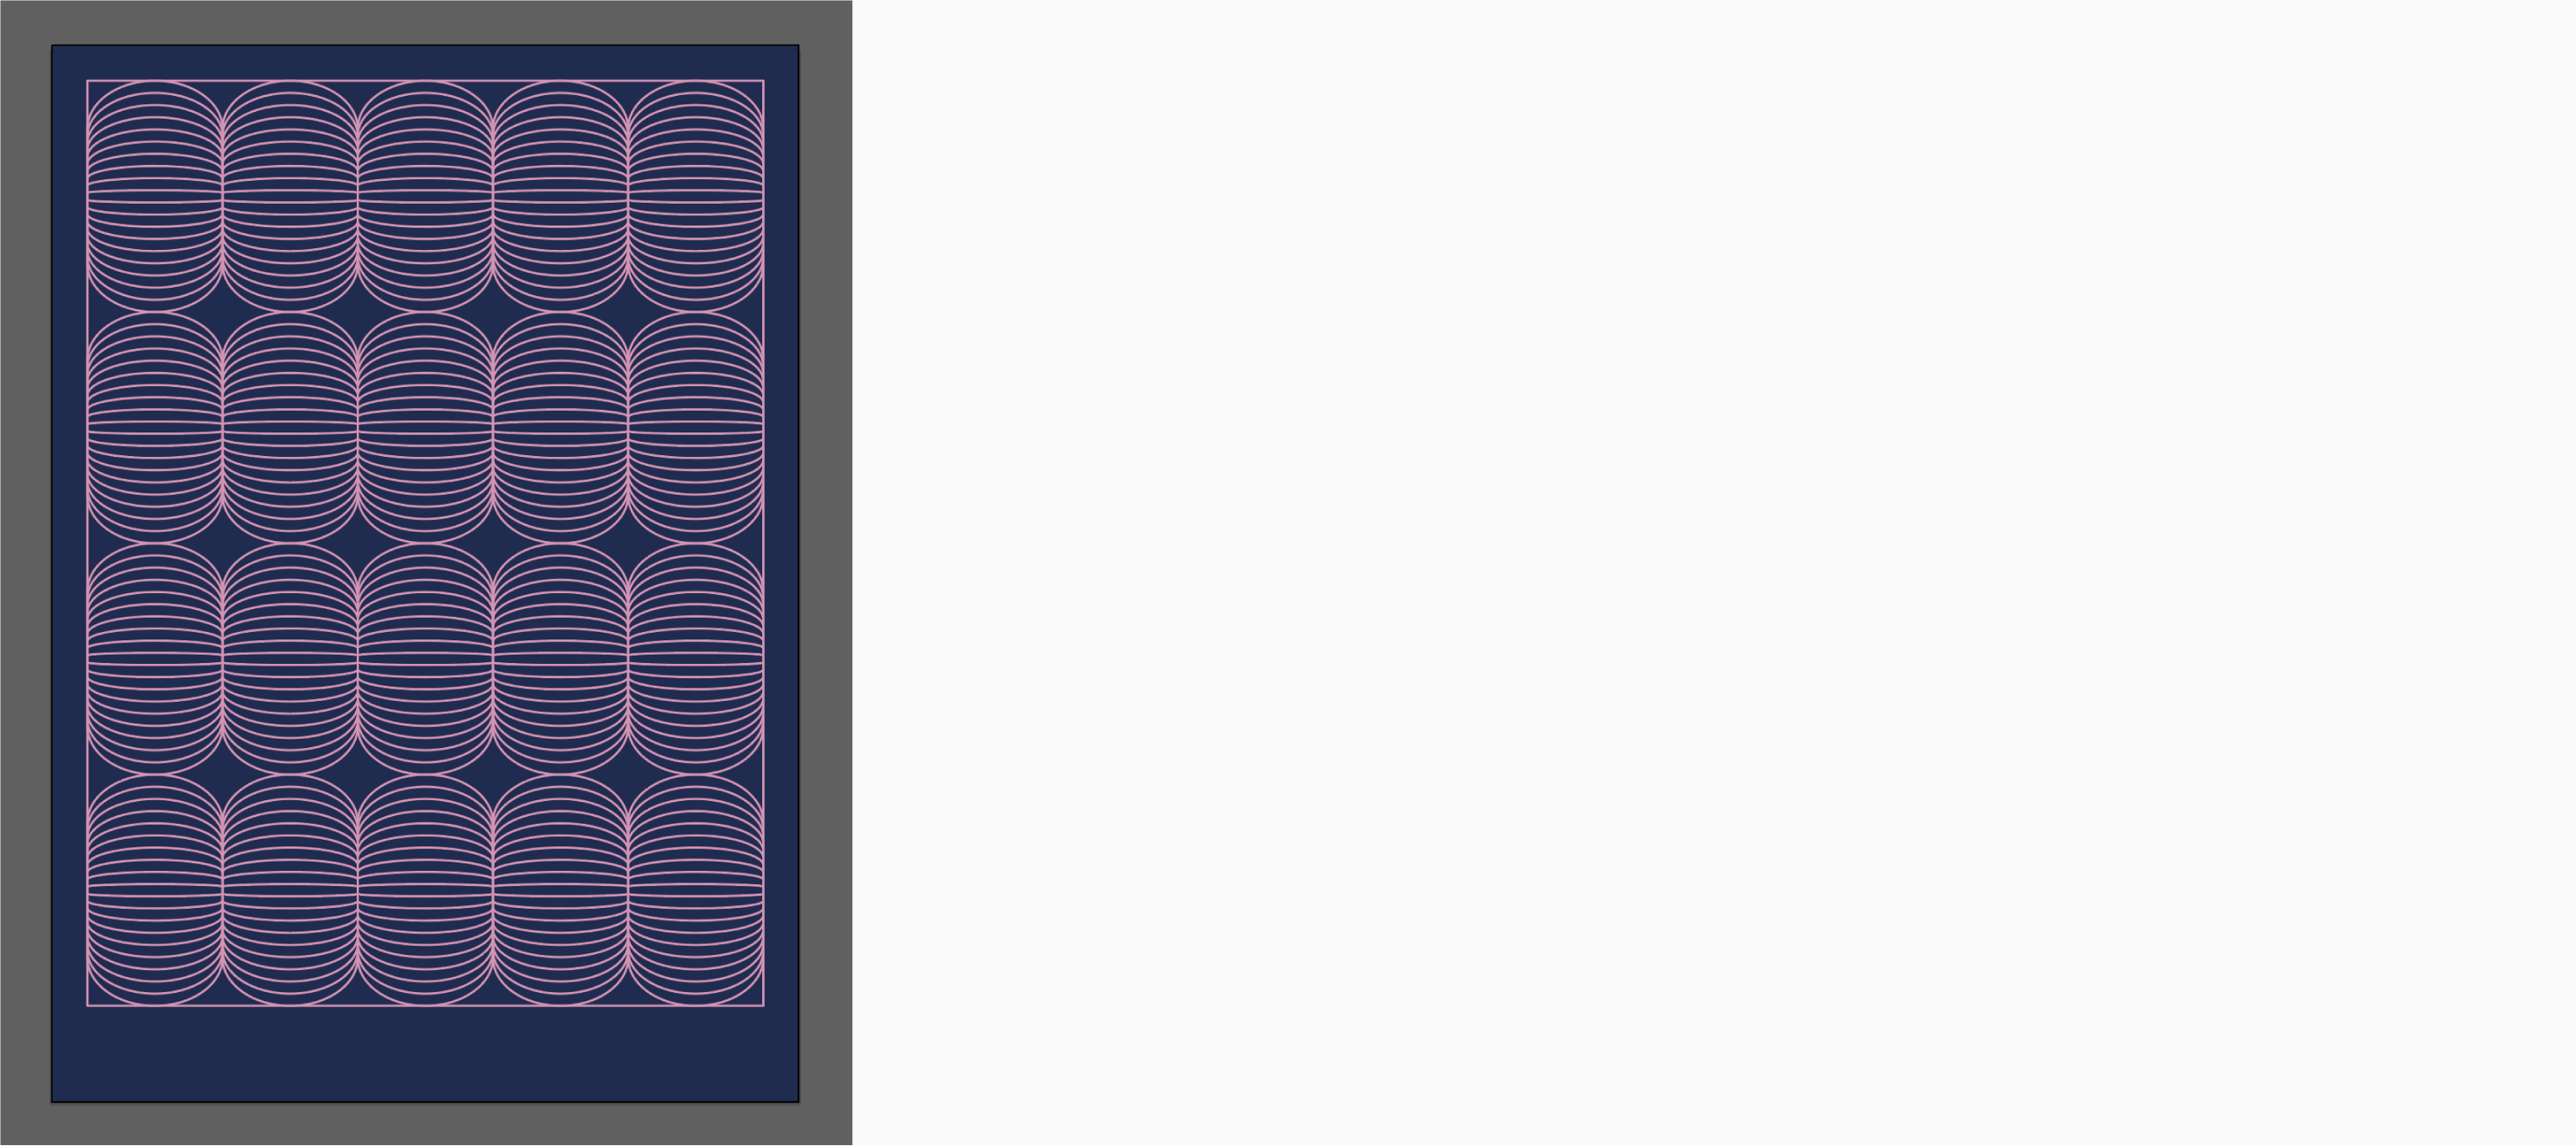
Select the blended shape, hold Option/Alt, and click the Bottom Arrow on the keyboard 4 times. With this you will fill the top row of a frame with 5 blend shapes.
Step 19:
Now it’s time to add some typography to the poster. We will be using 3 fonts with features listed as below:
- For the “SHINSEKAI” caption, we will apply Nimbus Sans Black Extended (font size: 39pt), HEX: de8fb4,
- For coordinates on the right side, apply ヒラギノ角ゴ ProN (font size: 6.7pt, leading: 9.65 pt). Keep it in the text box with the following dimensions: W: 32mm, H: 12mm. You can change the text box size in Transform panel. Set the HEX to #de8fb4. You can copy the tex from here: “34°39′08″N•135°30′22″E KANSAI REGION•OSAKA FOUNDED IN 1912”. Remember to break the text in three lines. Position the text with these coordinates X: 32.759 mm, Y: 11.878 mm.
- When you position your text in the bottom right corner, use the Line Segment Tool to create a stroke (Length: 7.3mm, Width: 0.6pt) and position it accordingly (reference the image of the finished poster). You can support yourself with Align Panel and Keyboard Increment.
- For the “新世界” caption inside the oval shape, use ヒラギノ角ゴ Std W8 (font size: 11.6pt) and HEX: 1e2b52. The oval shape should have following dimensions: W: 22.7mm, H: 9.3mm. Put it behind the caption by clicking on it with right mouse button, and then selecting from the drop down menu Arrange > Send Backward (or eventually by using hotkeys Comand/Ctrl + Shift + [ ).
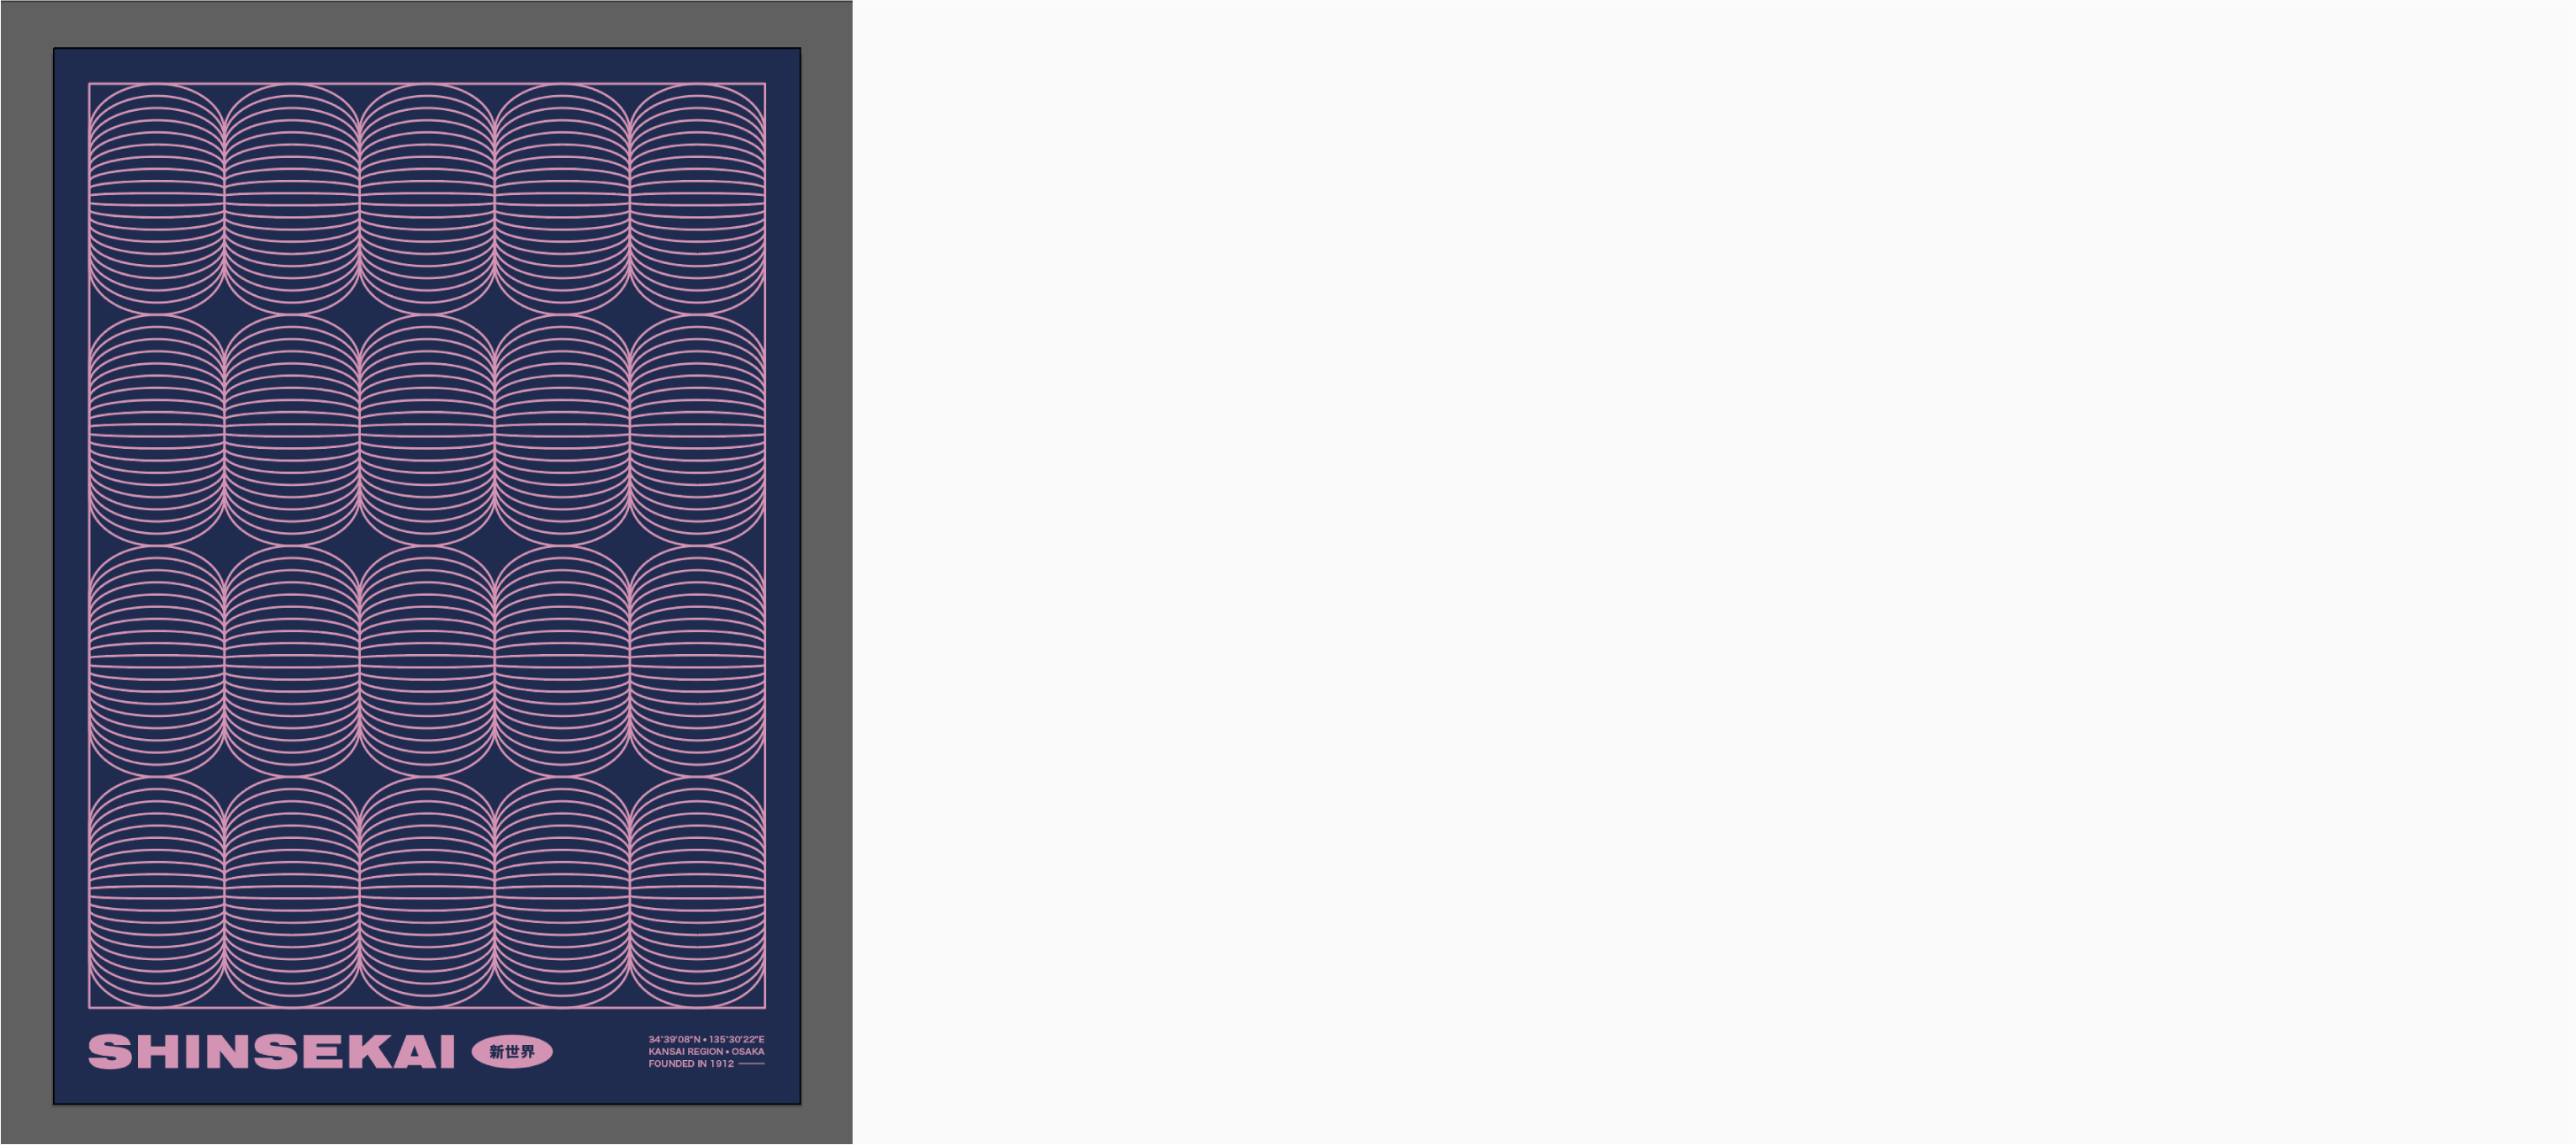
Step 20:
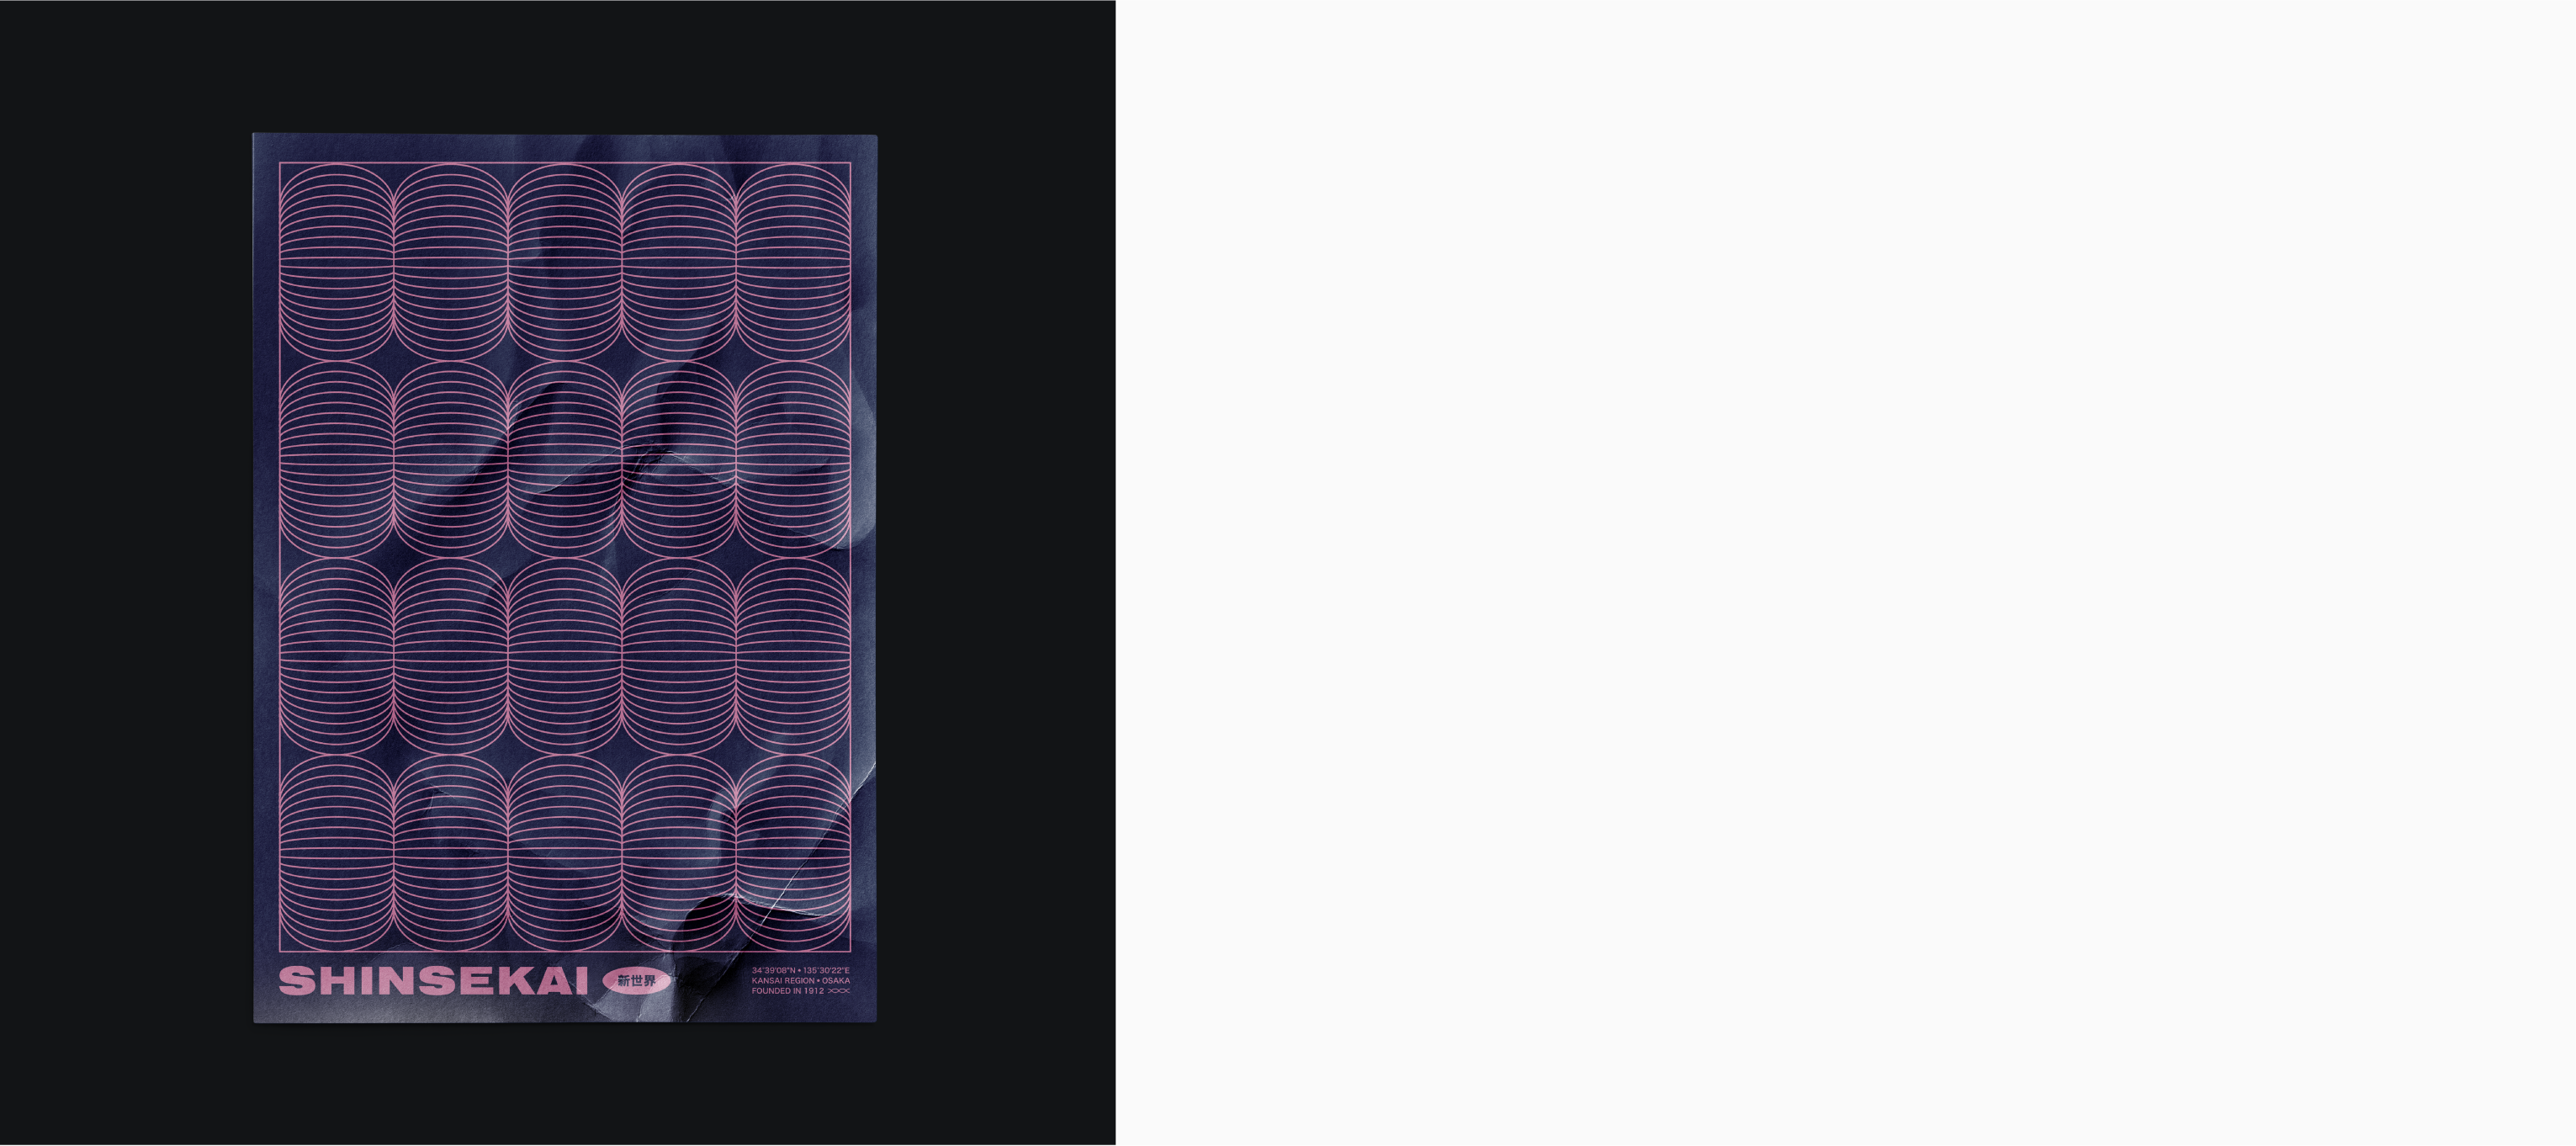
Our poster is finished! Now we can move it to Photoshop and see how it will look on a mockup template. The one that I’m using was created by ls.graphics and you can download it from this link: https://www.ls.graphics/free/free-crumpled-paper-mockup
Happy blending!


