Capturing Pictures in React Native
We recently had a client that want to have the possibility to take a photo in their React Native App. This is actually a quite straightforward feature to build in React Native as there are components you can use to get your project kick started.
If you already have your React Native dependencies set up you can initialize your project by running these simple commands, if not head over to the Getting Started guide here
$ react-native init MyCamera$ cd MyCamers$ react-native run-iosInstall the React Native Camera component
The library I am using here is a React Native Camera component, do these two commands to download and link your library.
$ npm install react-native-camera --save$ react-native link react-native-cameraNote: if you are having trouble importing the camera component into your project, try restarting your packager.
Add the Camera Component to your view
To get the camera working you need to import the component from the React Native Camera library.
import Camera from 'react-native-camera';
Then place the camera component wherever it suites you in your renderer
<Camera ref={cam => {this.camera = cam}} style={styles.preview} aspect={Camera.constants.Aspect.fill}> <Text style={styles.capture} onPress={this.takePicture.bind(this)}> [CAPTURE] </Text></Camera>Bind the onPress action to the takePicture function that does the magic and you’re in business:
takePicture() { this.camera .capture() .then((data) => console.log(data)) .catch(err => console.error(err));}Add some awesome styling for the preview area and capture button. Remember to import Dimensionsfrom React to get your screen sizing properties if you want to fit the camera to your screen.
preview: { flex: 1, justifyContent: 'flex-end', alignItems: 'center', height: Dimensions.get('window').height, width: Dimensions.get('window').width}, capture: { flex: 0, backgroundColor: '#fff', borderRadius: 5, color: '#000', padding: 10, margin: 40 }}Like champ you are, you could have easily worked this out from the documentation. But here are some tips to make it working on your iPhone properly.
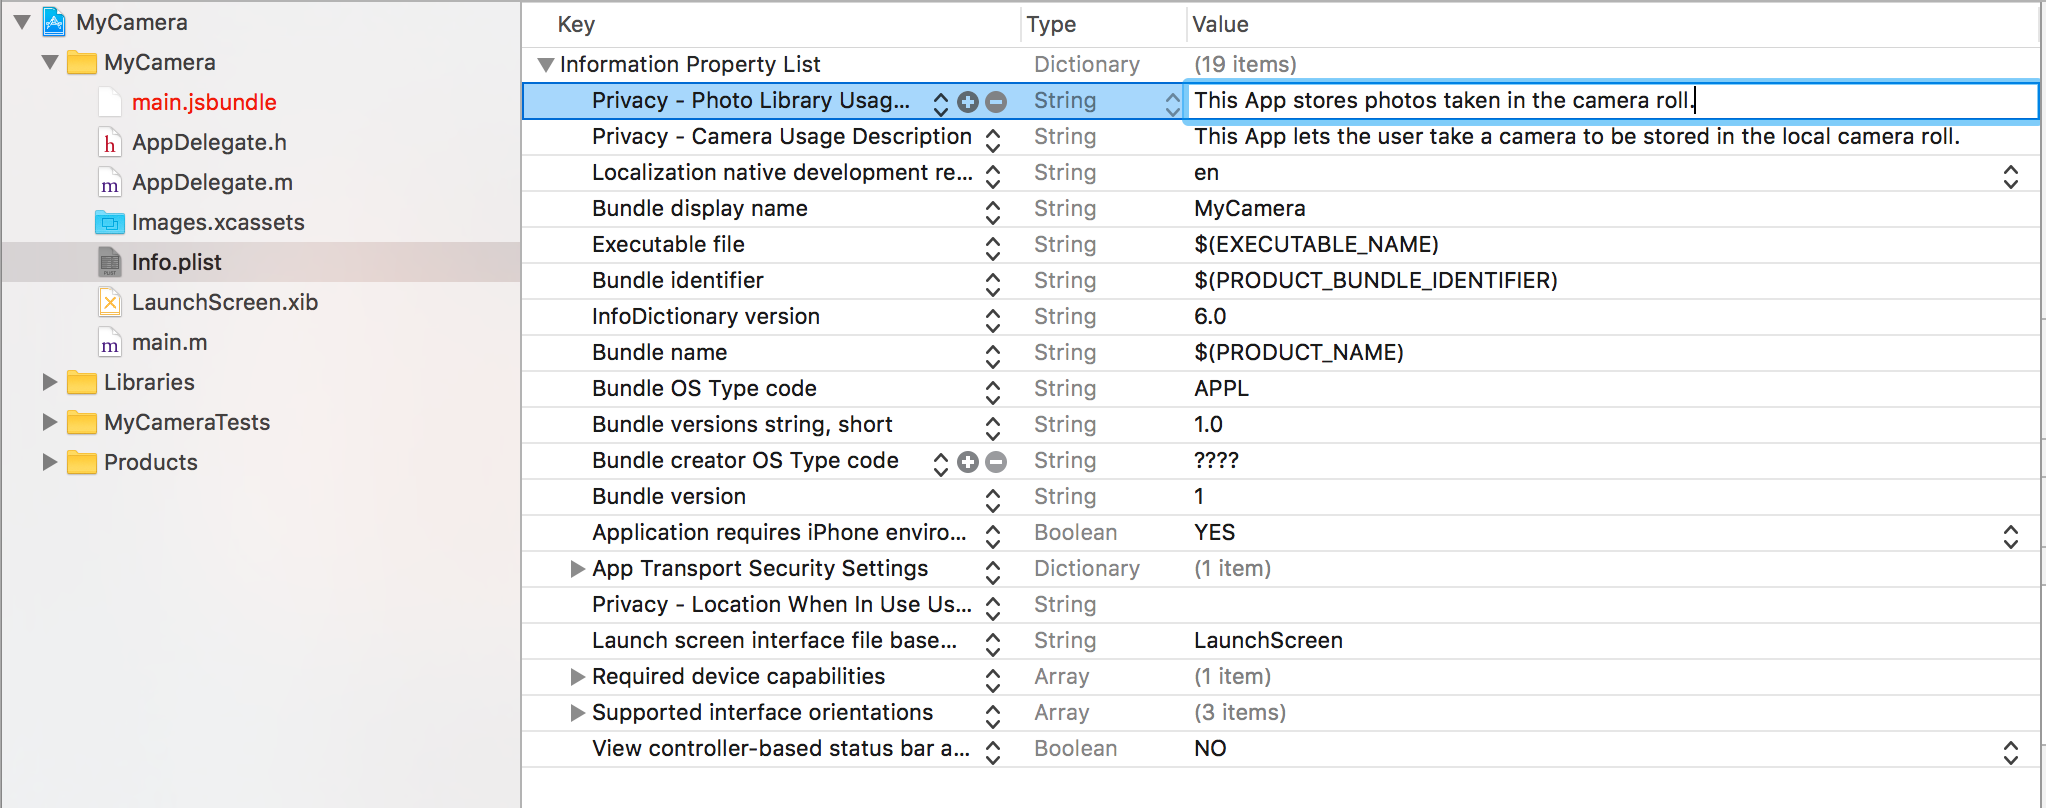
Open the project in XCode. Here you need to add a description for NSCameraUsageDescription in your Info.plist file. This is basically a description where you state how the App is using the camera. It is required by Apple, if you dont do this your will crash.

Also to actually be able to store the photo in the camera roll you also need to specify NSPhotoLibraryUsageDescription in your Info.plist file. See the picture below for example.

When running the MyCamera App on your iPhone it will ask to “to Access the Camera” and “to Access Your Photos”.
You should now get the camera App loading showing you a preview and the possibility to snap your photo as shown in the screenshot below. When tapping on the capture button your image is saved in the camera roll.
Quite neat huh? I hope you found this small post on adding a camera component to your native iPhone App useful.
Oh, and it should work just as fine on Android.
Resources:
- You can download the complete example on GitHub.
External resources:
GraphQL based backend for React and React Native?
Crysatllize is a back-end for rich product information and e-commerce built on GraphQL. Ideal for React and React Native e-commerce Apps.
Check out Headless Commerce with Crystallize.


