
Handwriting Effect Animation Tutorial Part I
Welcome to the first part of the "Complex Handwriting Effect Animation" tutorial! On YouTube, you can find many tutorials about this effect. Maybe you've already done some works with not too complex texts or logos. But what to do if the font is so articulated, full of curvatures, details and thickness variations, like this?

We simply have to work more on the Illustrator file before exporting it to After Effects.
Let's open the file to analyze it!
Try to imagine the progress of the writing and explain the critical points that we might encounter.
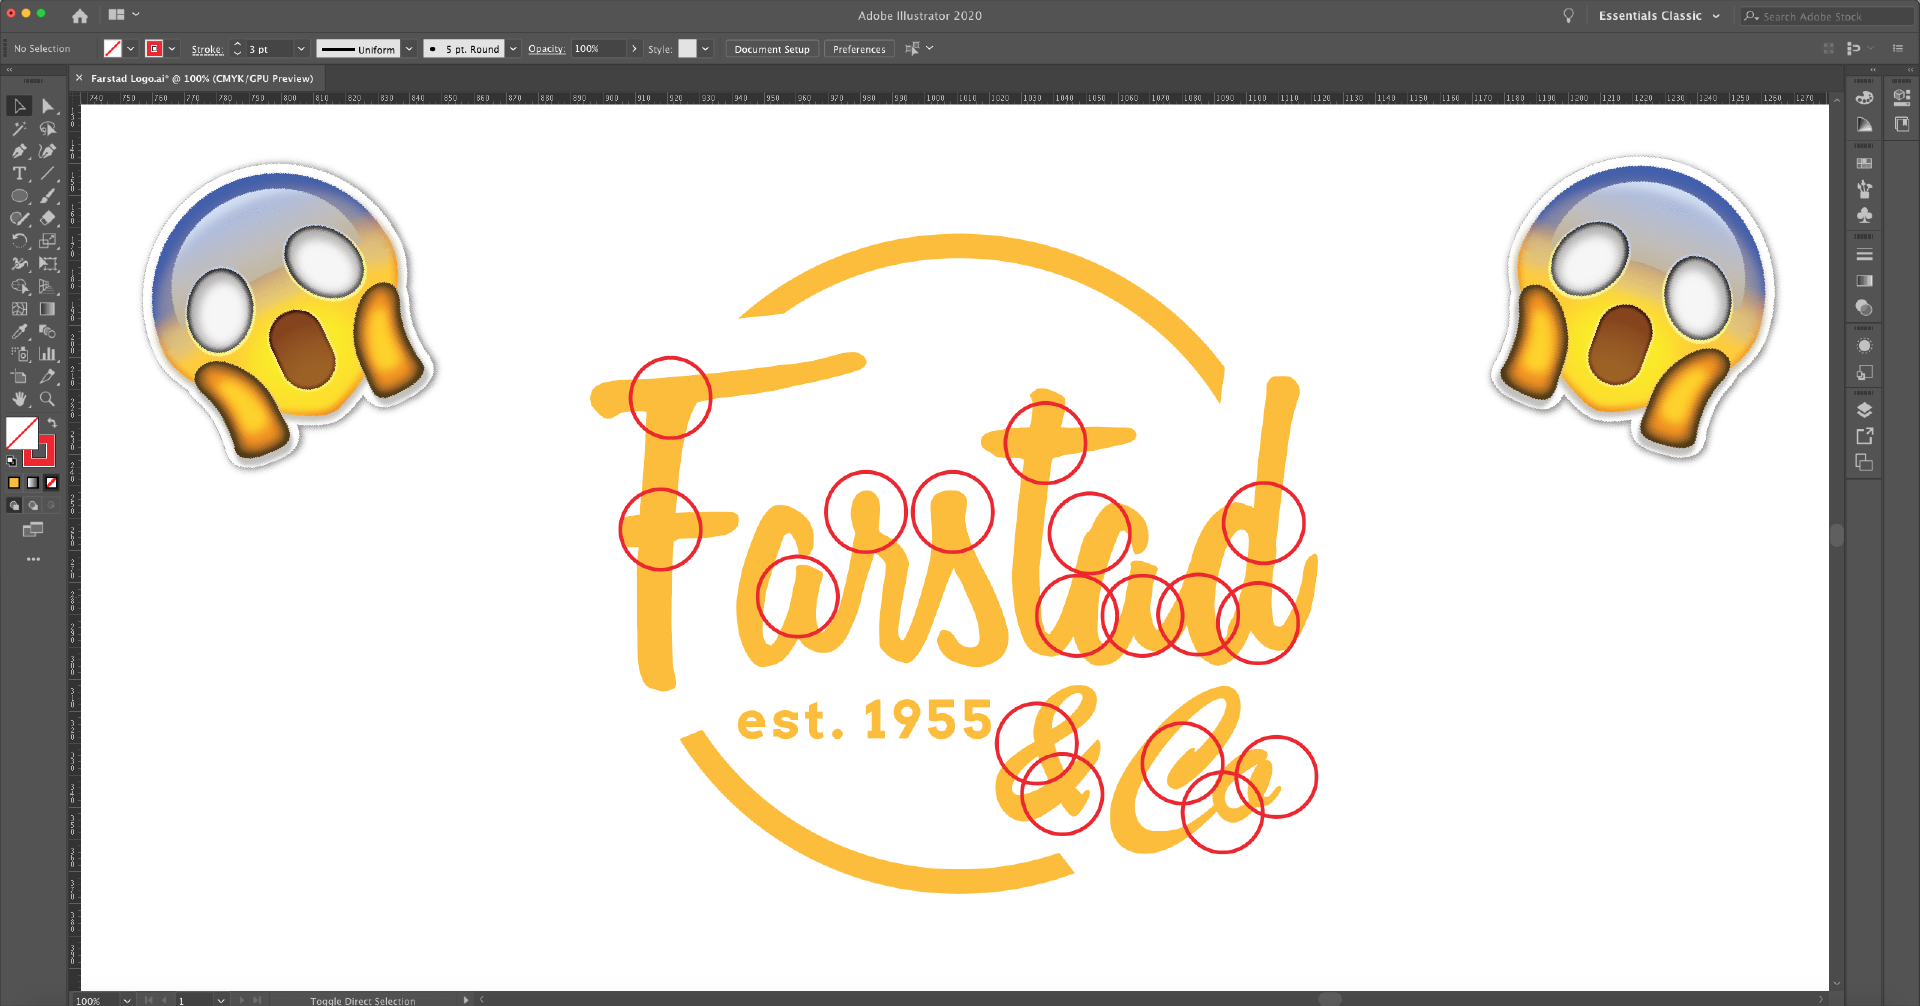
Copy the logo and start to work on it. Drag each path of the text and divide it according to the elements that we will animate later.
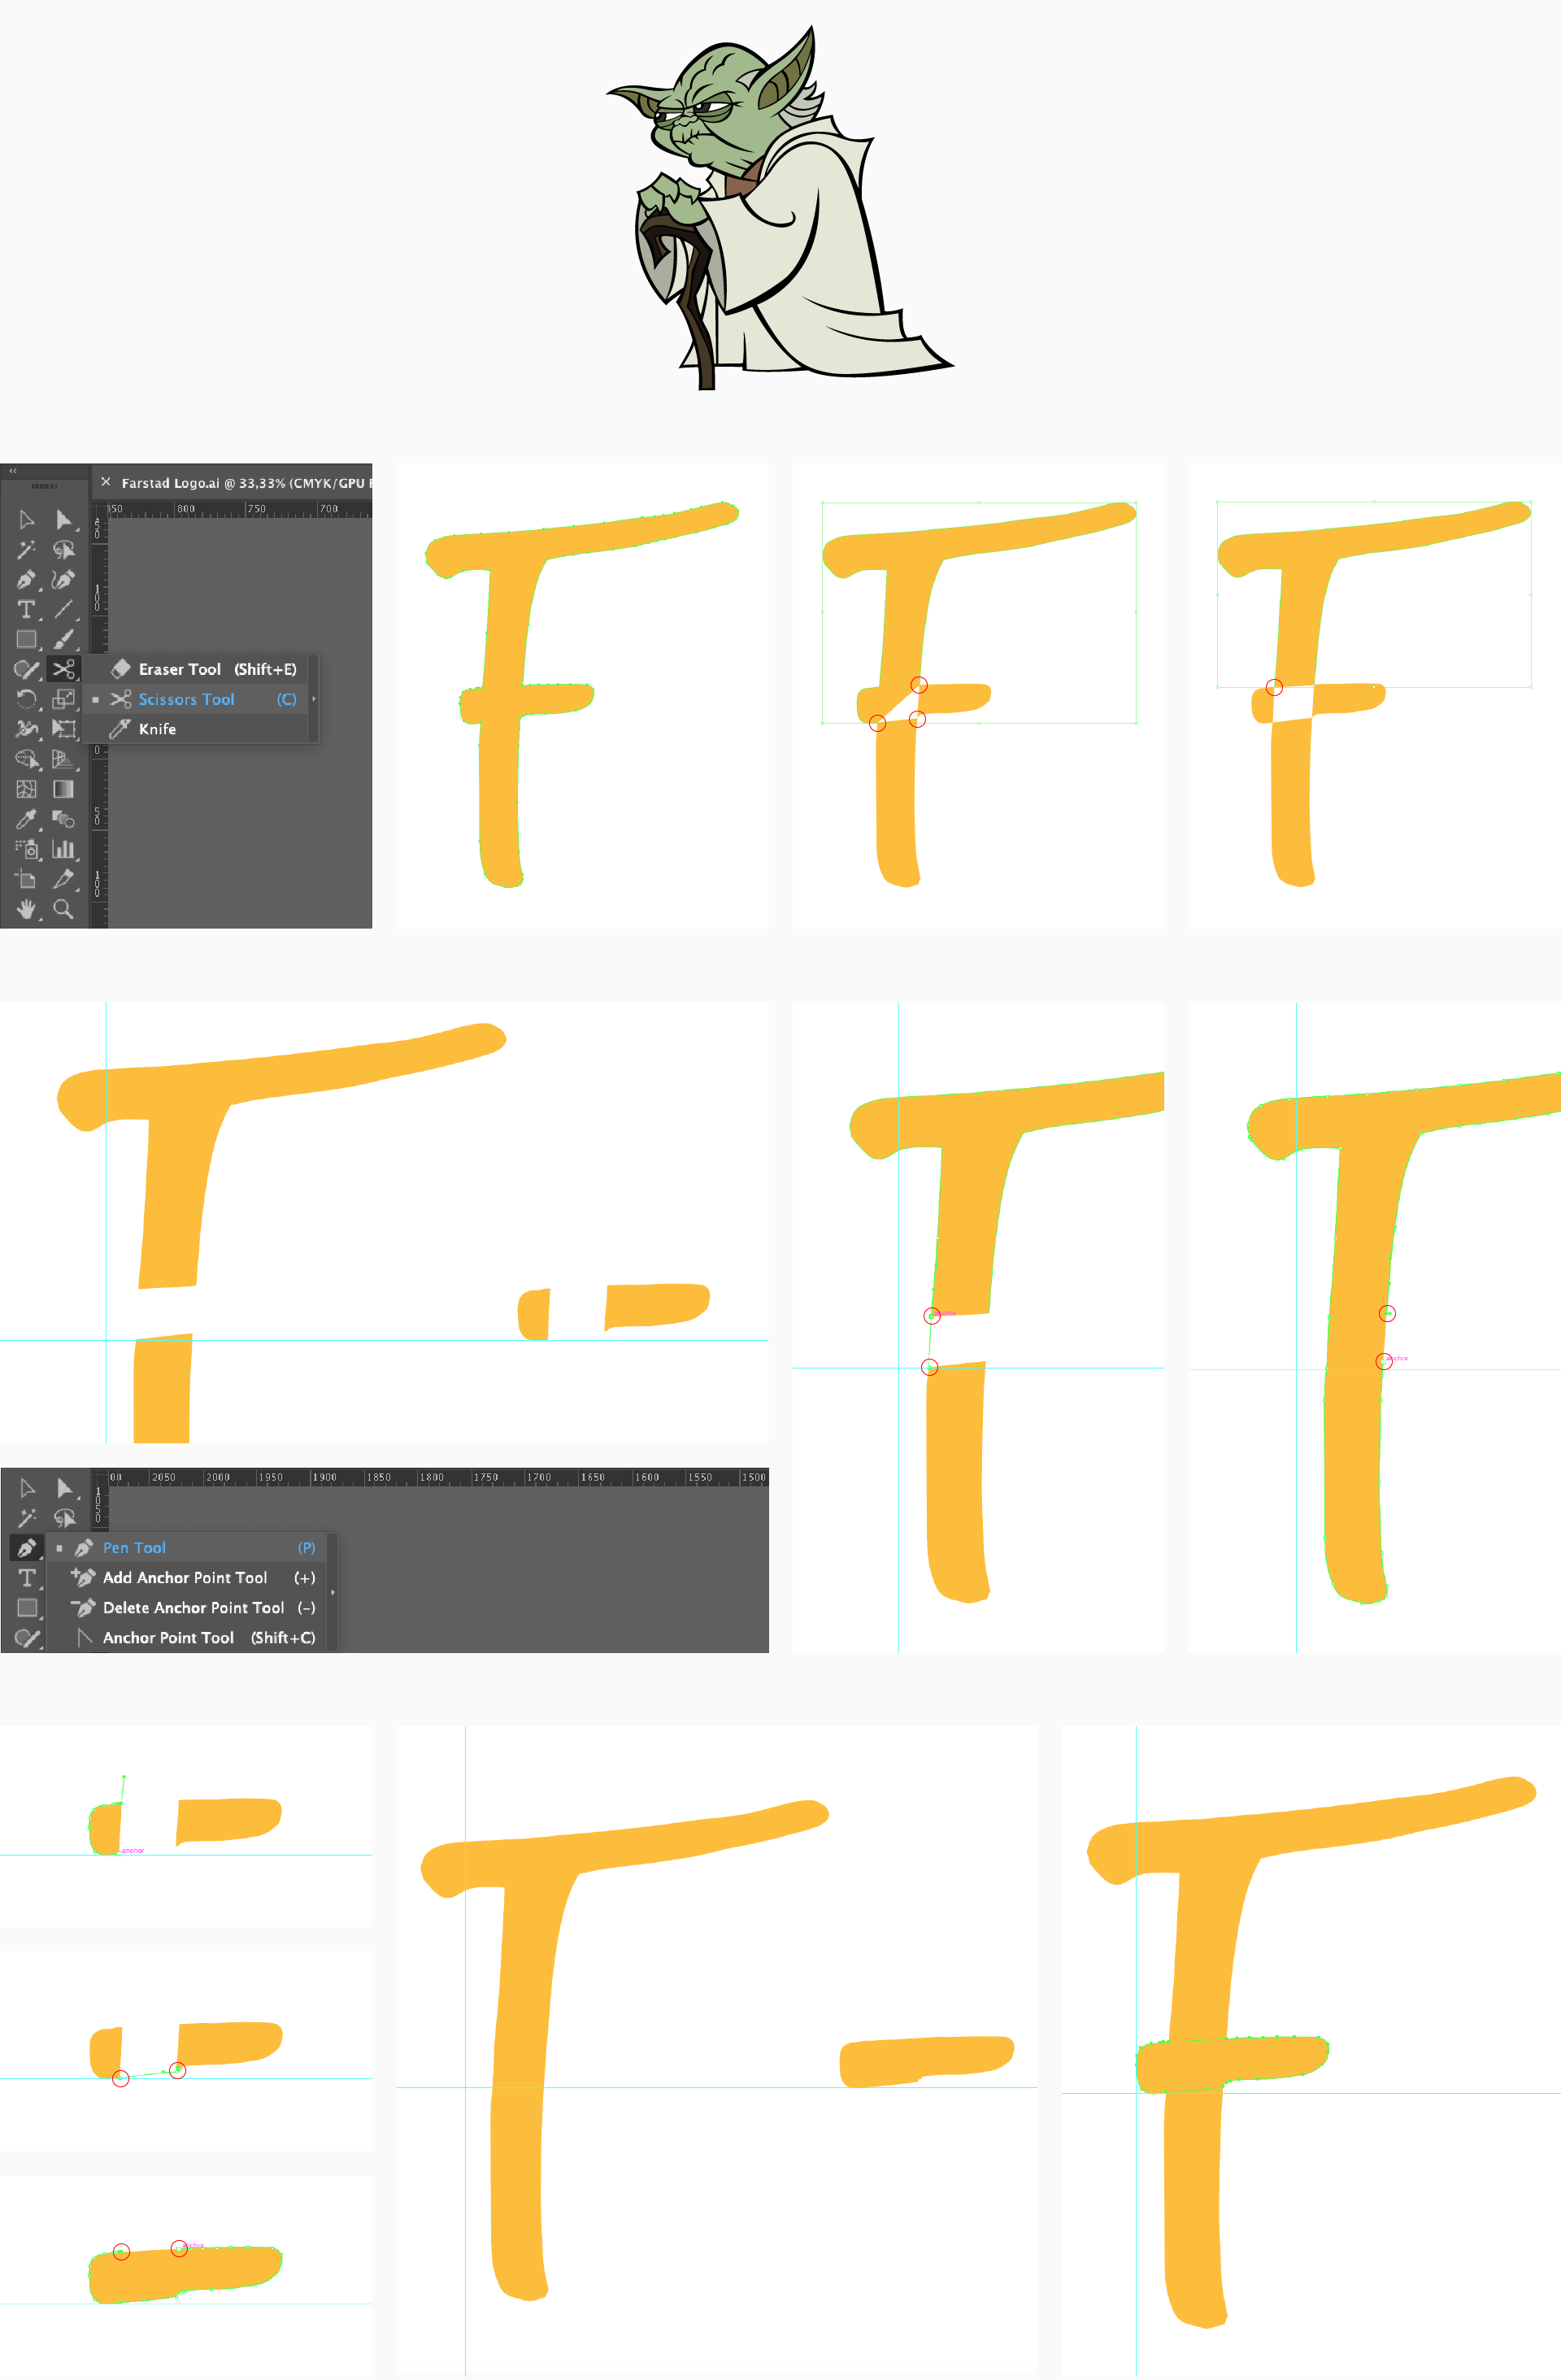
I recommend cutting the path with the "Scissors" tool at the most critical points, where multiple characters intersect or overlap. Then use the "Pen" tool to recreate the path. In the example below, we see how we can disassemble and rebuild a bar of the letter "F".”
More accurate in Illustrator we are, easier our work in After Effects will be!
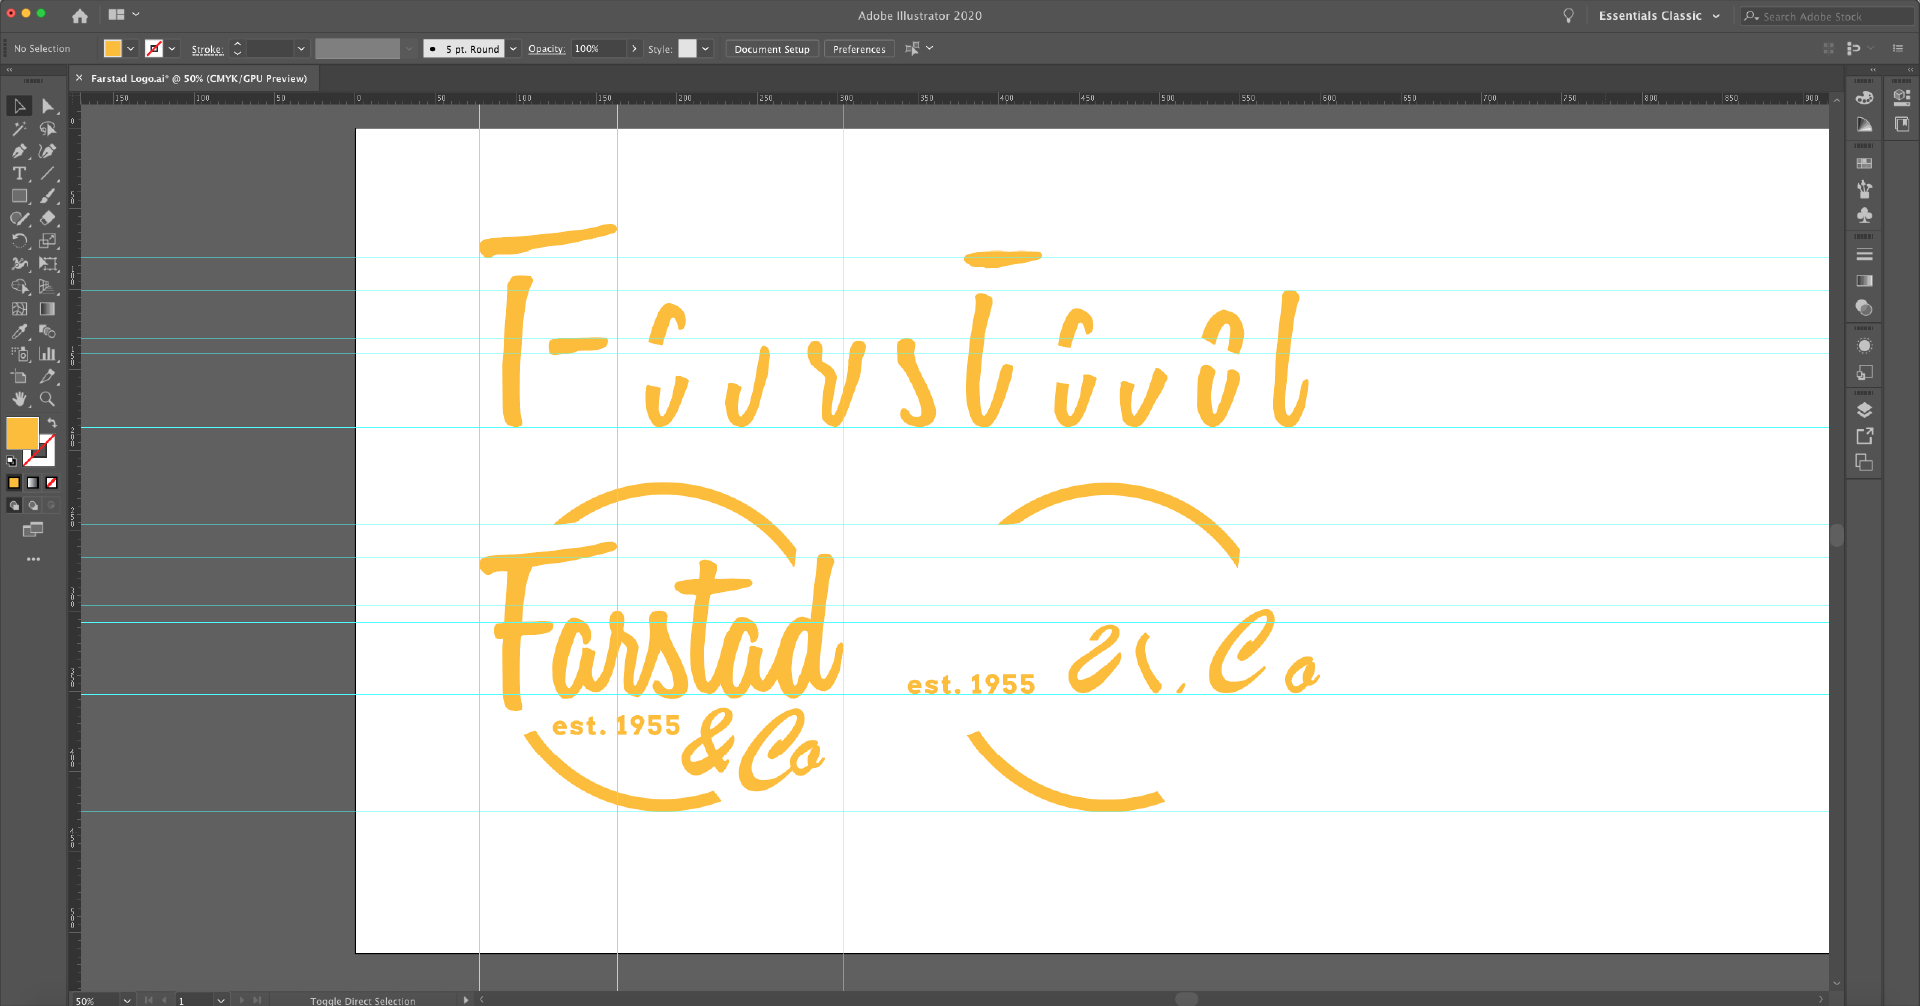
We should arrive to a point where all the elements are divided like in the image below.
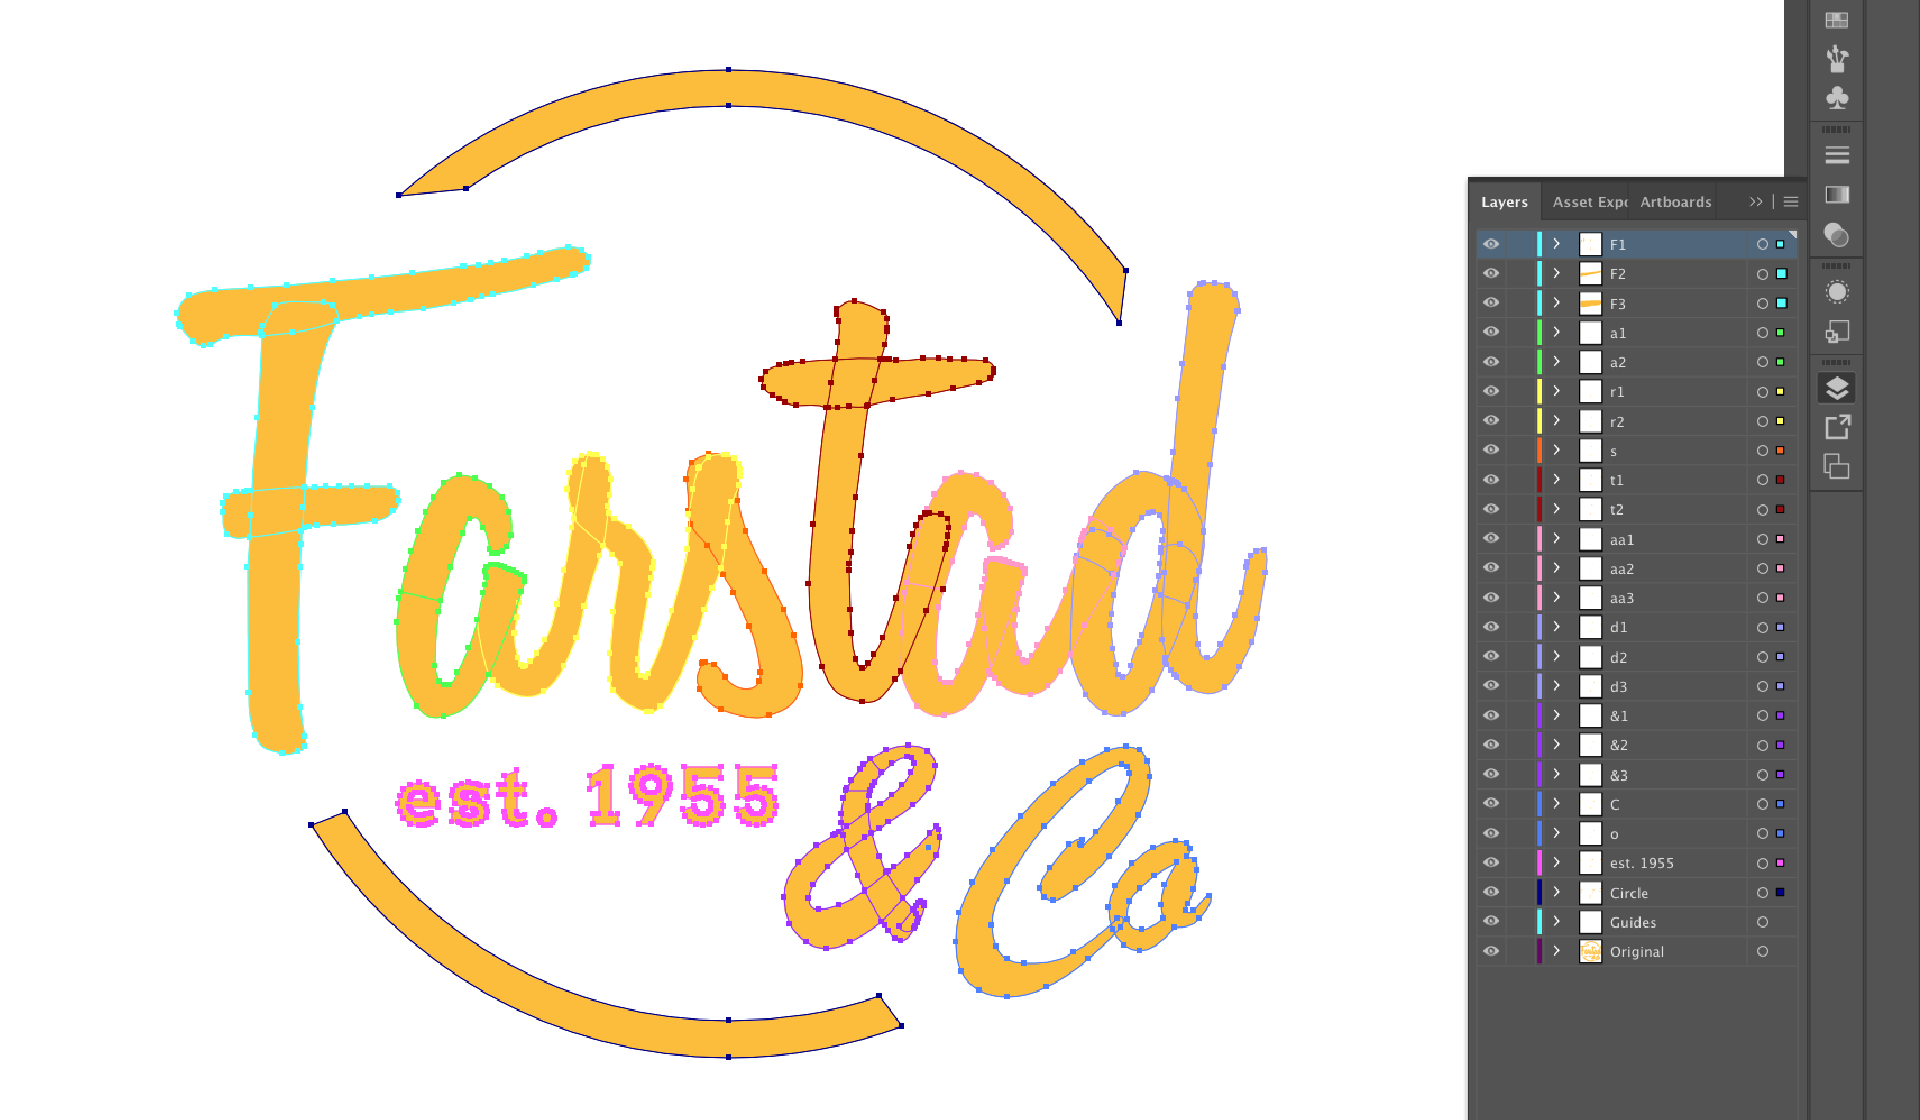
After that, let's reassemble the elements of the logo to their original positions. Then drag each element to a different layer.
In the end, we should have the same amount of layers, as in the image below.
Once we have finished our work on Illustrator, we can save the file and import it on After Effects.
Open After Effects and drag the file to the column on the left or go to: "File > Import > File" and select it.
After that, you have to choose to import it as a "Composition" and press "OK."
Note that on the left, a composition box will appear with the same name as our file and a folder with the vector layers. Drag the composition to the timeline area.
To make the software follow the same Illustrator's vector paths, it is essential to select the icon similar to an asterisk on the bar.
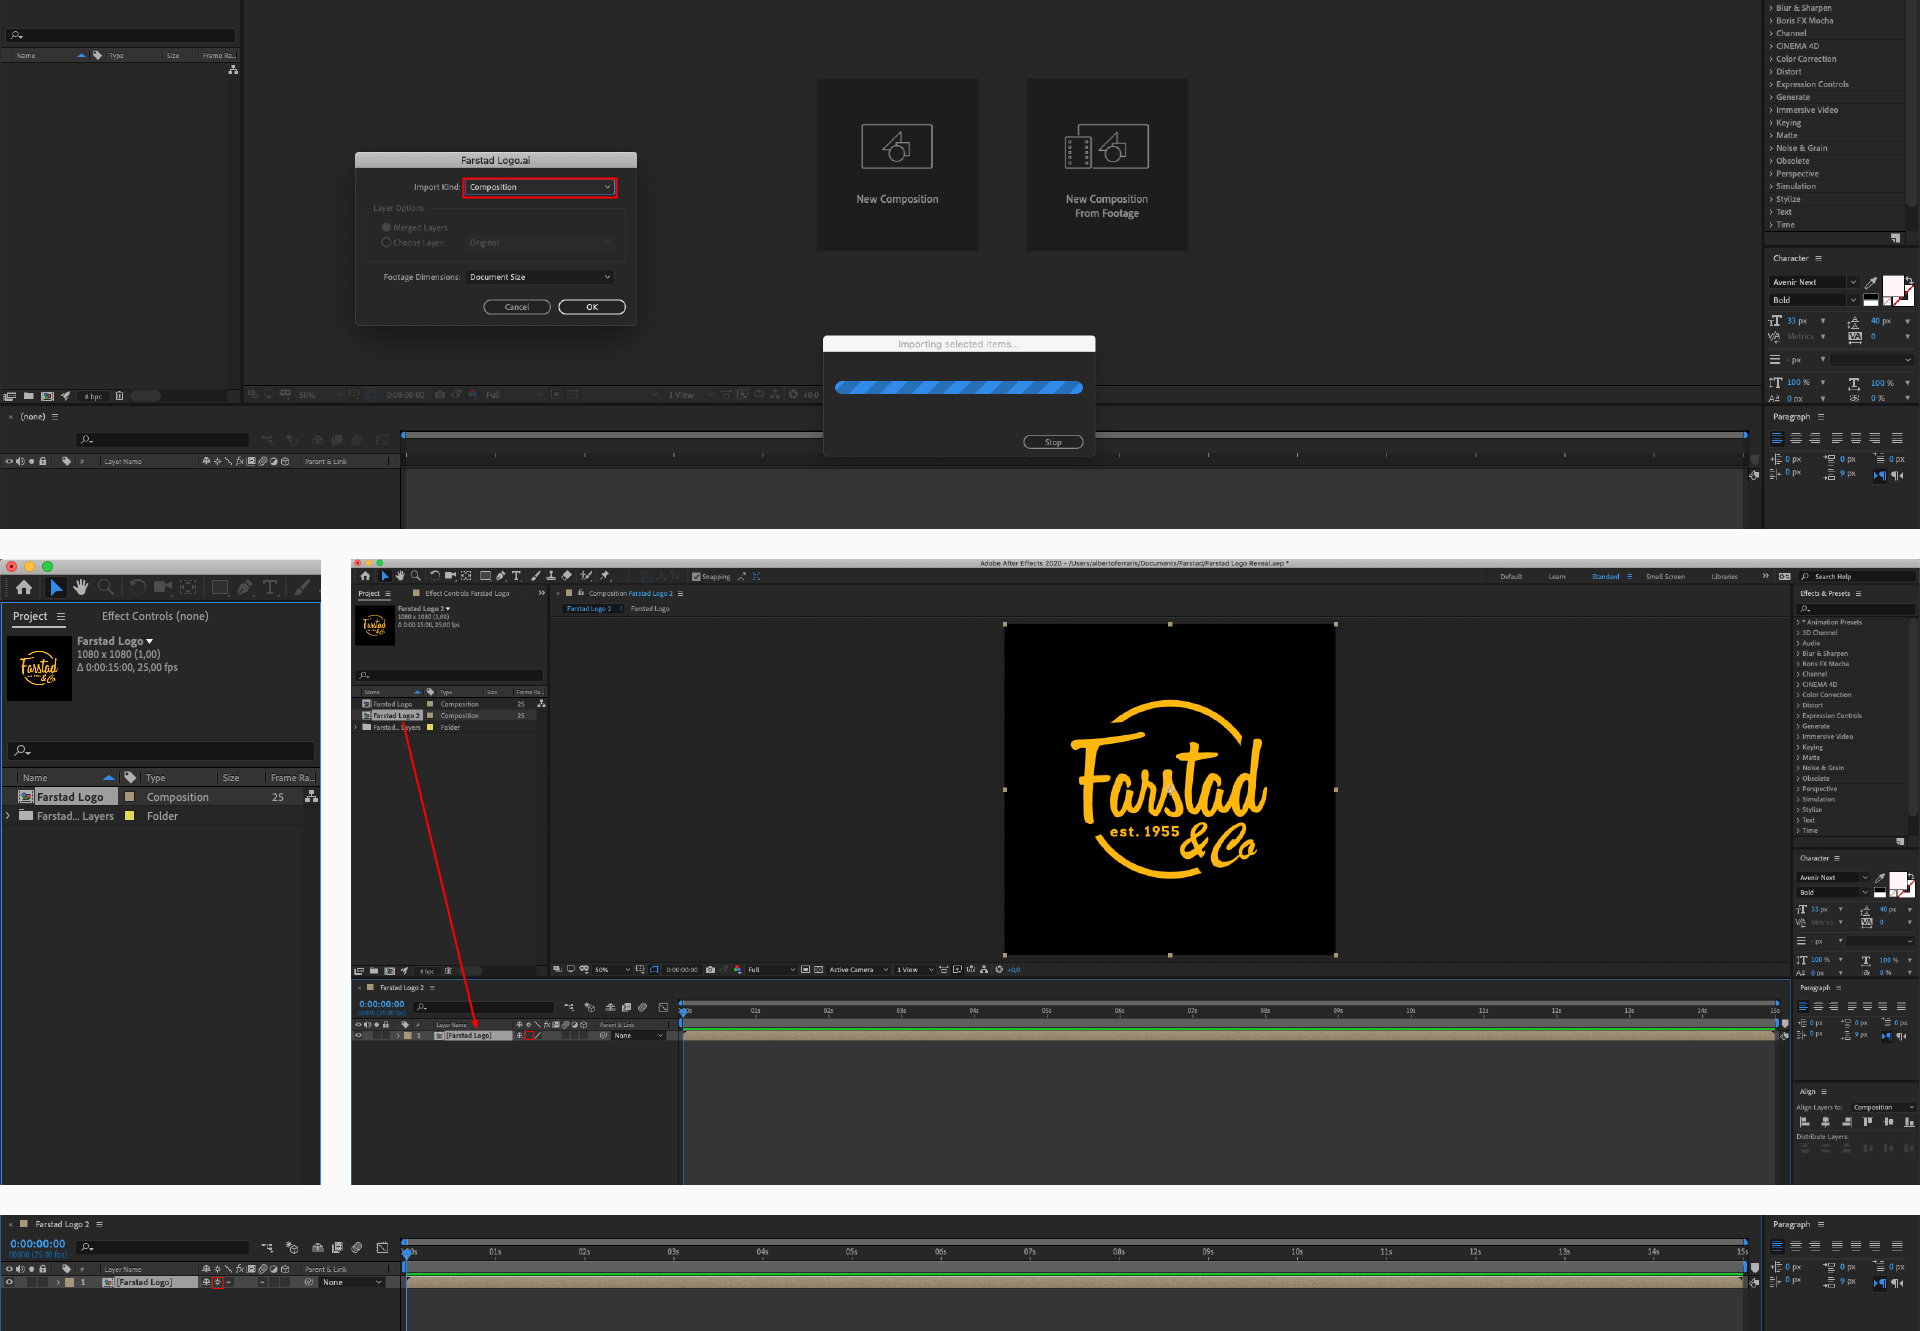
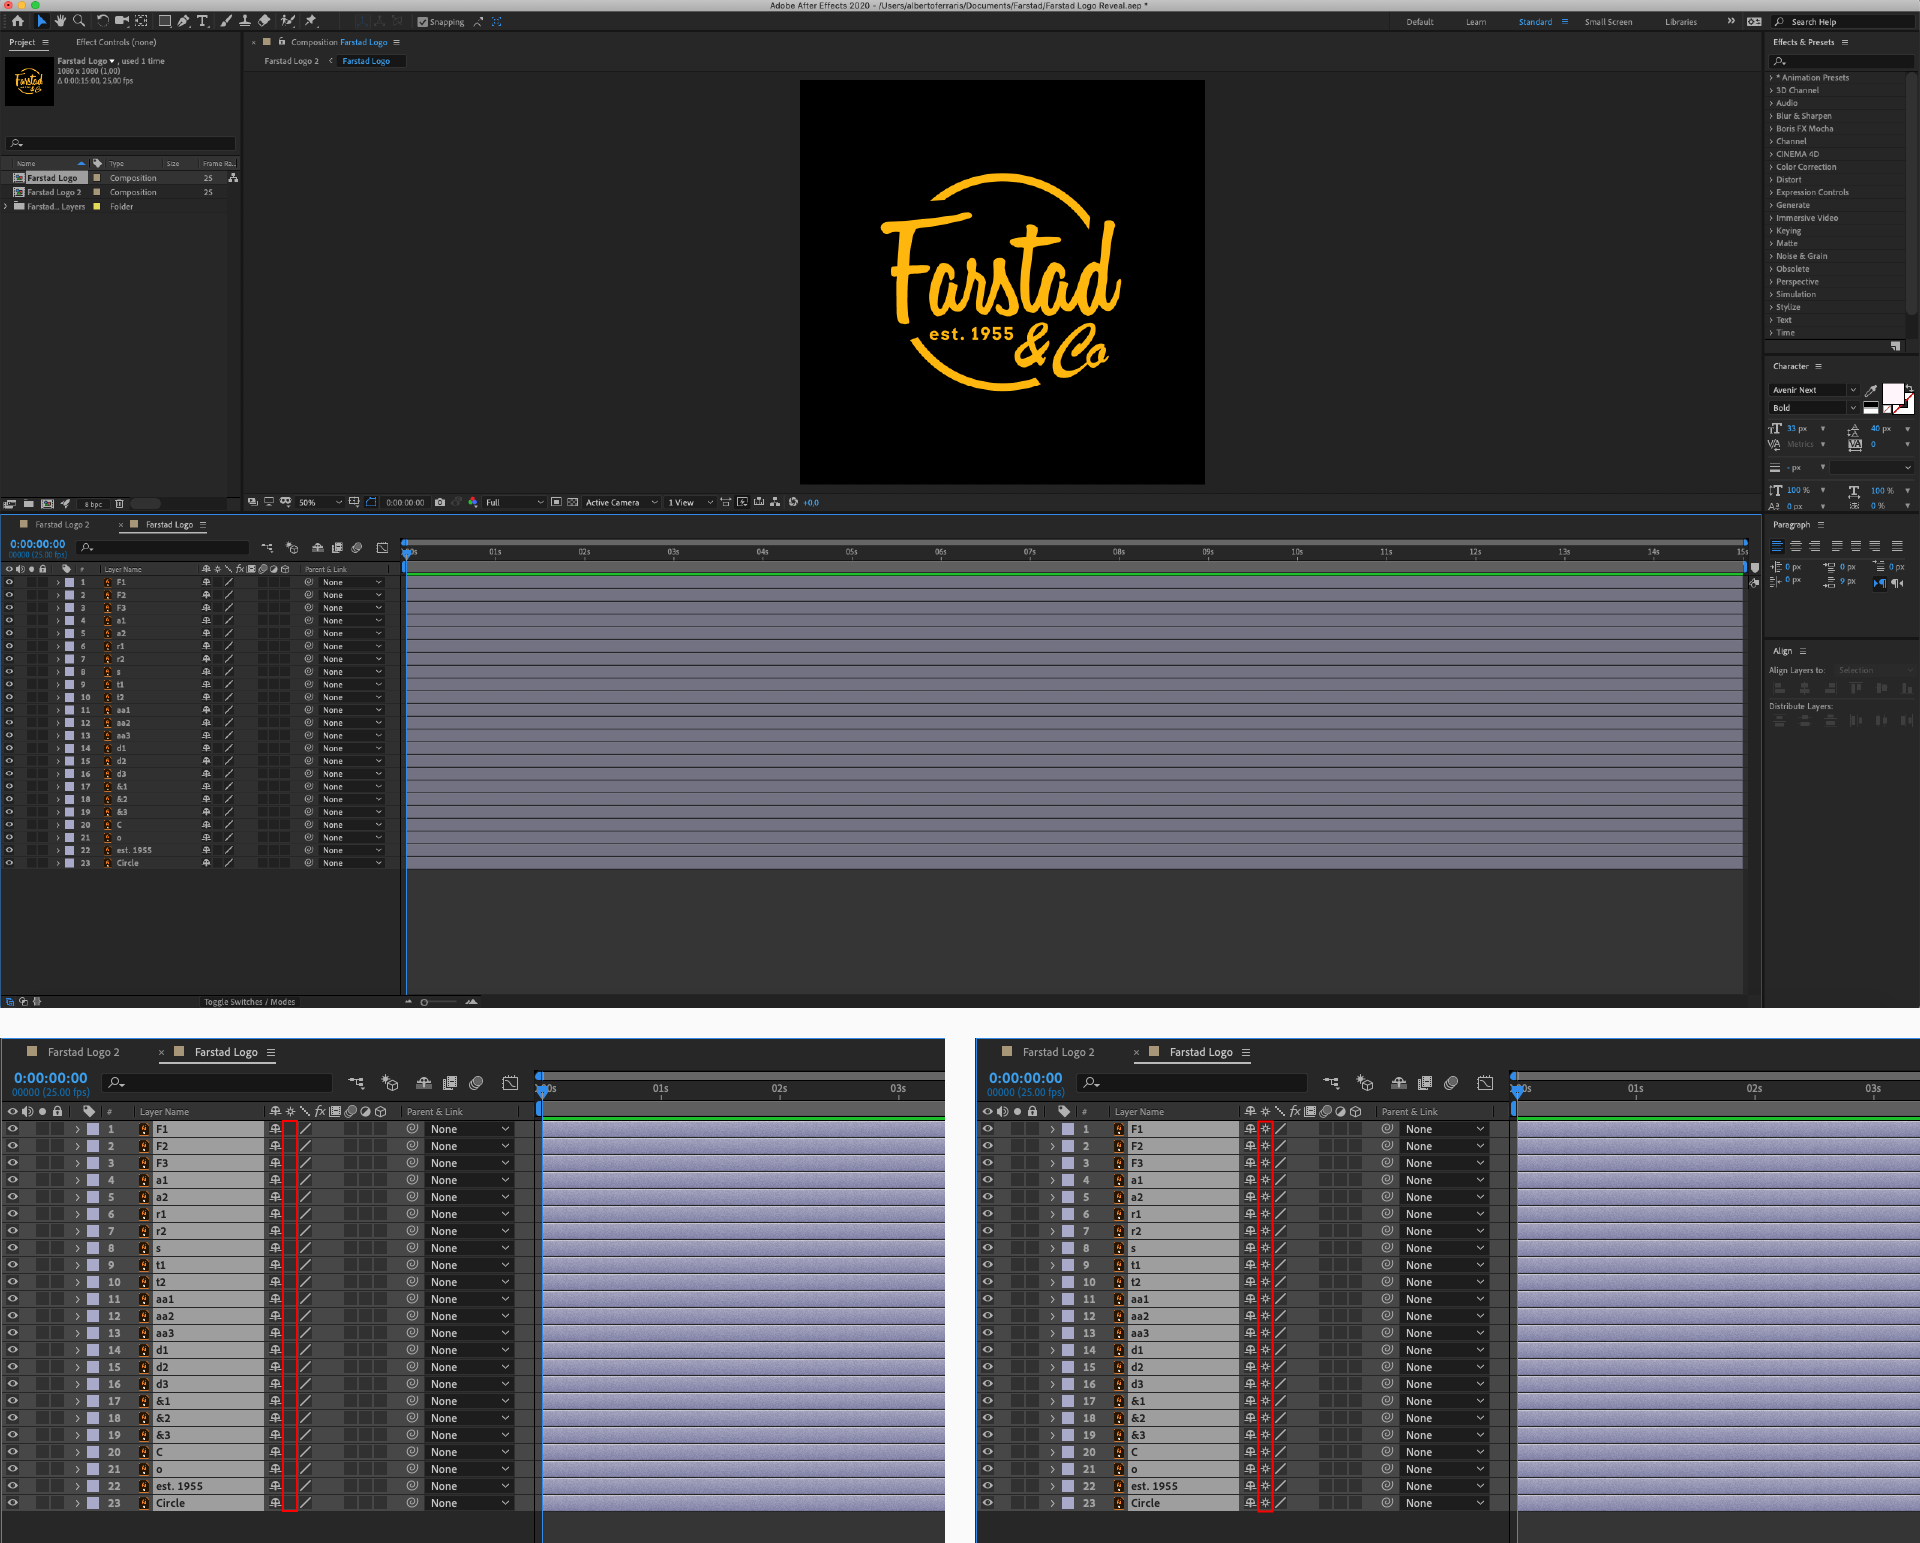
Then double click on the composition bar to enter. We can find all the layers we divided on Illustrator.
Let's select all the layers and click on the same asterisk icon.
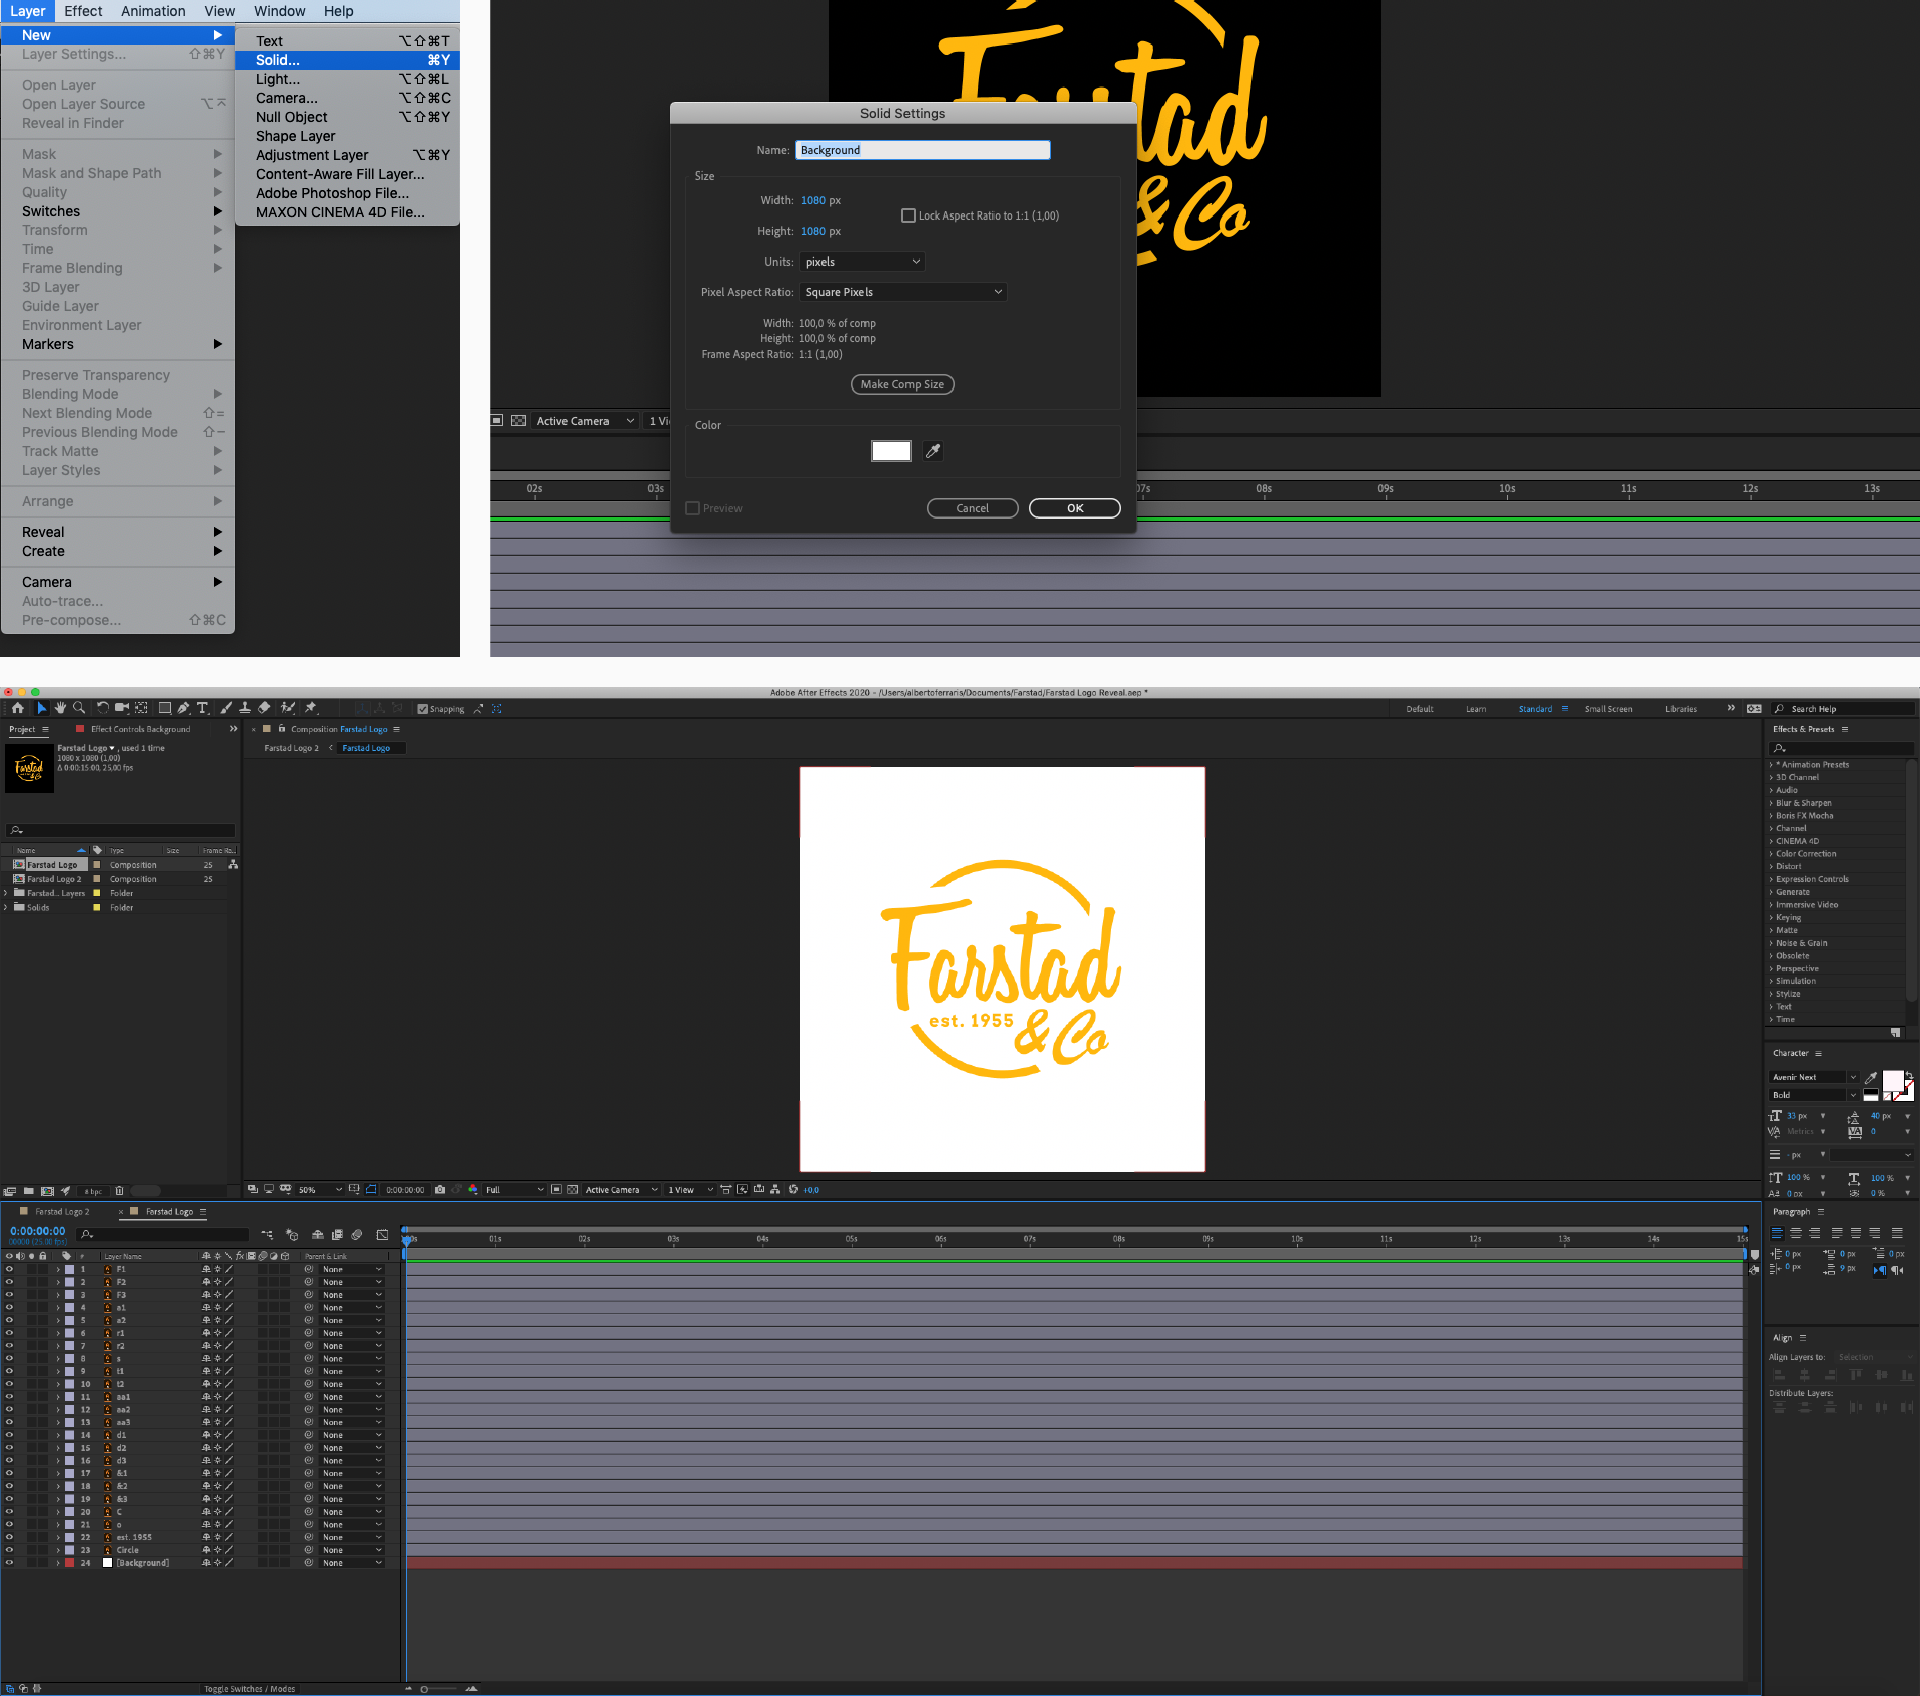
If we need a background, we must go to "Layer > New > Solid" choose the color and press "O” or directly create a square outside a layer selection. Then drag it to the bottom of the list.
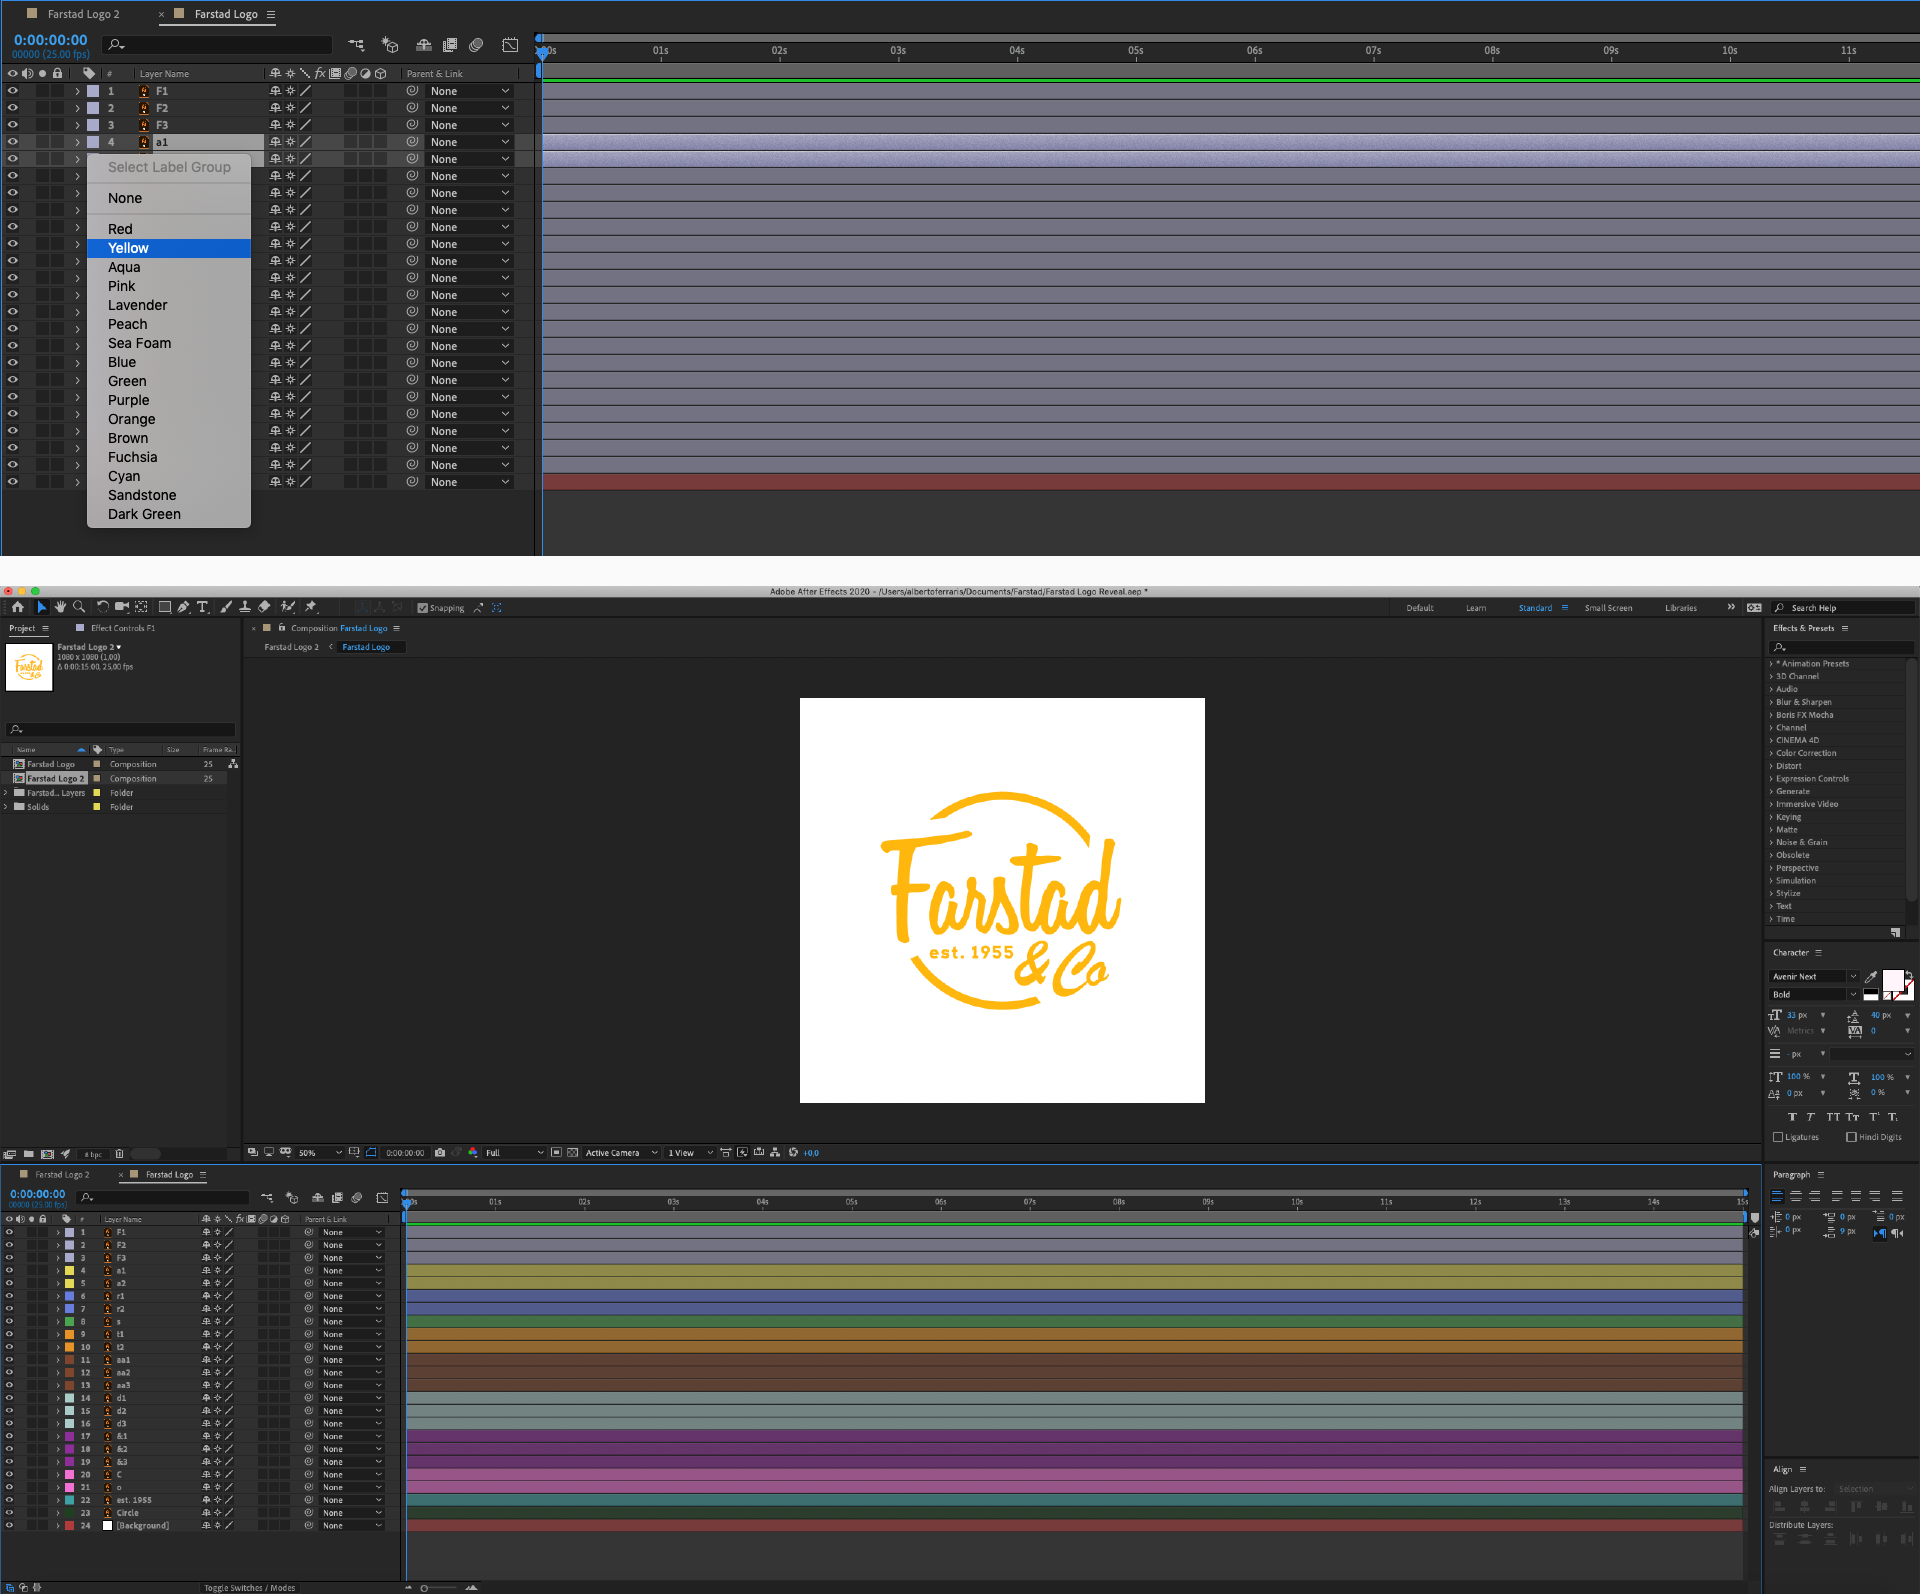
Finally, to simplify our work it is better to choose a colour for each of the elements for each character, clicking on the coloured box on the layer.

In the next part of the tutorial we will start to animate our logo, see you soon!


