Handwriting Effect Animation Tutorial Part II
Welcome to the second part of the "Complex Handwriting Effect Animation" tutorial!
Let's continue with our logo reveal.
To simplify our work, we can click on the eye icon on the left of our layer bar to hide the layers that we will work on later.
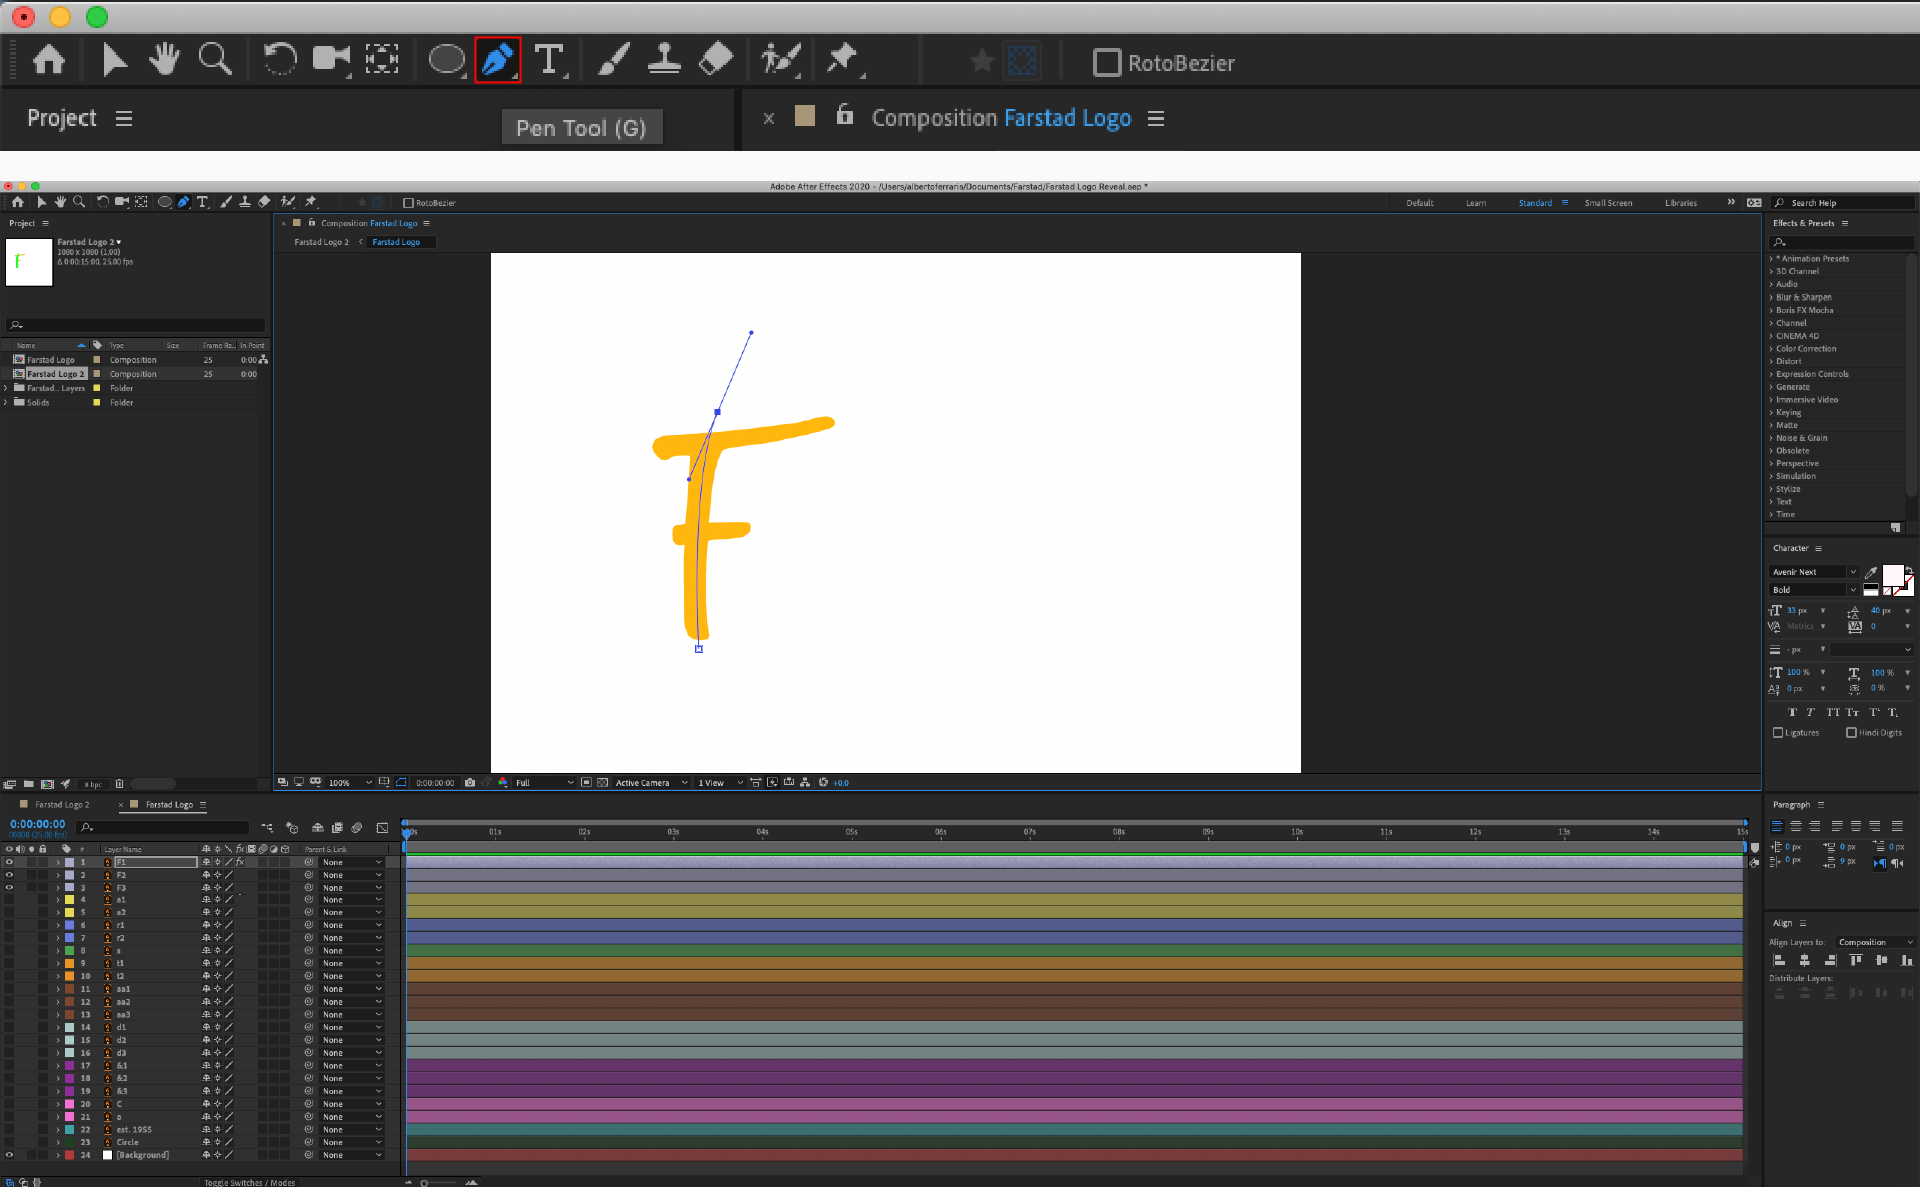
Now we have to select the first layer of our logo, then the "Pen" tool on the top bar. Let's draw a path on the vector image that will be the mask of the layer.
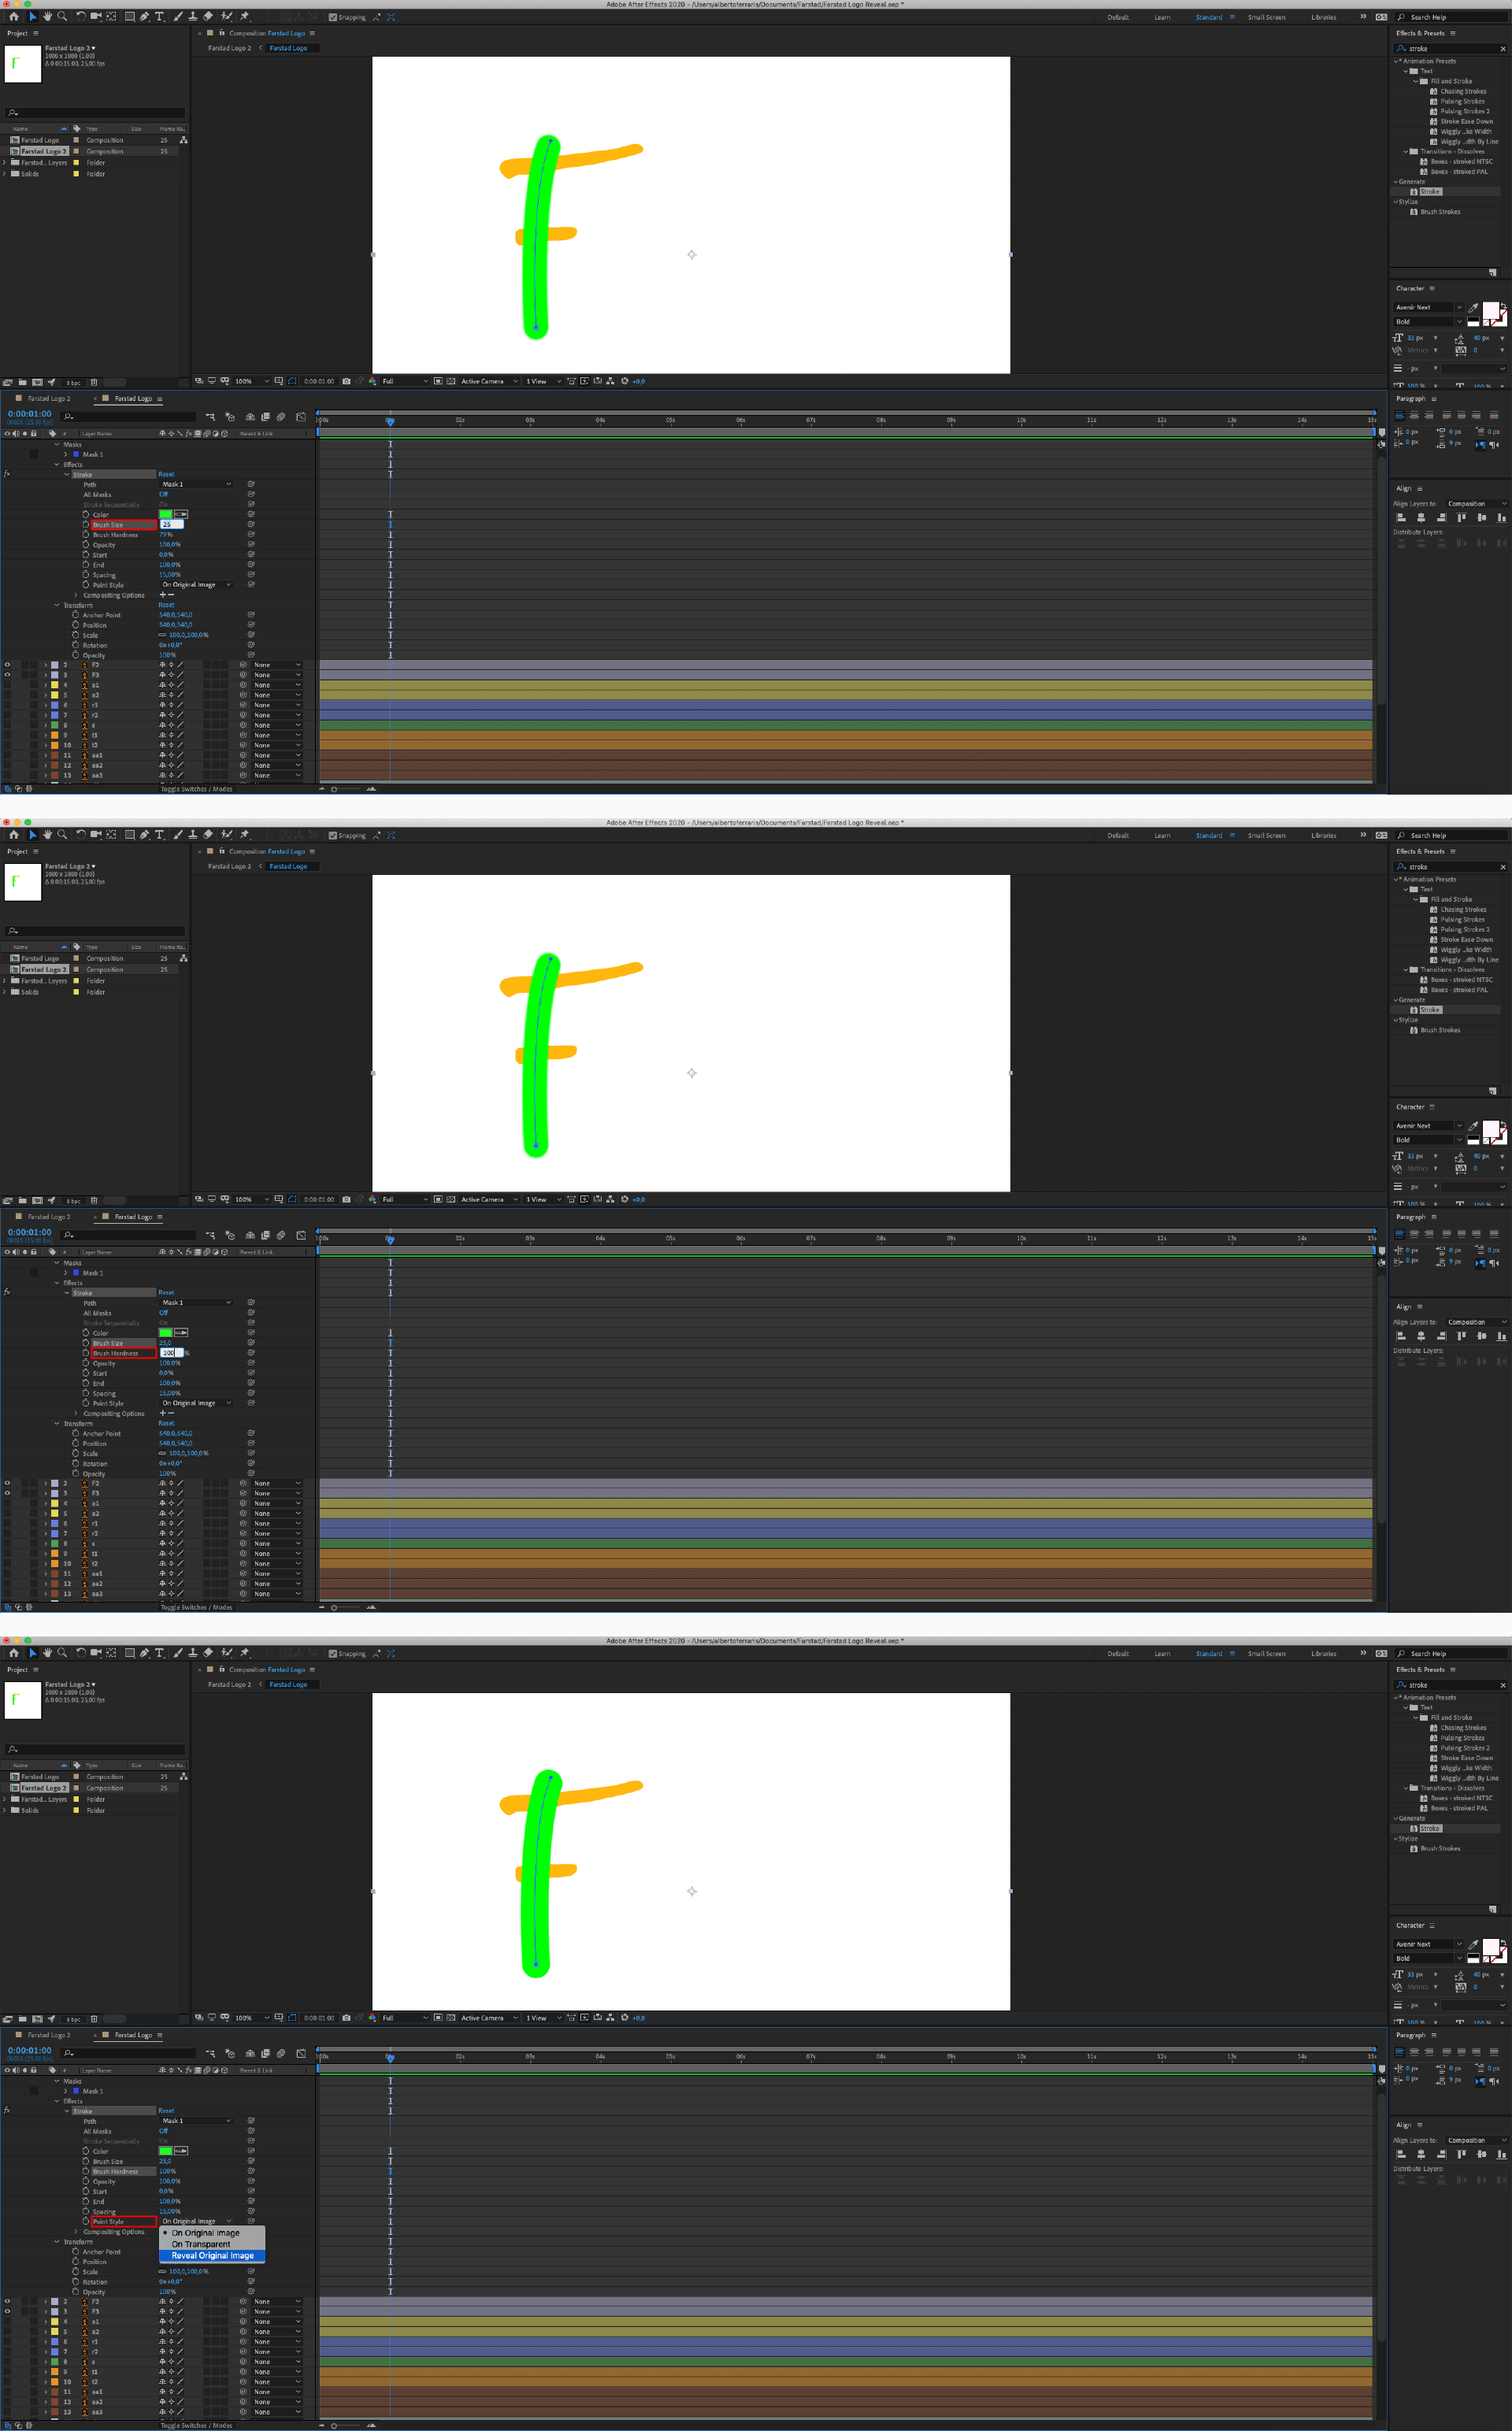
After that, look at the "Effects & Presets" box, usually found on the right of the screen. Search and select the effect "Stroke" and drag it to our layer. Alternatively, we can create the stroke by clicking the right mouse button on the layer and then: "Effect > Generate > Stroke".

We can see a little stroke on the path of our mask. If we open the layer, clicking on the little arrow ">", we can see the sections: "Masks", "Effects", "Transform". Let's open "Effects > Stroke" and for better visualisation, we can change the colour. Then it is important to set a "Brush Size" that covers the whole vector, and choose the "Brush Hardness".
Last but not least, from the "Paint Style" list, select the voice: "Reveal Original Image".
Now it is important to animate the stroke we have created.
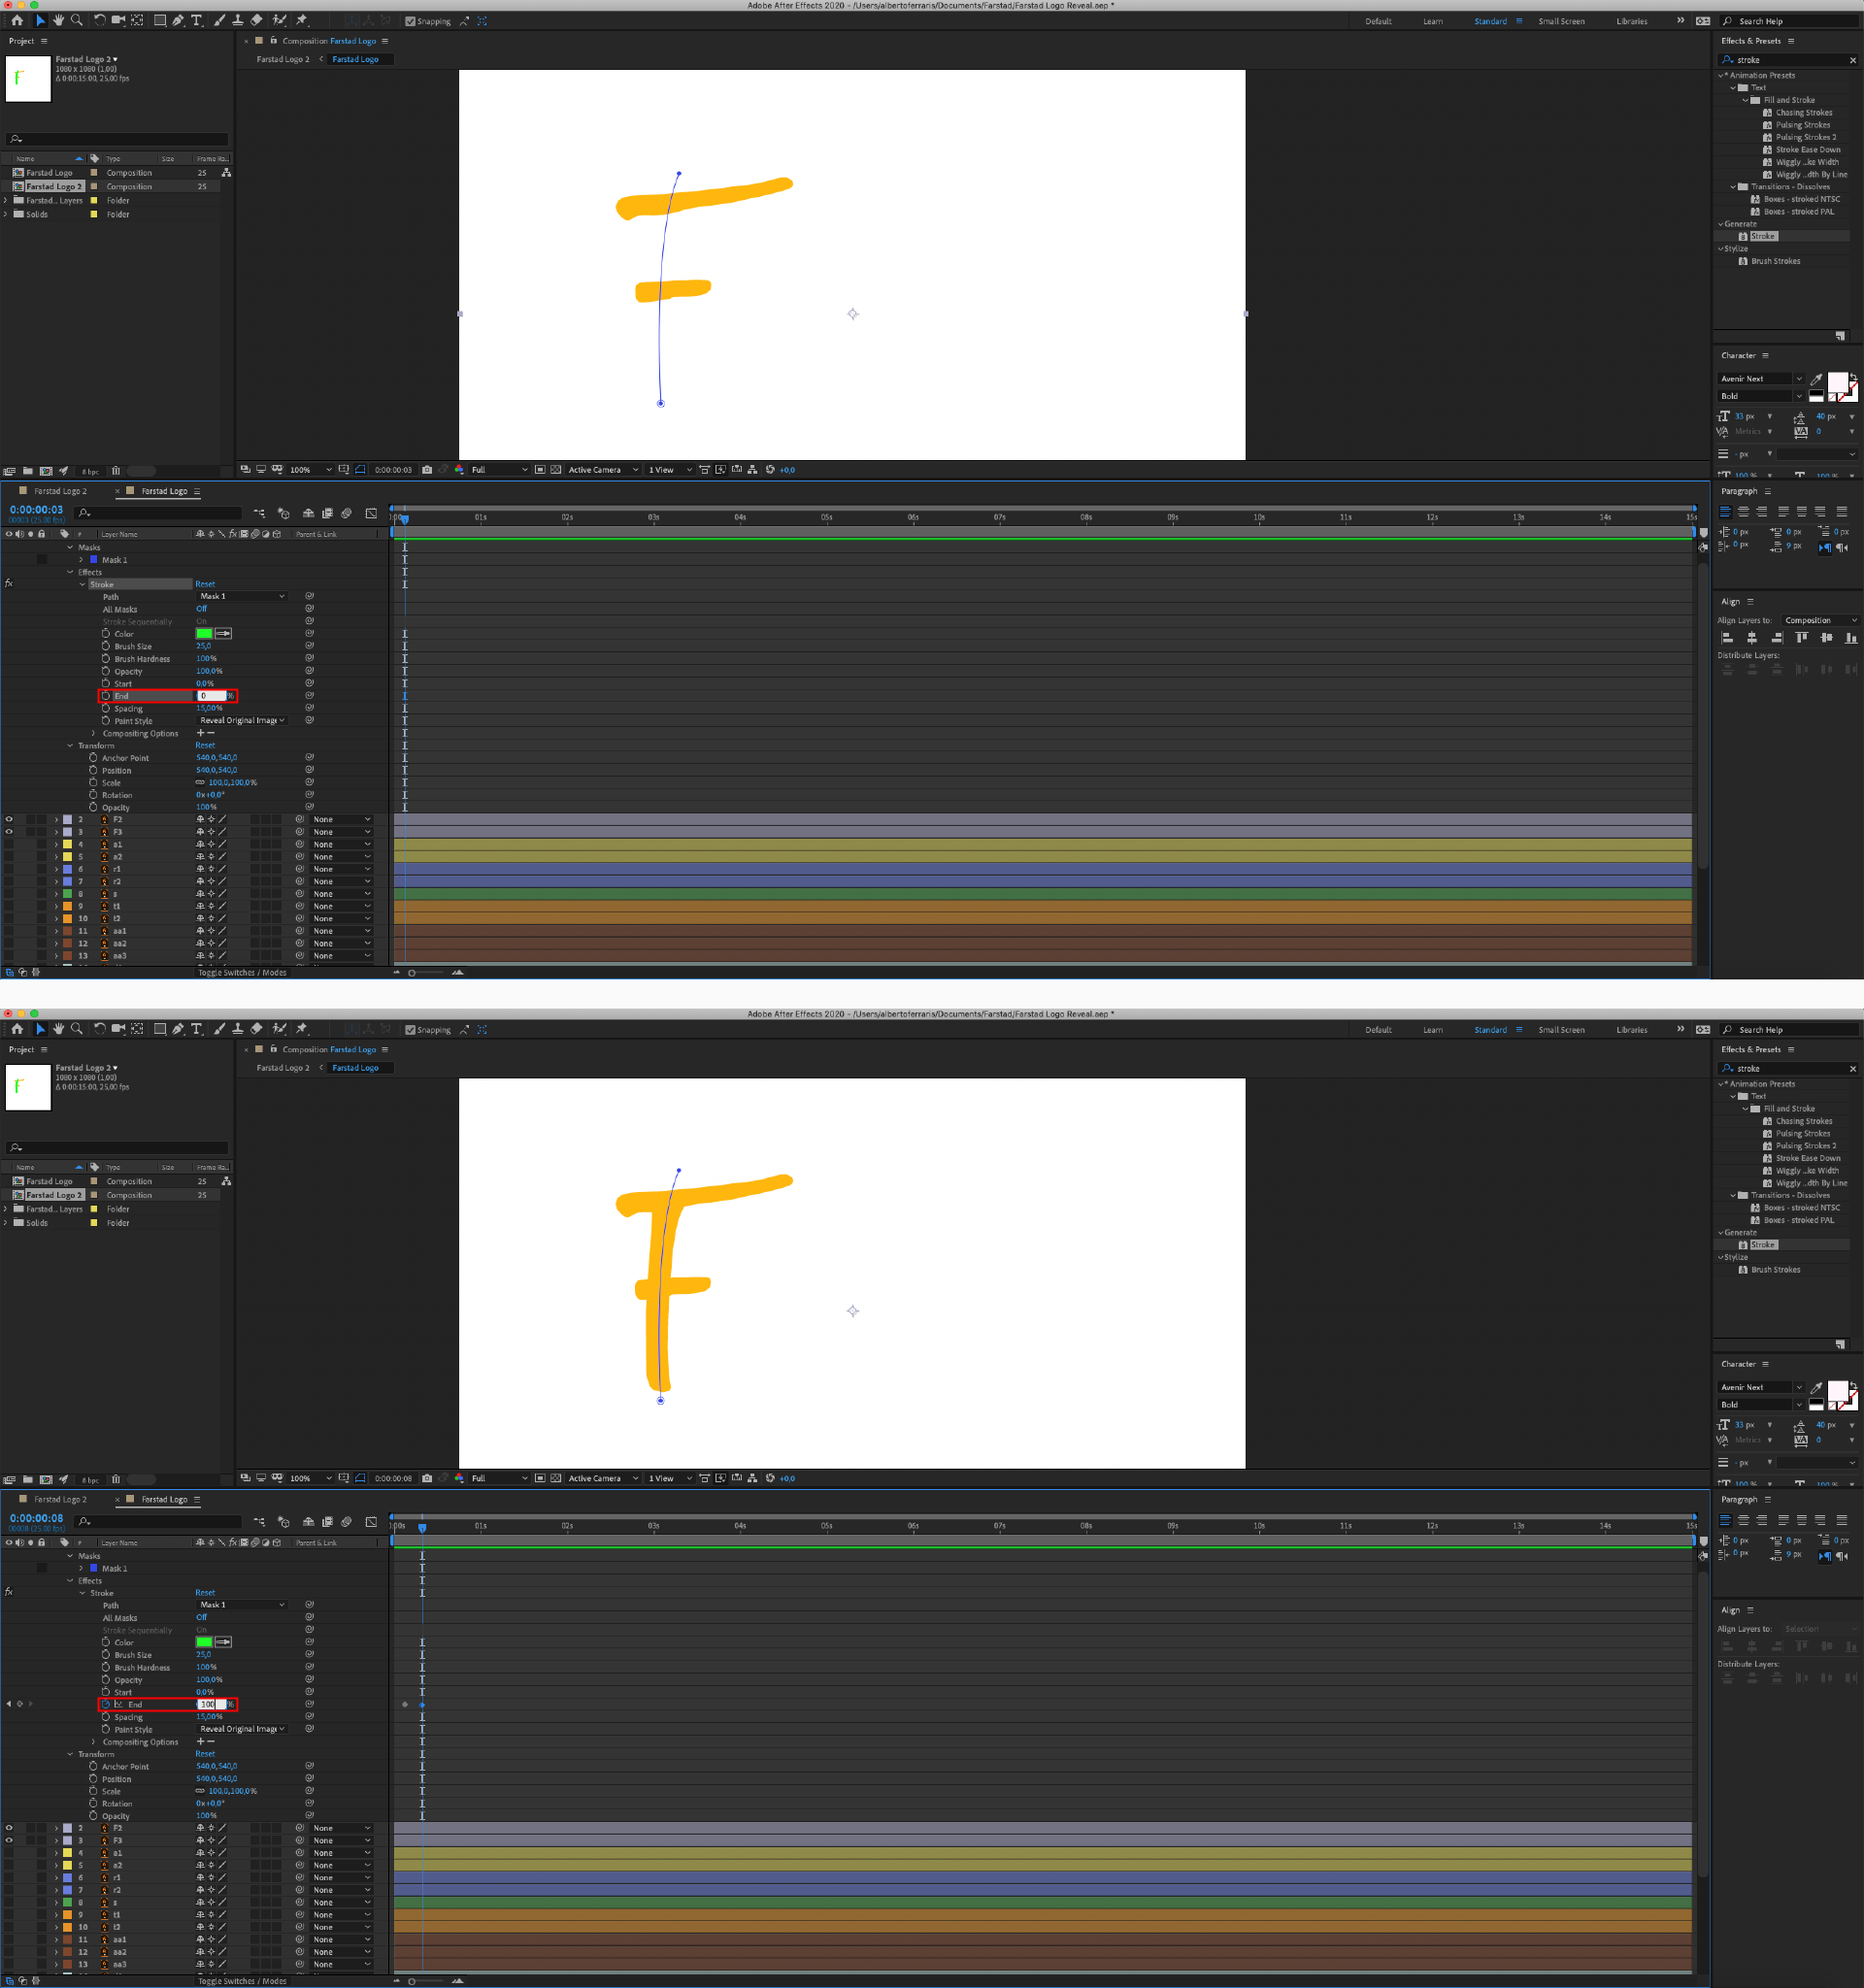
Inside the "Effects > Stroke", go to the voice "End". Set the value "0" and press the clock icon on the left. In this way, we have created the first "Keyframe", visible in the timeline as a little rhombus in the position of the cursor.
Let's move the cursor some frames to the right and set the value: "100". If we drag the cursor from the beginning and press the space bar, we will see the animation preview.
Manage the keyframes' distance in function with the velocity we want to give to the animation. Notice that the movement will be a bit rigid.
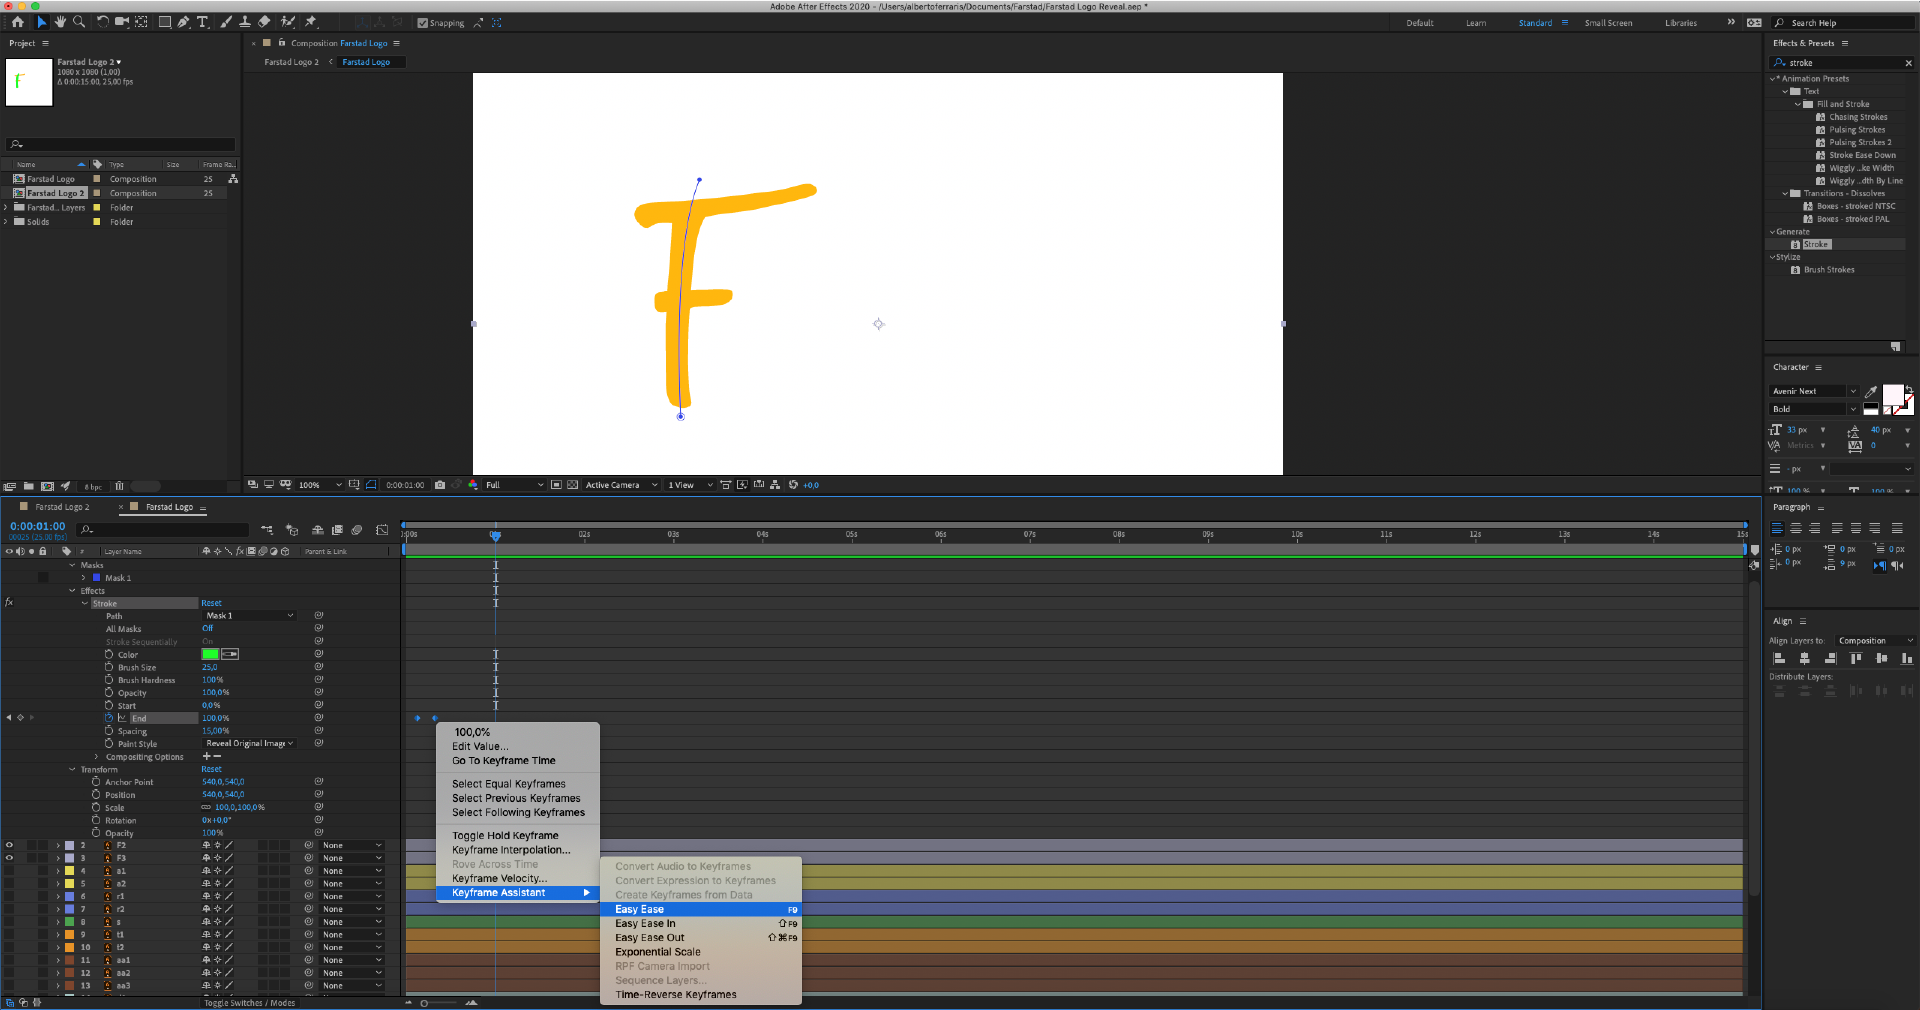
To improve this aspect, click with the right mouse button on one of our keyframes and select: "Keyframe Assistance > Easy Ease". Now the movement will be smoother and more fluid.
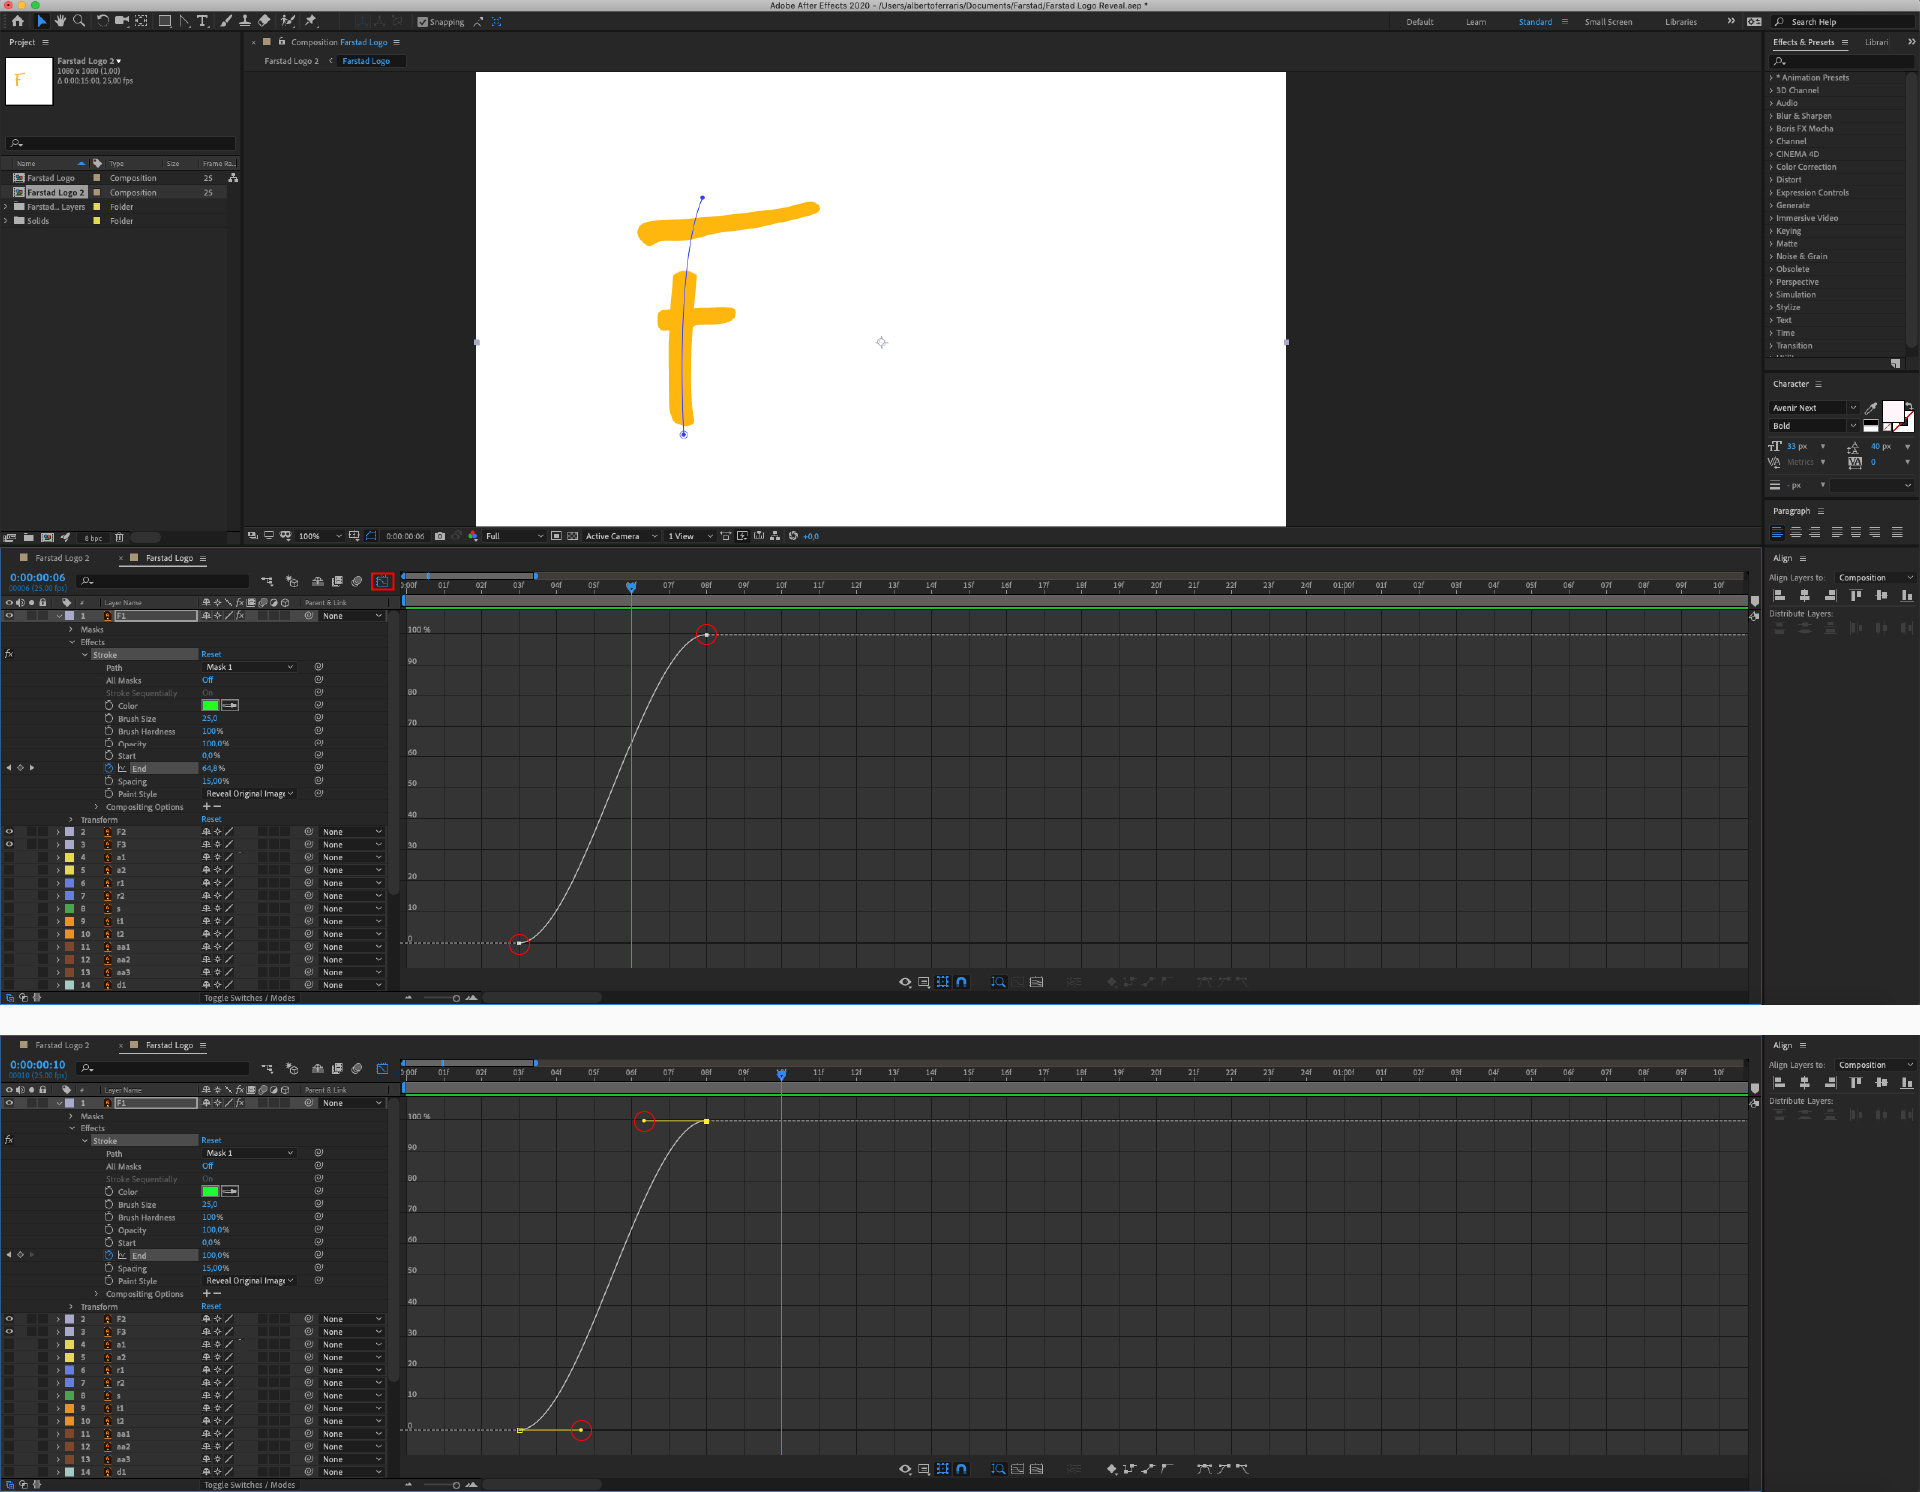
We can also customize the fluidity of the "Easy Ease" by opening the appropriate area, selecting the keyframes and by clicking on the icon marked with the red square below.
By clicking once more on the keyframes in the graph, it is possible to change the inclination of the curve with the appropriate knobs.
Now we know how to reveal our graphics. Let's continue with the rest of the elements of our logo.
It is essential to analyse the direction of our handwriting effect and proceed with all the steps (in the screenshots, we will see only the starting path(.
It is useful to find a good strategy to create a fluid sequence of movements, with reference to our logo. We can create the keyframes from the second "0" of every layer, then drag each layer to the right. On the other hand, we can directly create keyframes sequentially.
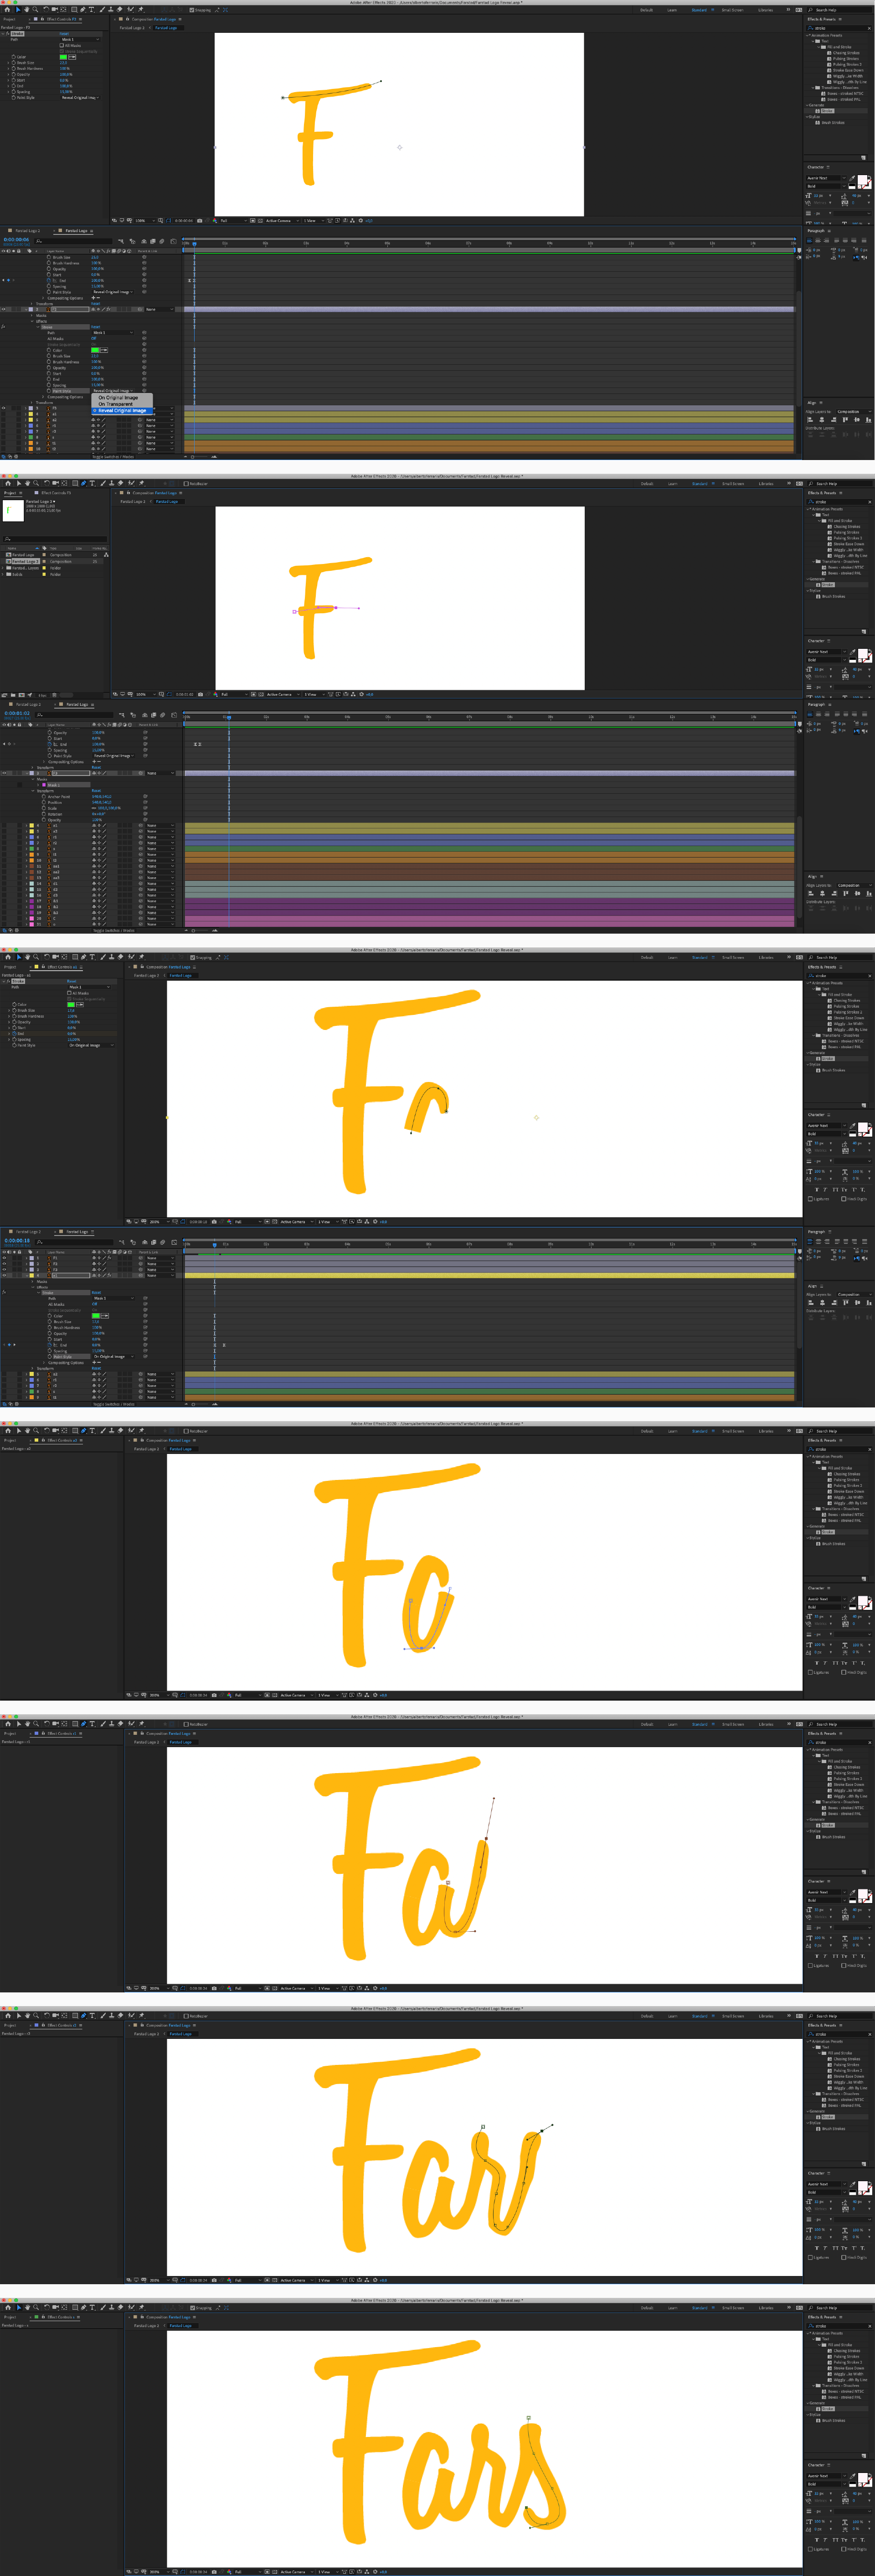
When we have finished with all the characters, the circle and the little text: "est. 1955" will be missing.
To create the circle, it is important to cover the two segments with the same mask, so it will be easier to give a good "Easy Ease".
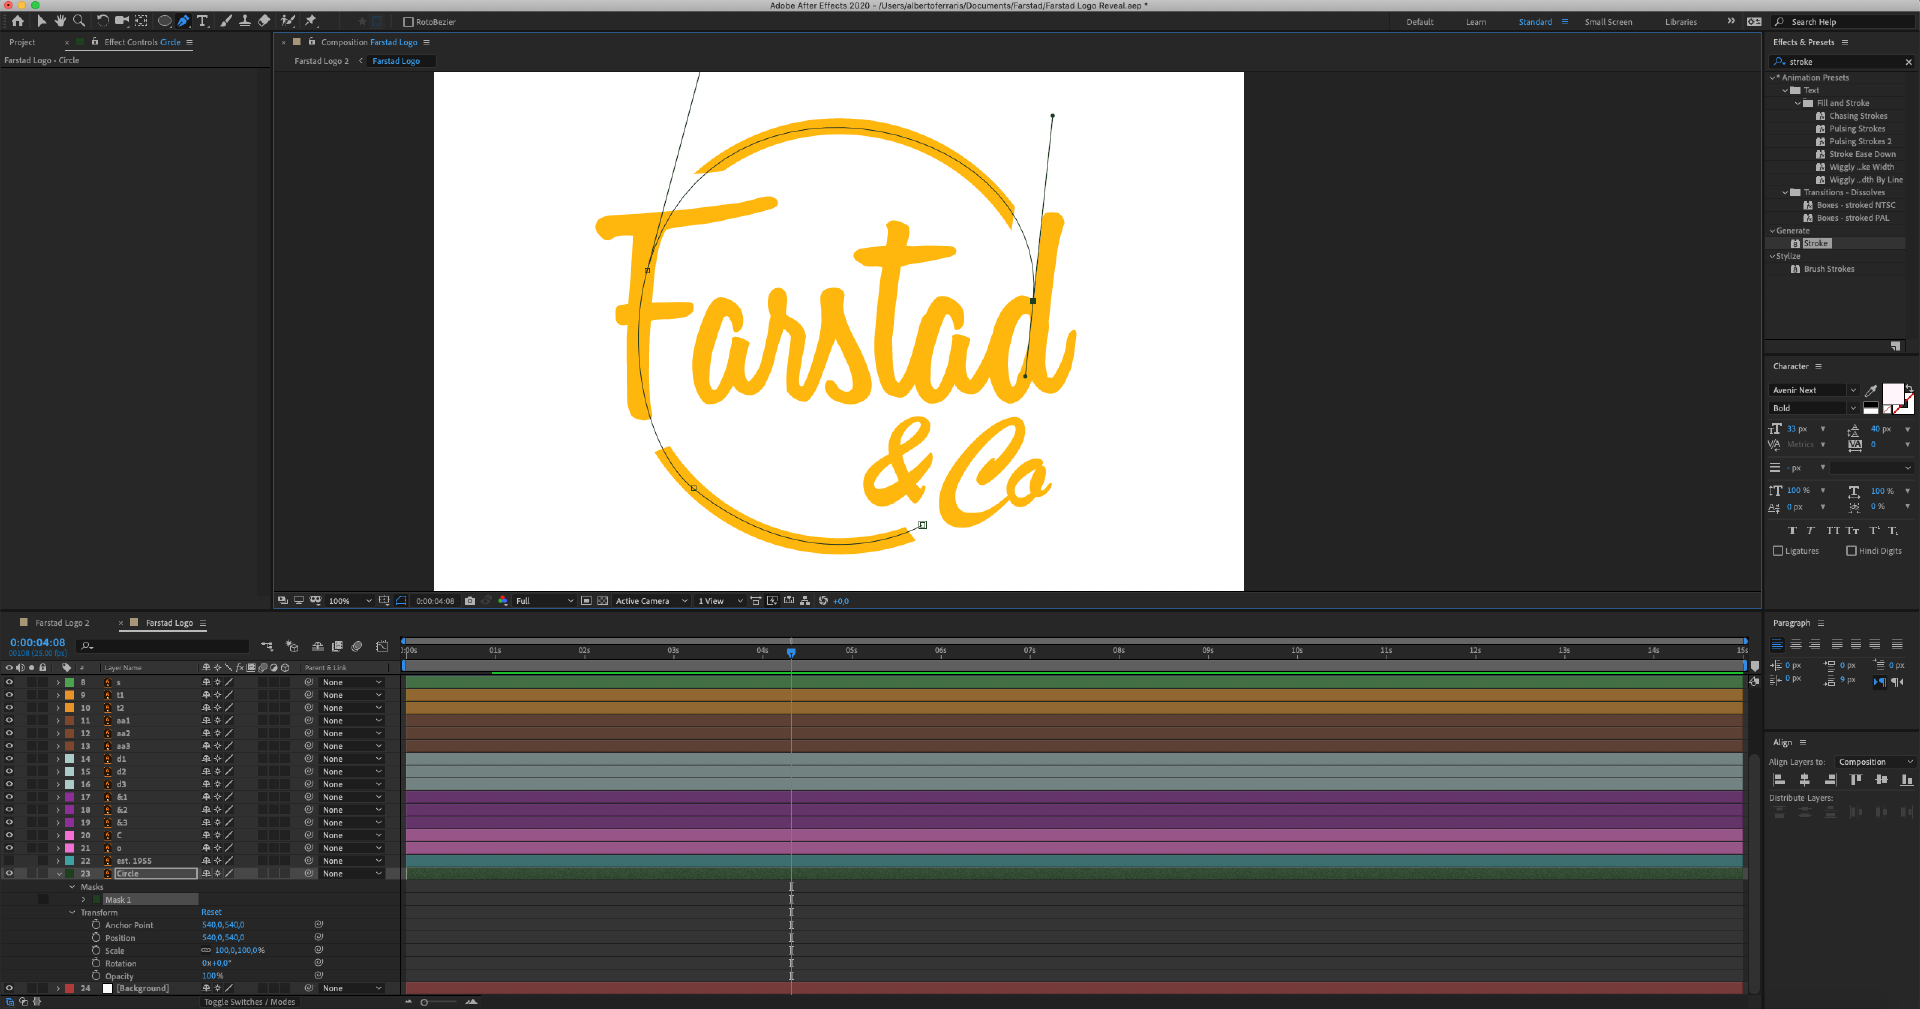
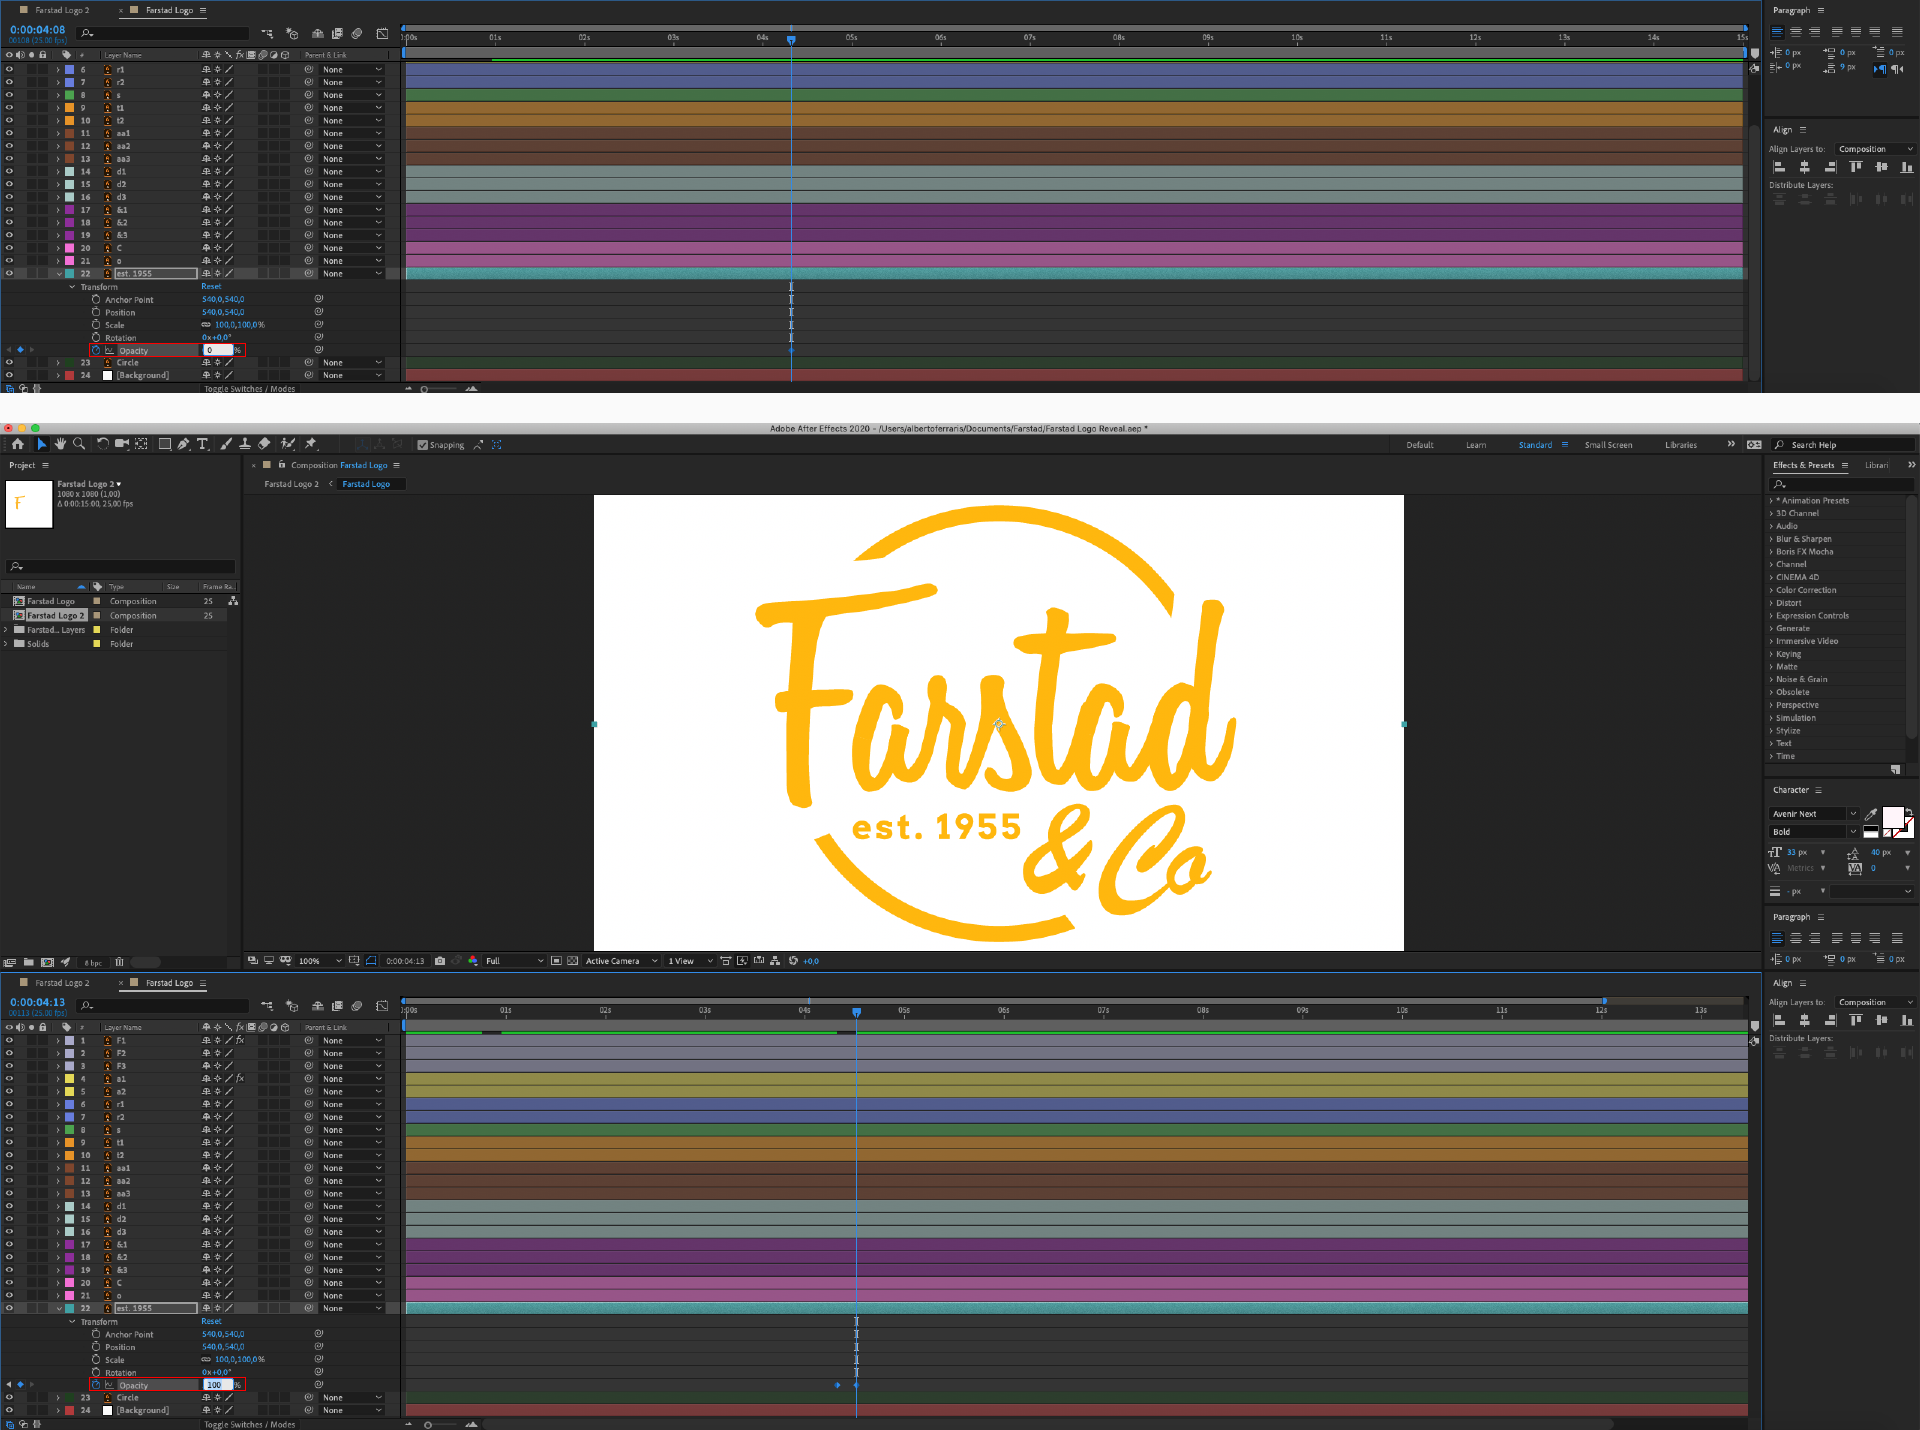
For the "est. 1955" layer, the work is easier. We only need the graphics to appear, so let's play with the opacity under the voice "Transform" of the layer. Set the value "0" at the first frame and "100" at the last one (finding the good timing with the circle reveal).
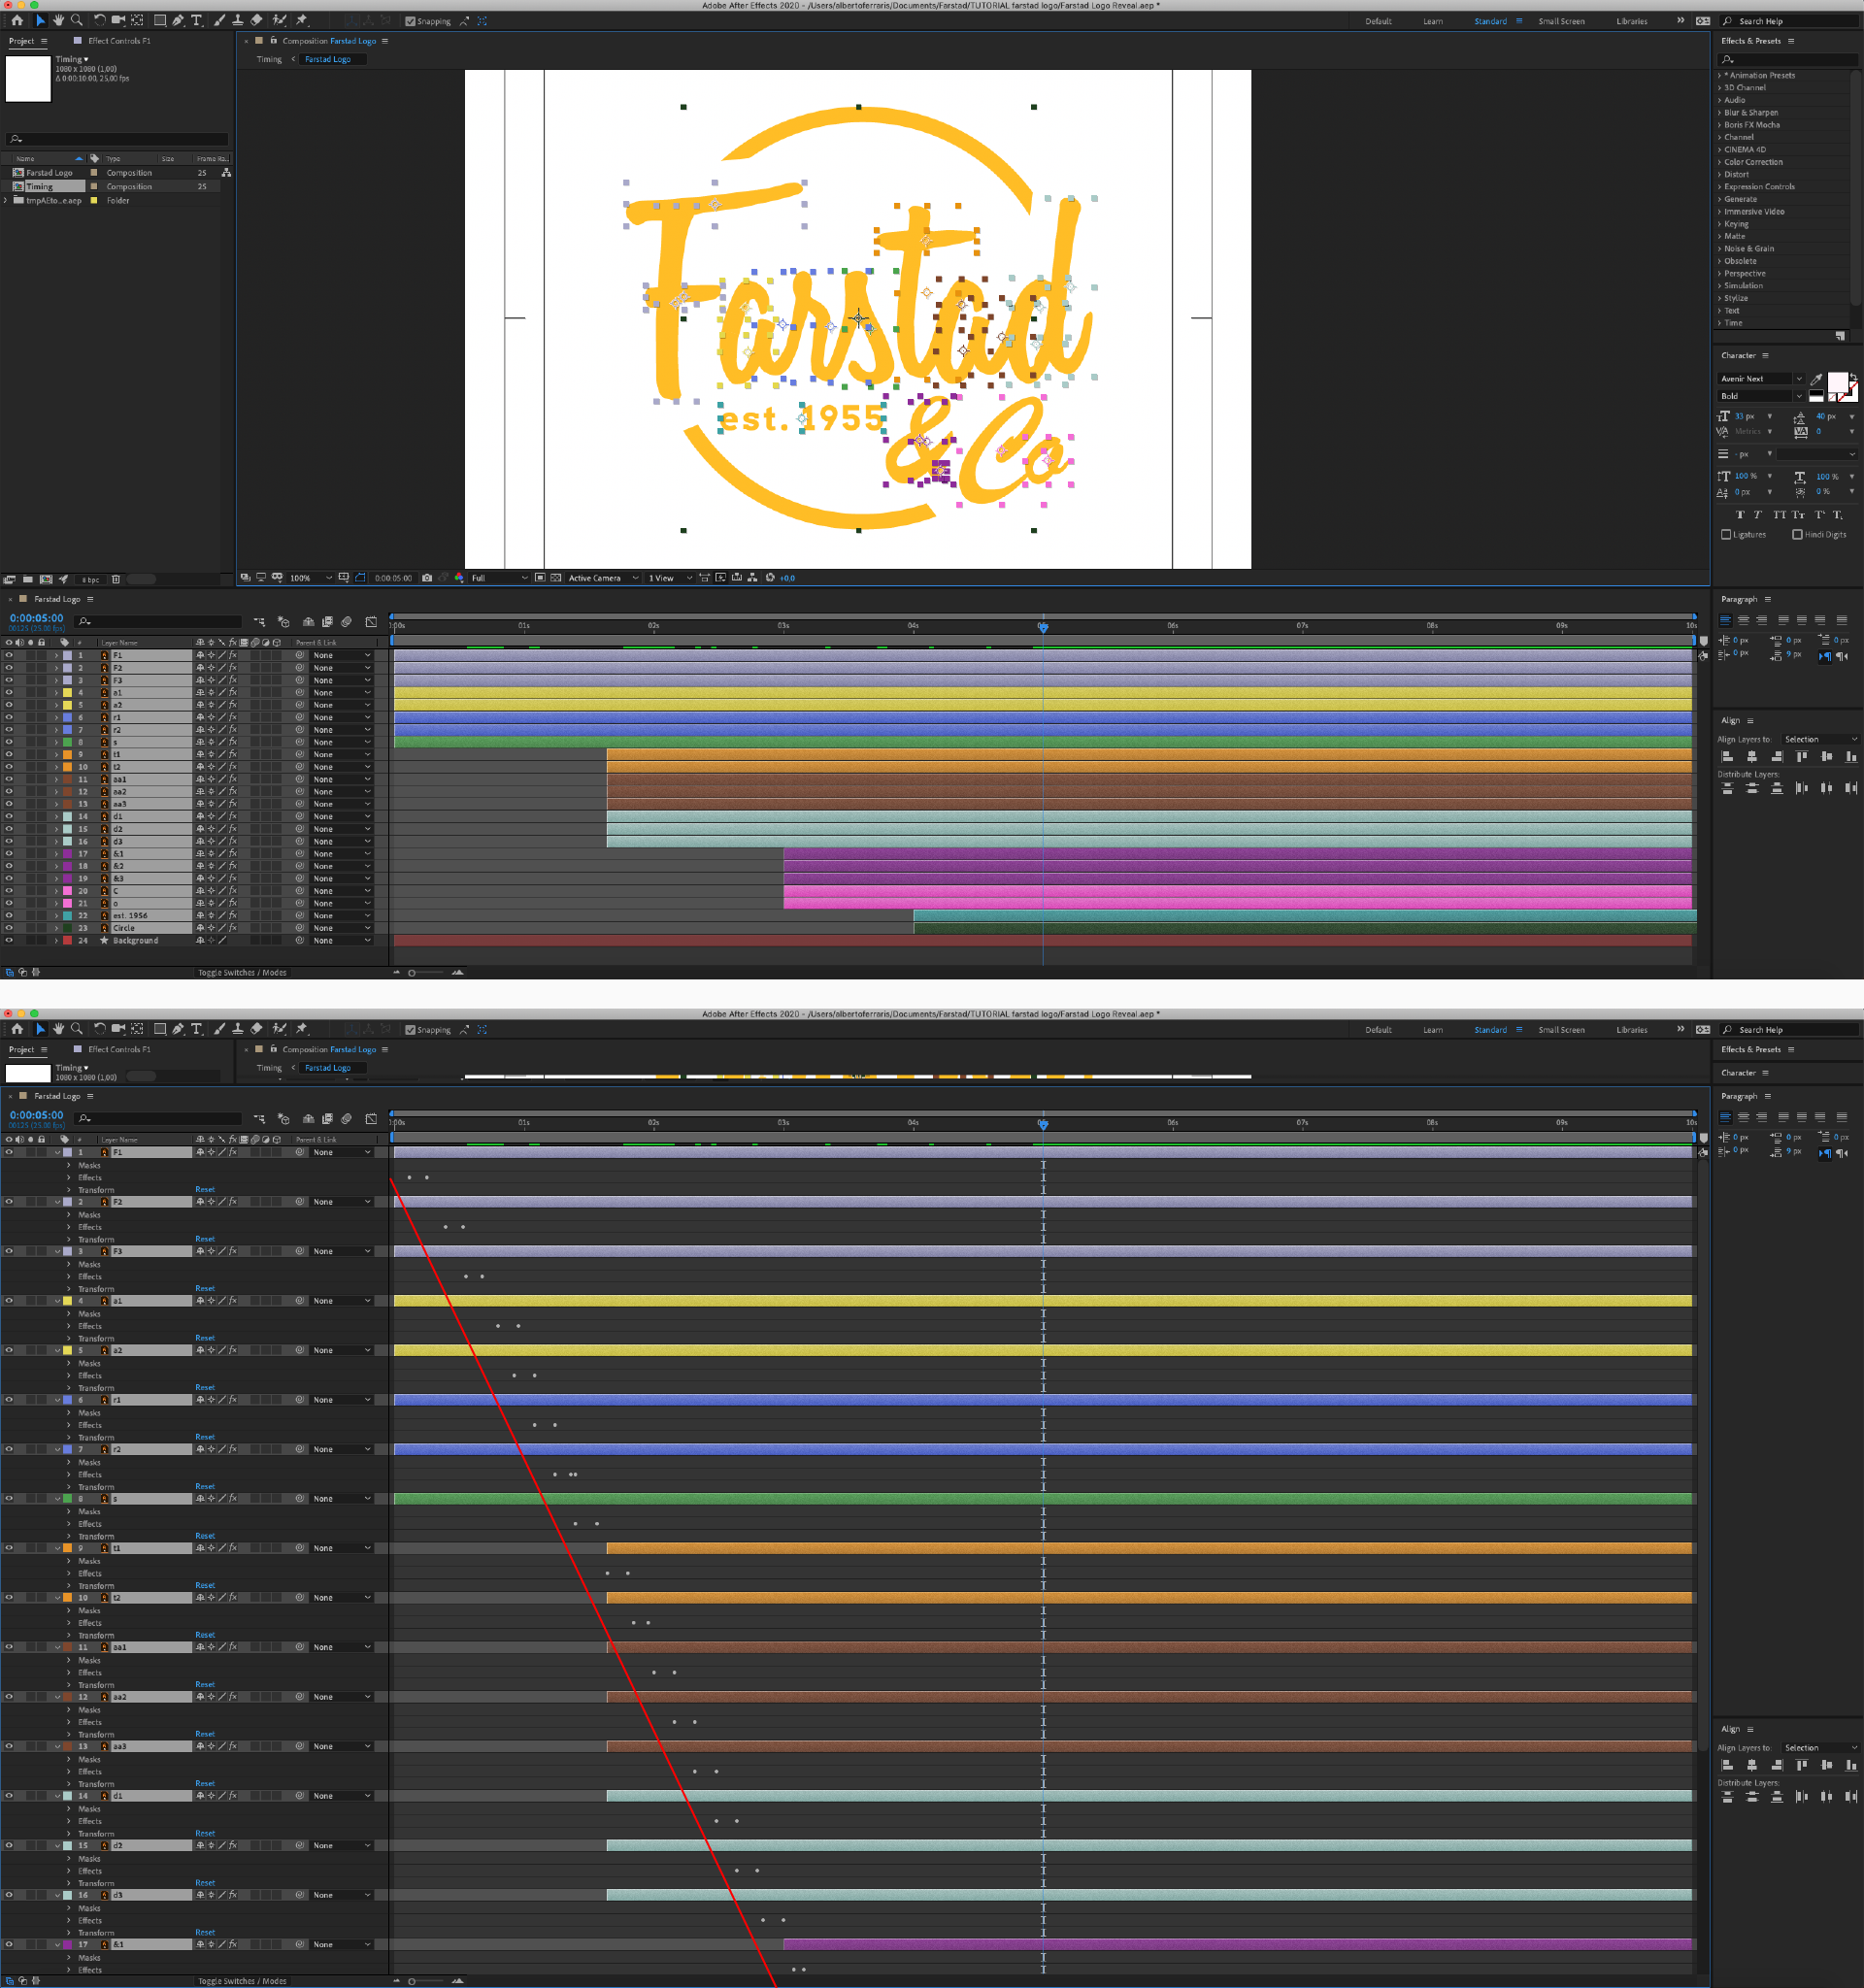
Let's manage all the keyframes with good timing, moving these or the layer bars in the timeline. If we select a layer in the timeline, we can opt to cut it in position with the cursor using: "Shift + Command + D" (for Mac) or "Shift + Ctrl + D" (for Windows). We should obtain a visual diagonal of keyframe points like in the second image below.
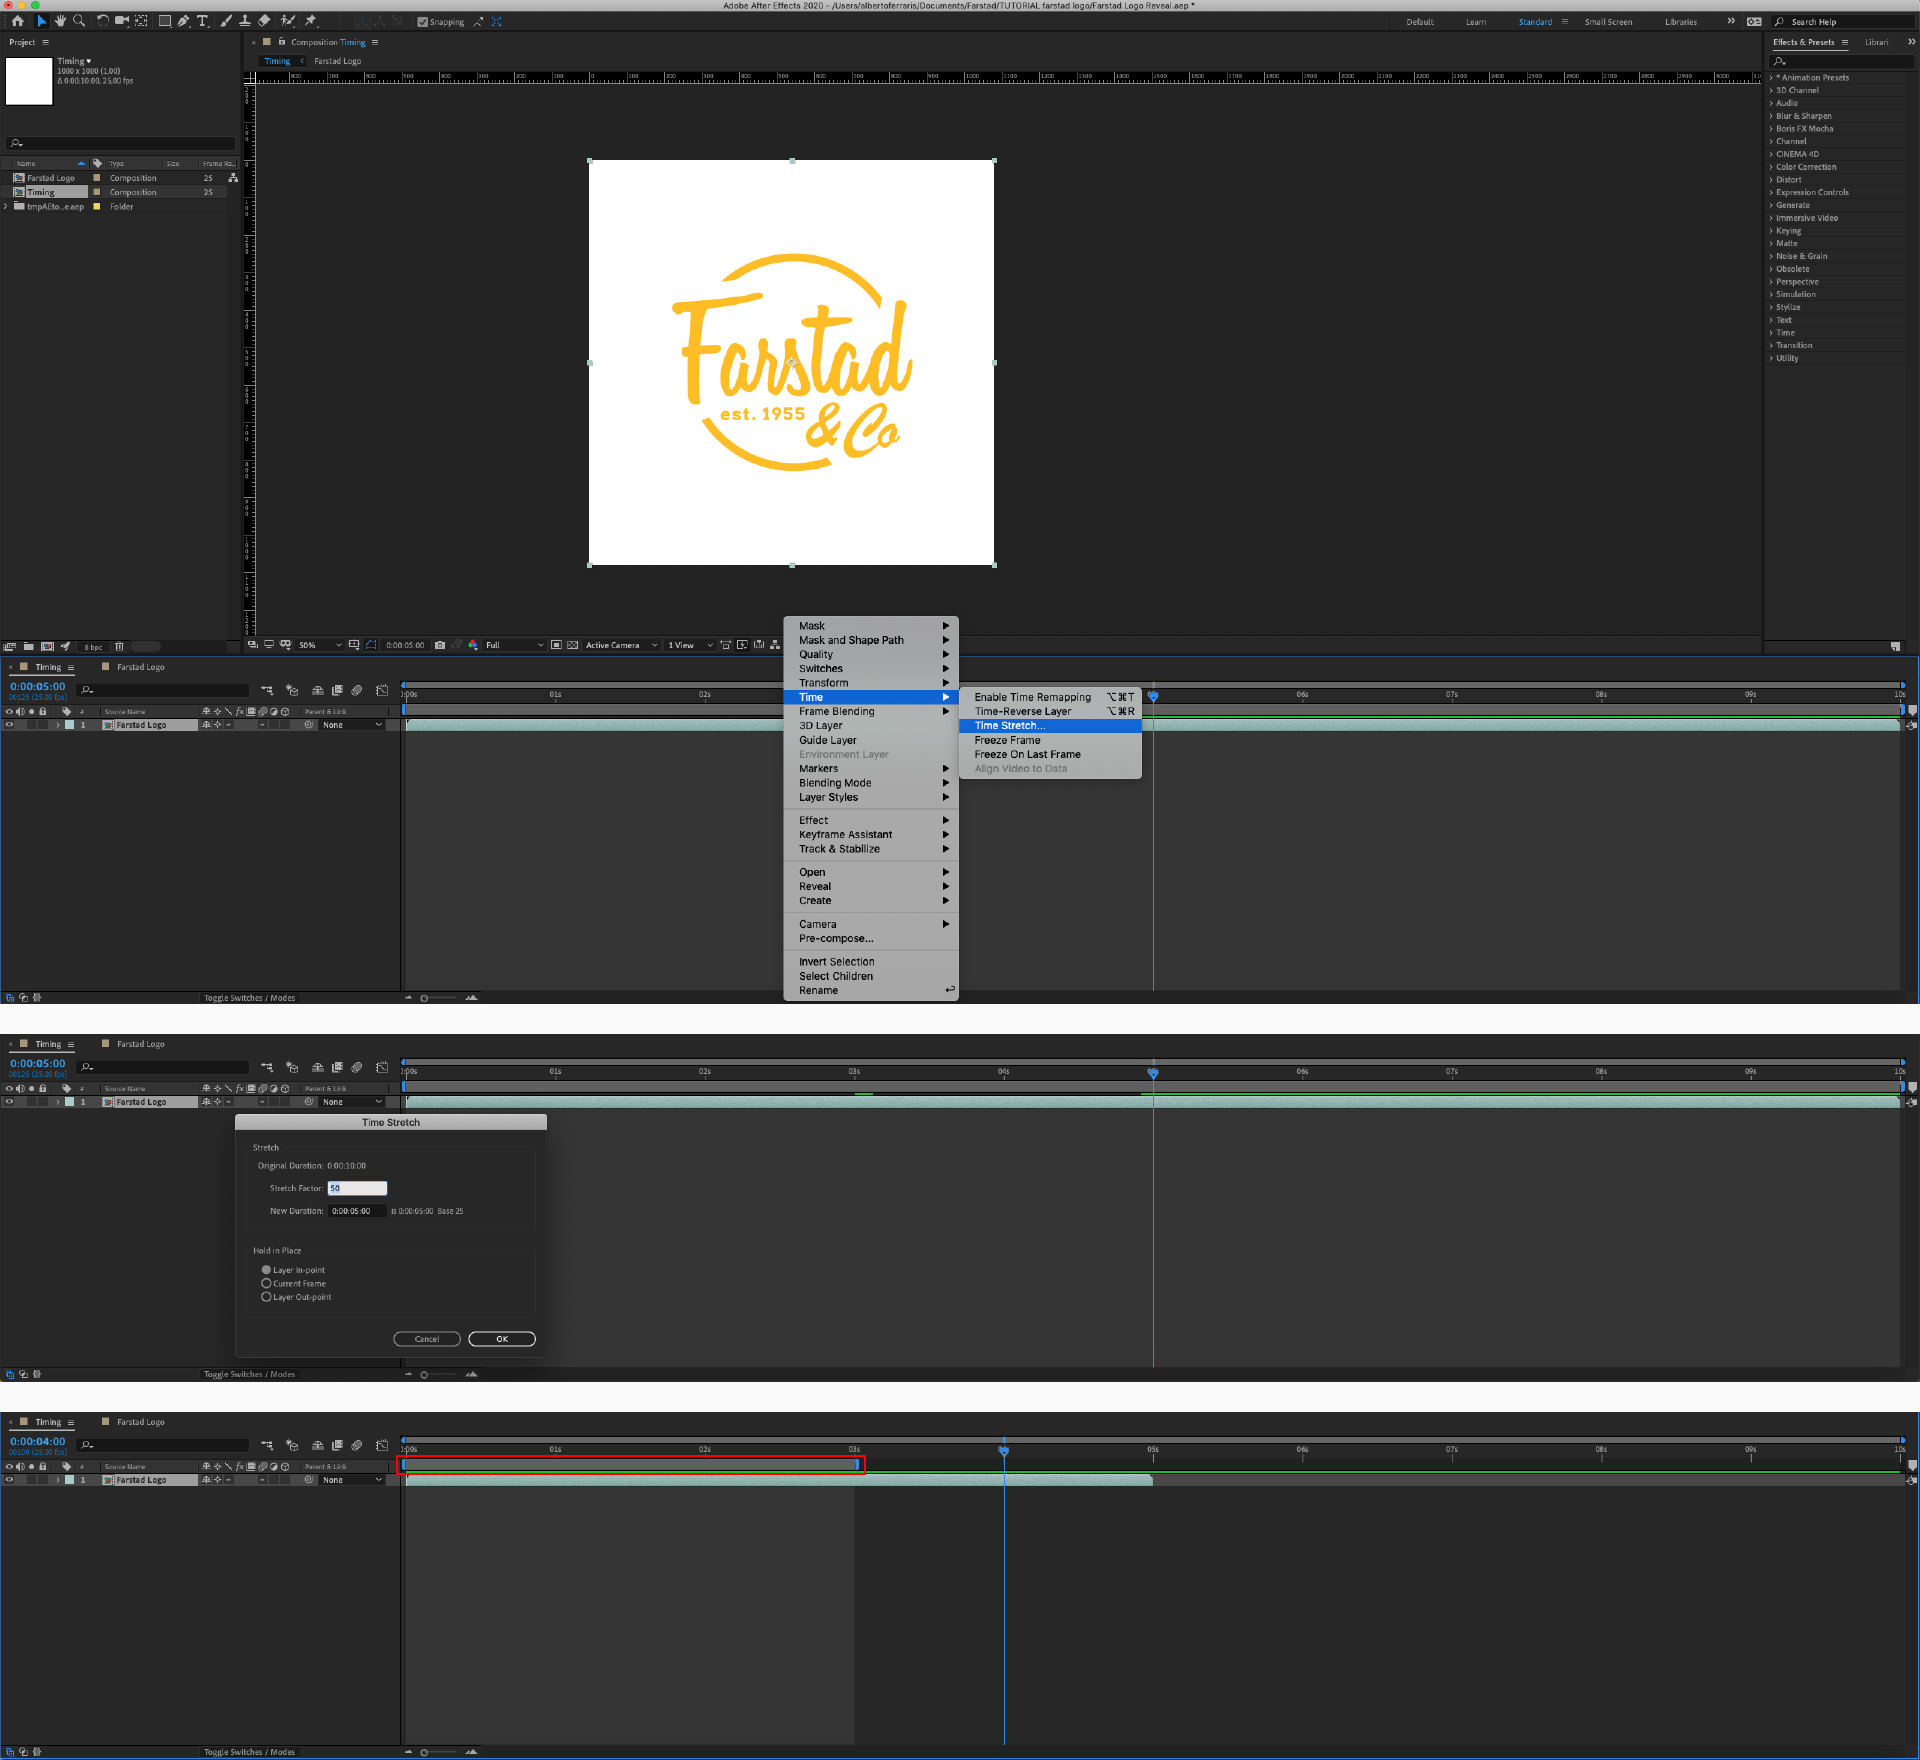
Now we can take the original composition (I renamed it "Timing") to easily manage the timing. For example, we can stretch the layer time by right-clicking on the layer, then going to "Time > Time Stretch" and choosing the right value for a better look at the project.
We can also choose the rendering time range, moving the bar next to the seconds on the timeline. Or directly editing the composition time going to the top bar: "Composition > Composition Setting > Duration".
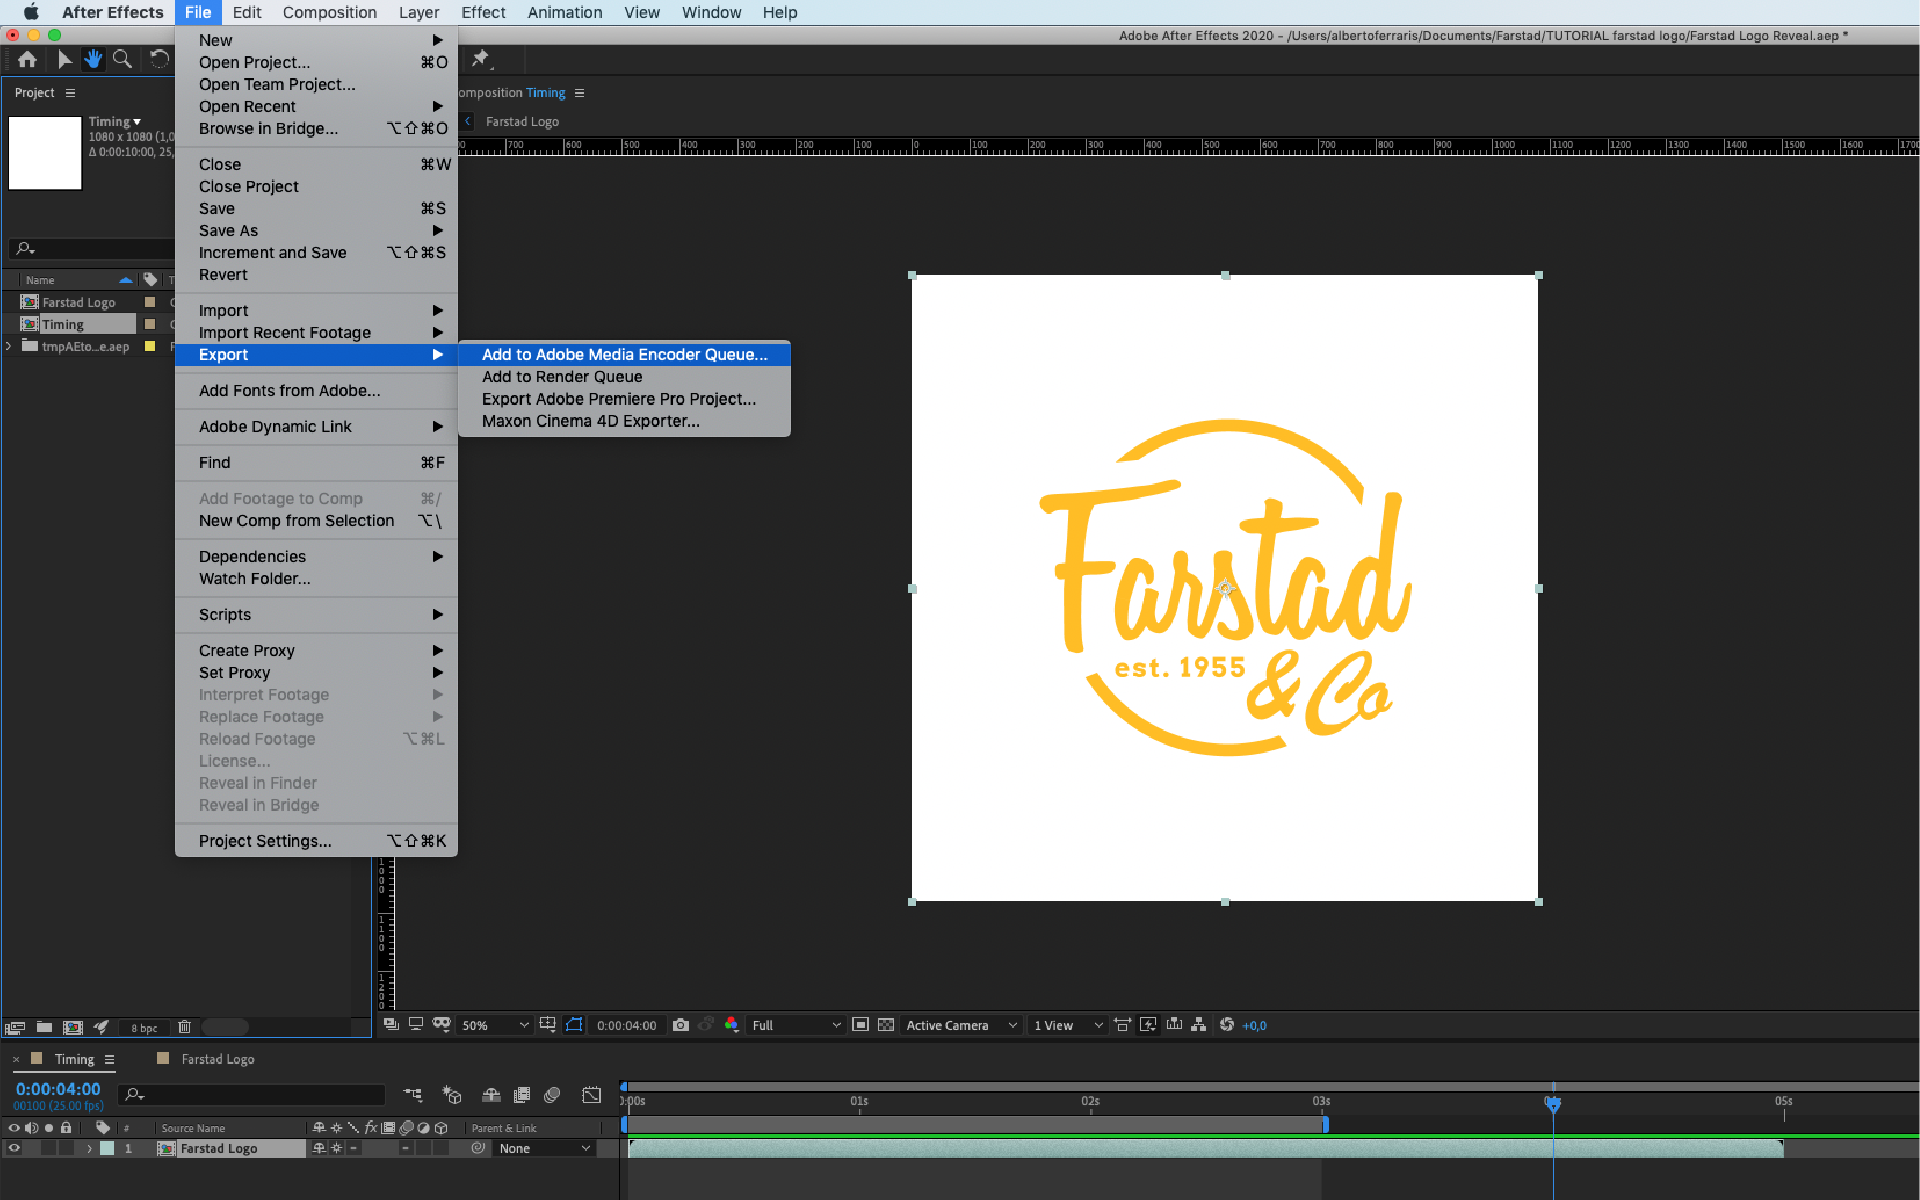
Finally, we can export our animation going to: "File > Export > Add to Adobe Media Encoder Queue". If we do not have Adobe Media Encoder we can do it by "File > Export > Add to Render Queue".
P.S. The Render Queue inside After Effects does not have the option to be exported as an H.264 (MP4 format). So, if we do not hove Adobe Media Encoder, we can render the animation as a MOV file (a non-compressed file) and later use another video editing software to convert it.
This is our final result!

Good job!


